This post may contain affiliate links. See our disclosure policy.
Making your own Perfect Pie Crust doesn’t have to be intimidating. Follow this simple recipe and it will turn out light and flaky every time!
Featured with this recipe
Pie crust is one of those things that can terrify new bakers. I always left the pie making to my mom, whose delicious crust was something of an art. Why mess with perfection? But luckily, she taught us all her secrets to her perfect pie crust. Now that we are all grown up, we can make this recipe for our families! And here’s the truth: making flaky, light pie crust is really simple and does not have to make you nervous, once you know a couple of tricks.
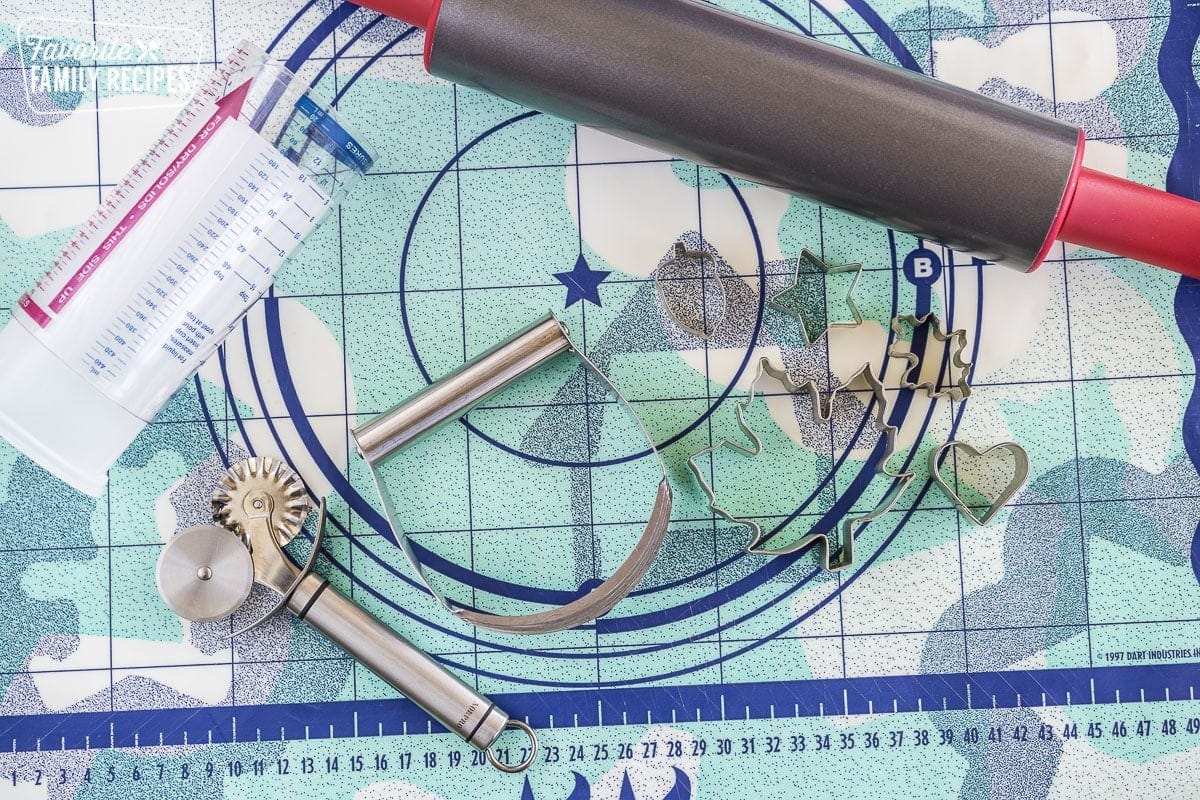
Start with the Right Tools
When you are tackling a baking project, it helps to have the right tools. Besides the pie dish or pie pan itself, here’s what we recommend for this recipe:
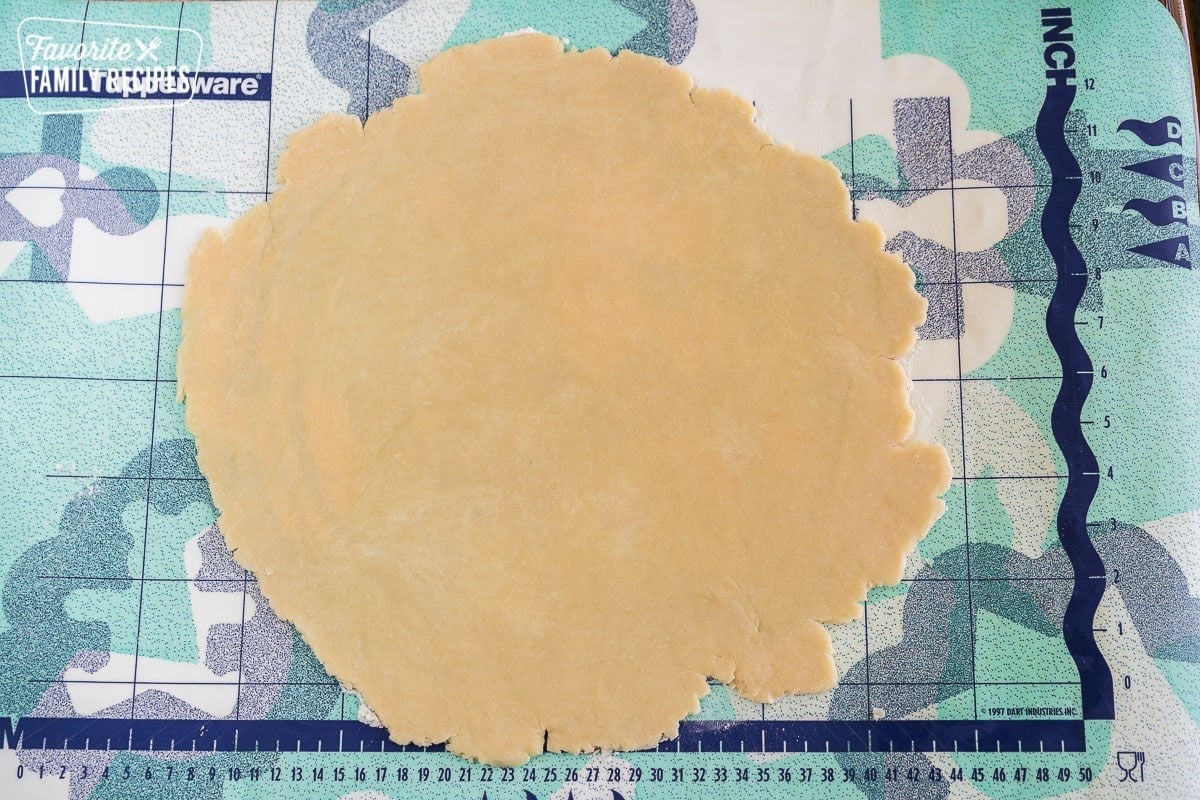
- Silicone Pastry Mat with measurements – This is the perfect surface to roll out your dough. You will still need to lightly flour the mat, but it works so much better than the countertop. It has measurements on it so you know how big to roll out your crust.
- Rolling Pin with offset handle – This will help you to make a perfectly smooth crust.
- Adjustable Measuring Cup – An adjustable measuring cup is perfect for measuring shortening. You won’t have to worry about it getting stuck or getting it all over your hands.
- Pastry Blender – This is the easiest way to blend the shortening and dry ingredients together. You can also use a food processor.
- Fluted Rolling Pastry Cutter – If you plan on making a lattice top, this is a must!
- Large Plastic Bowl – Get a bigger bowl than you think you need. You don’t want flour flying all over the place.
- *Optional: Cookie cutters for decoration
What Ingredients Do I Need to Make Pie Crust?
First of all, you probably already have all the ingredients for pie crusts in your pantry right now. Here’s what you need:
- Flour – All-Purpose Flour works great as the base of this recipe
- Salt – for flavor
- Baking Powder – helps the crust to rise and adds a savory flavor
- Sugar – for a little bit of sweetness
- Shortening – serves as the fat in this recipe, making those light, flaky layers
- Egg – makes the dough more pliable and easier to roll out
- Ice Water – acts as a binder for other ingredients, helps keep shortening cold
- White Vinegar – keeps your pie crust nice and tender – don’t leave this out!
That’s it! For real. This is the easiest and most delicious crust you will ever taste!
What is the Trick to Making Pie Crust?
The trick to getting that fluffy, light texture is how you mix the dough.
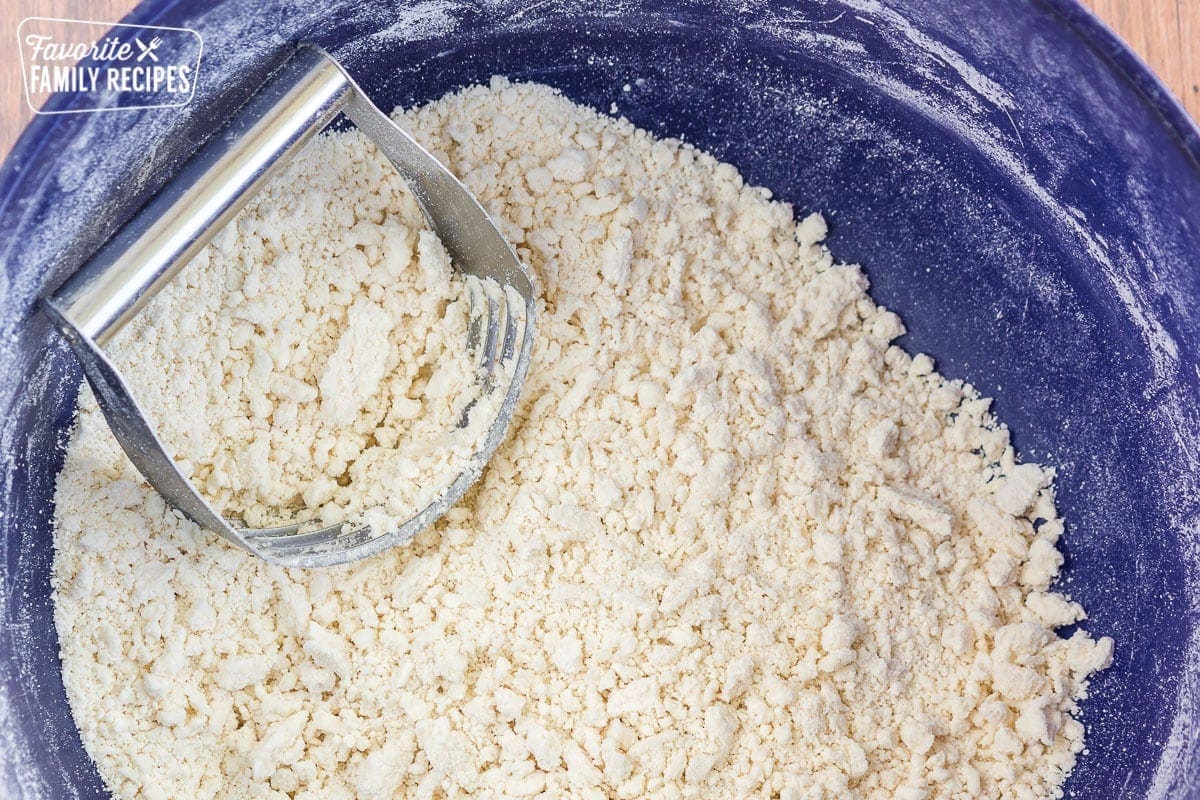
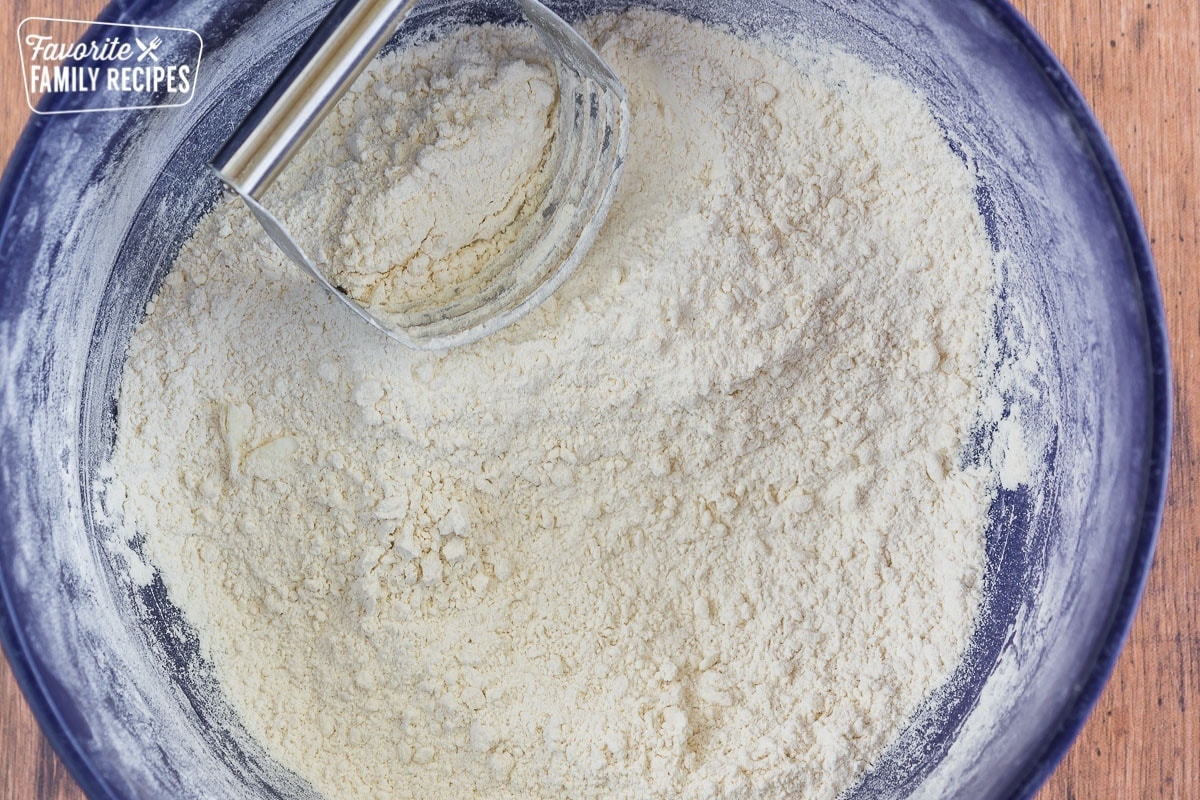
- First, sift the flour, salt, baking powder, and sugar together.
- Next, “cut” or crumble part of the shortening into the flour mixture. You can use a pastry blender or even your fingers, but make sure your shortening or butter is really cold.
- Once the mixture is crumbly, add the rest of the shortening.
- Work the fat into the flour mixture until it has formed crumbles about the size of peas.
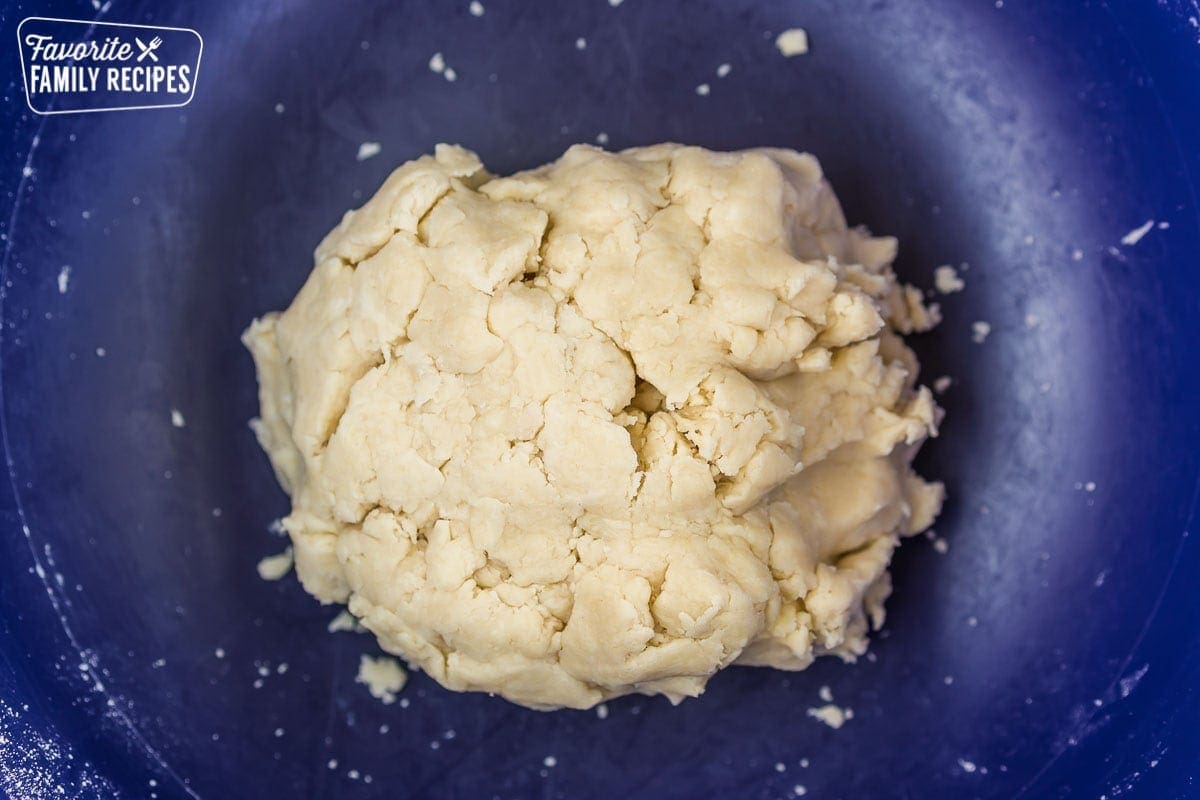
- After you add the wet ingredients, DO NOT over mix. Handle the dough as little as possible. No kneading! You want it to just be able to hold together before rolling it out.
How Do You Make a Pretty Pie Crust?
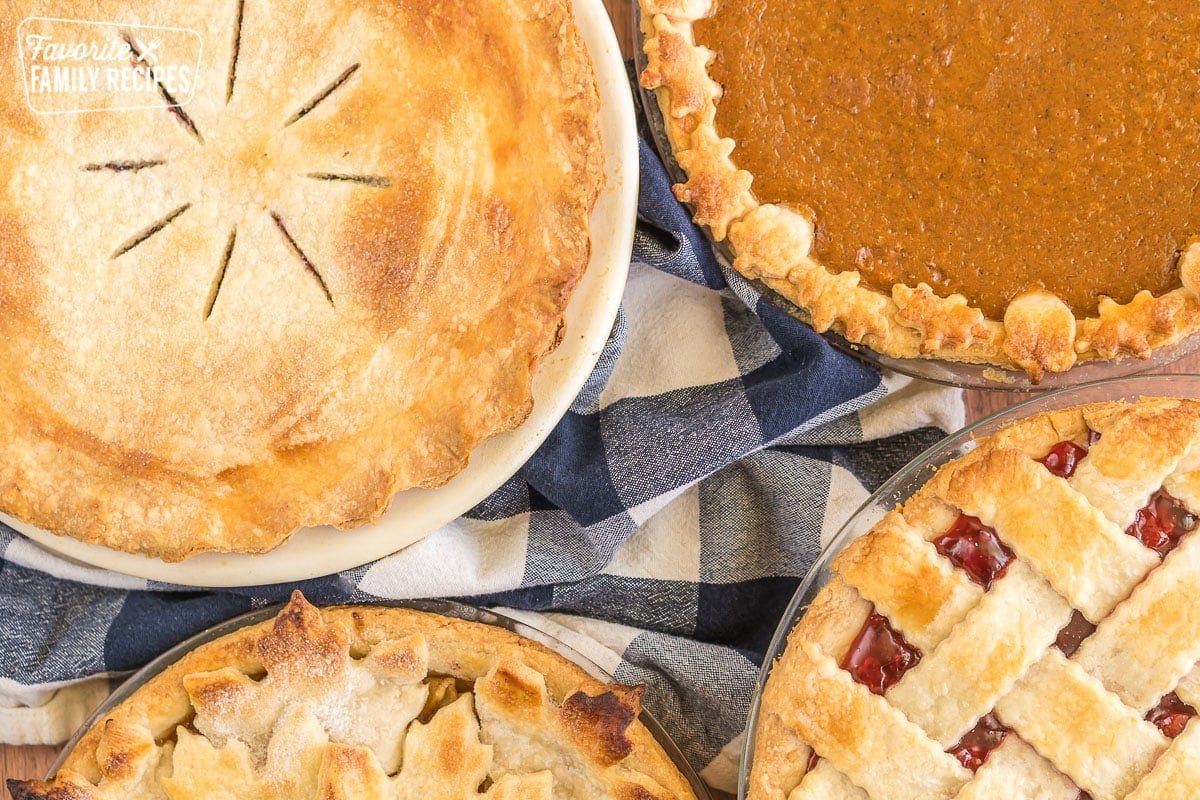
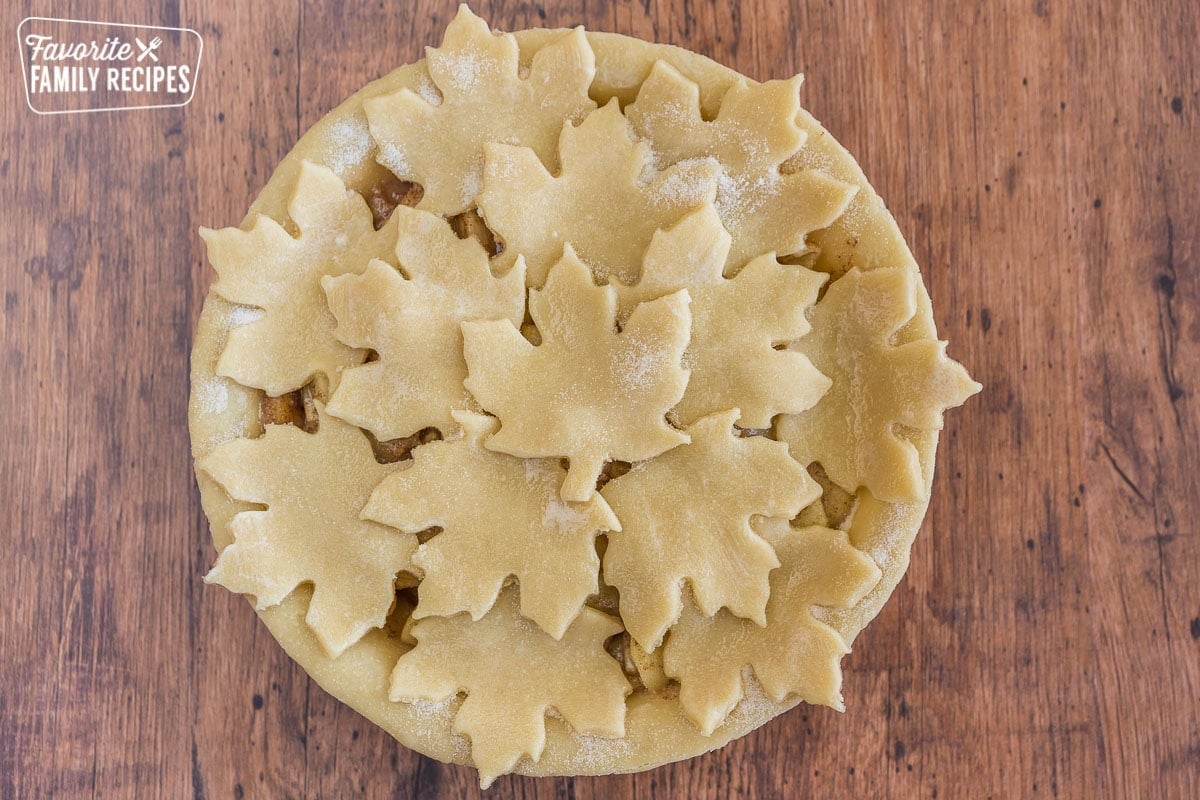
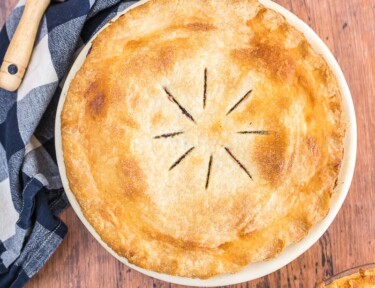
There are so many options when it comes to topping your pie! You can leave the crust totally open, add some pretty designs, or cover the whole thing with a top crust. See below for a few fuller coverage tops. However you top your pie, make sure to brush it with a little milk and sprinkle a little bit of sugar on top.
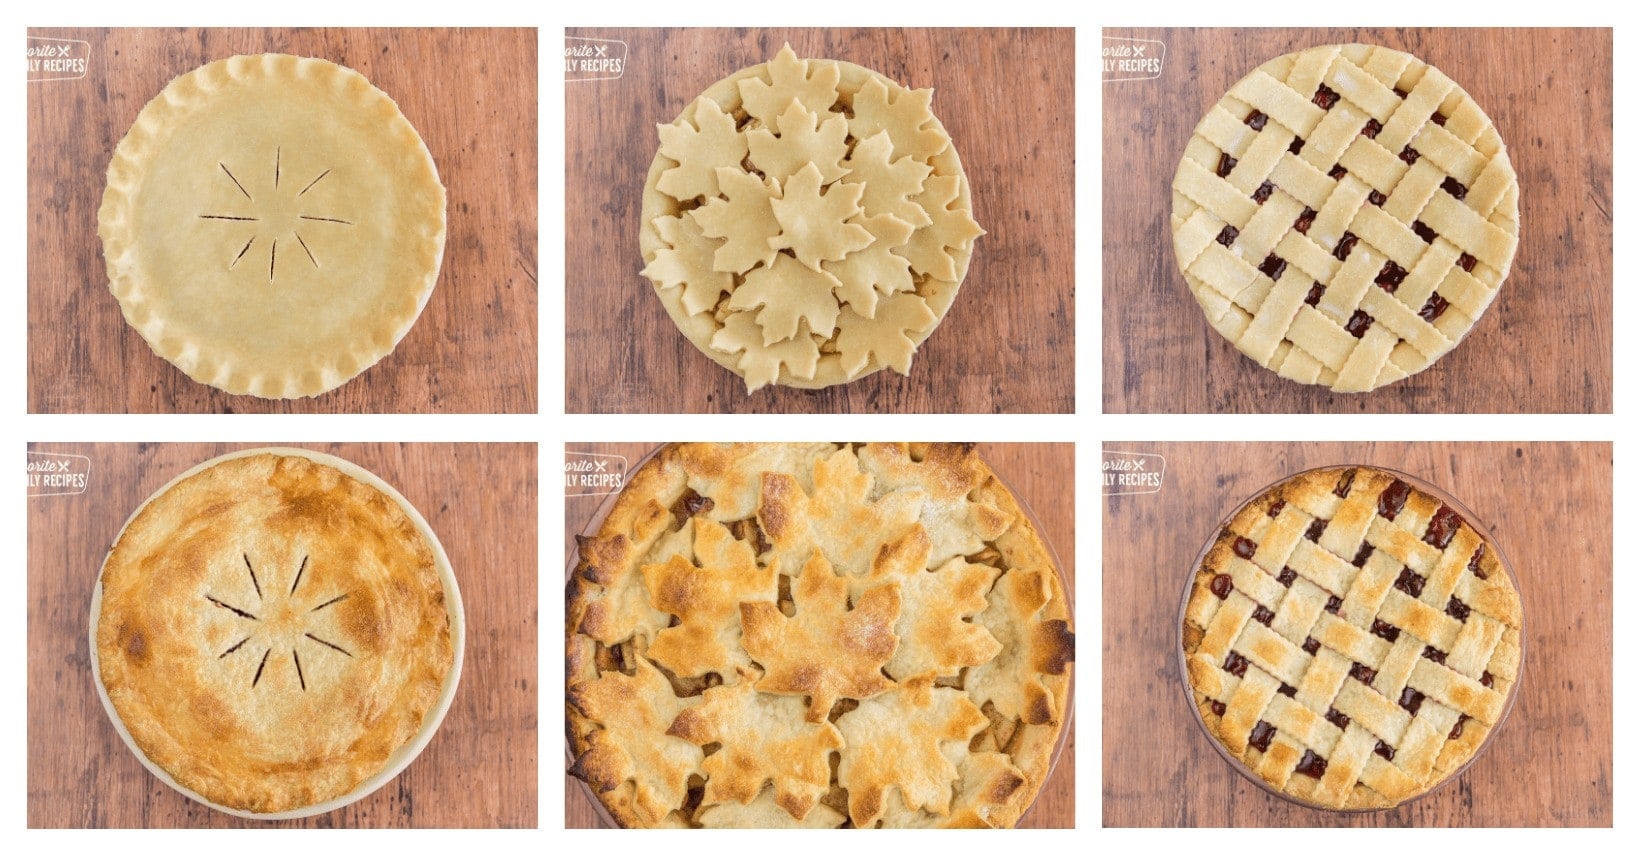
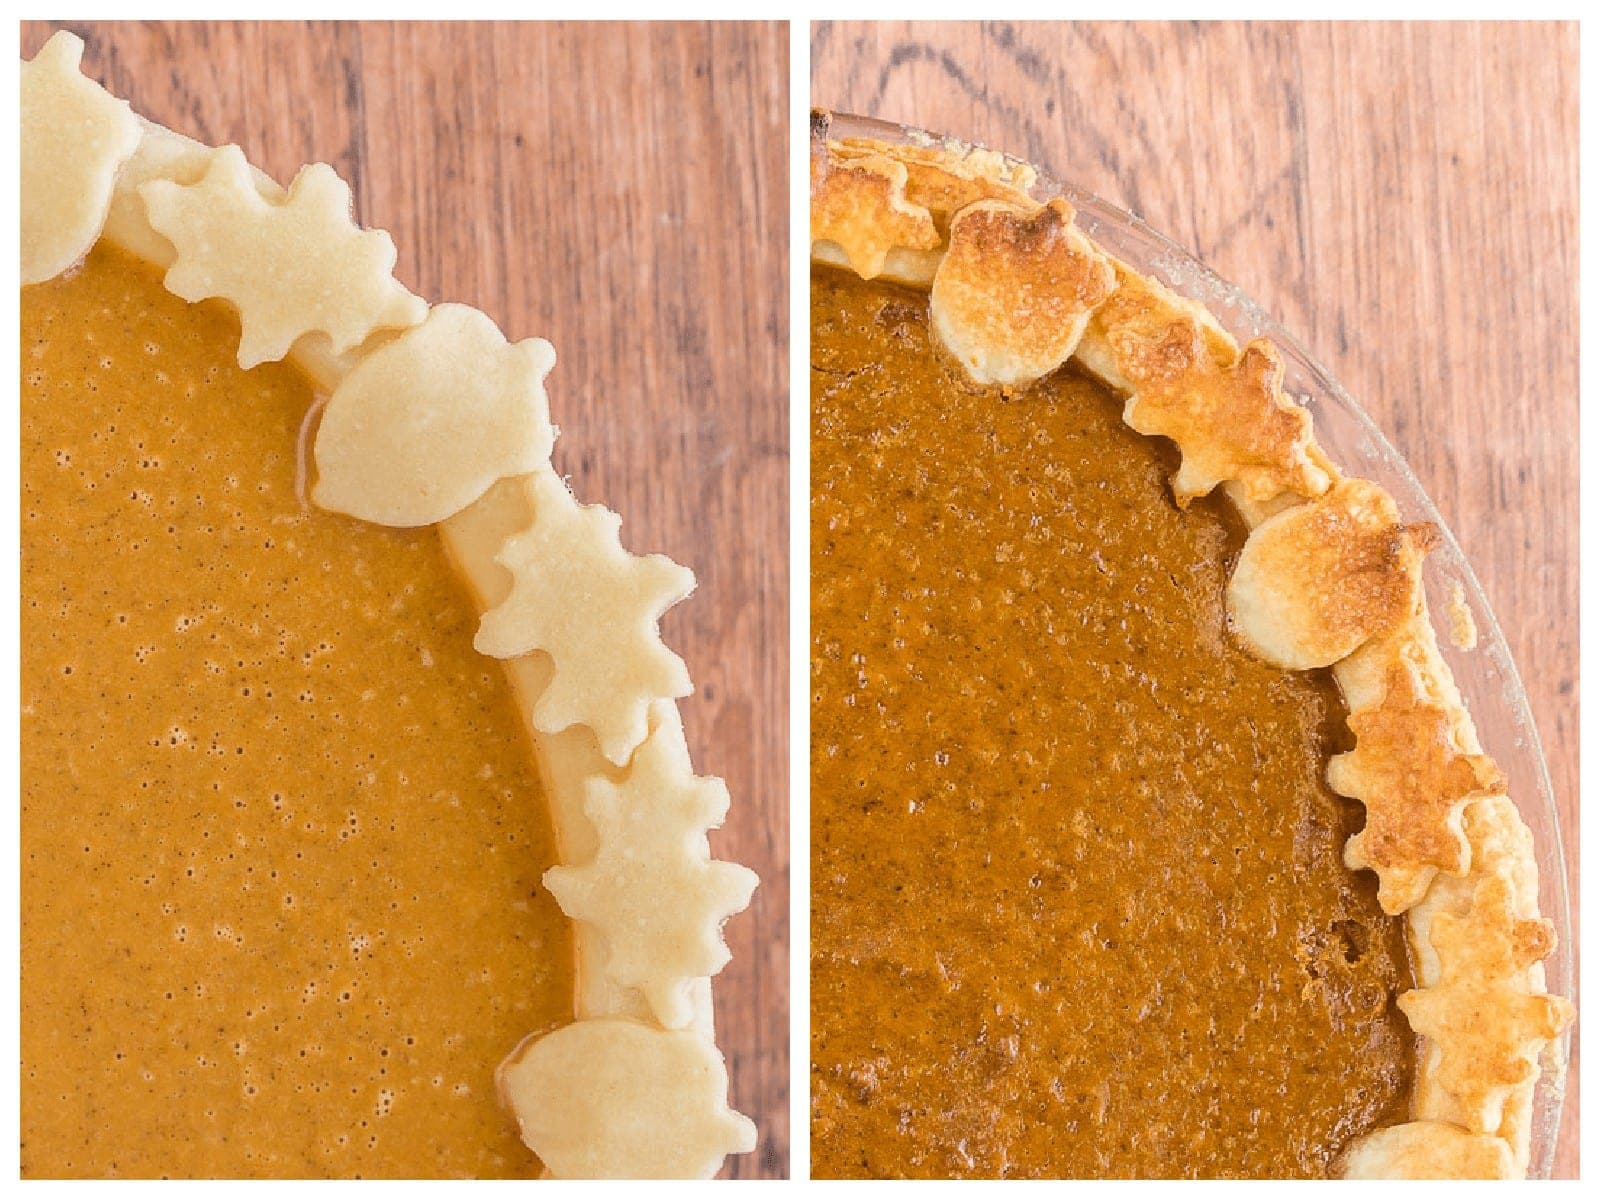
You can also use cookie cutters to create a fun decorative edge around your pie crust. As you can see in the picture below, we used acorn and leaf cookie cutters to make a fun Fall pattern for our Pumpkin Pie.
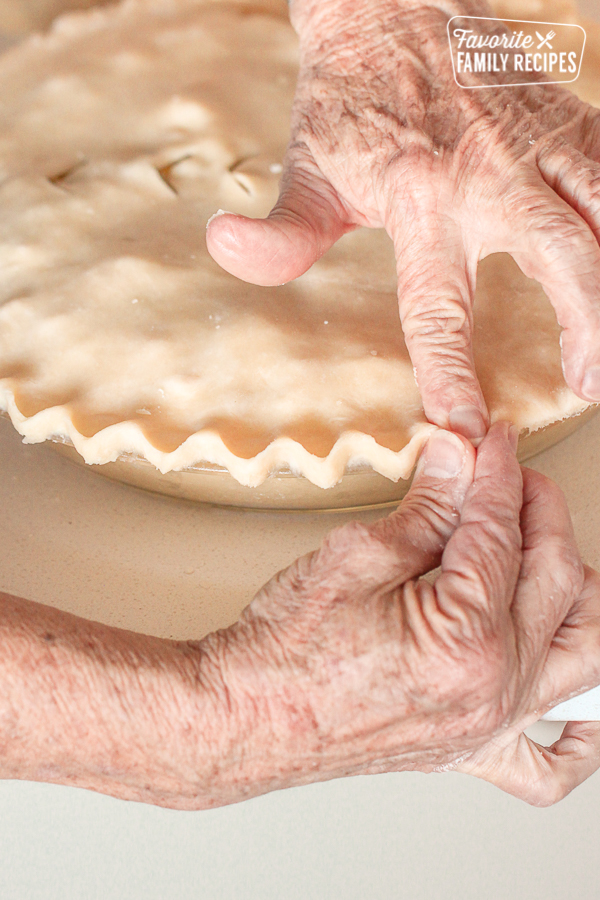
How to Crimp Pie Crust
If you are doing a full top crust, this simple “pinching” method makes your crust look beautiful and holds all of that pie filling in place. Our lovely mom is demonstrating this method in the photo below. Isn’t that pretty? Check out this video to see just how easy it is.
How to Pre-Bake Pie Crust
Pre-baking is when you bake the crust on its own without filling. You’ll use this method when you want to fill it with a no-bake filling. You’ll want to avoid throwing it in the oven as is though, because pockets of steam will make the pastry puff up. To avoid puffing up, poke holes in it with a fork, and/or add pie weights, dry rice, or beans on a sheet of tin foil inside the crust. If you are using pie weights, chill for about half an hour. Bake at 425 for about 10-12 minutes or until the crust is golden brown. You’ll have perfectly shaped, perfectly flaky pie crusts in no time.
FAQ
Yes! You can freeze it baked or not. To freeze an unbaked pie crust, wrap it up in tin foil and store up to three months in the freezer. There’s no need to thaw them out either. Simply put your filling in and bake as directed. Baked crusts can be frozen the same way. They’ll also keep in the freezer for a good three months.
Shortening doesn’t melt as quickly as butter or other fats, so it’s easier to mix into the other ingredients and roll out. The longer the shortening keeps the water and flour separated, the more flakes will form. Magical, right? Shortening also allows the crust to hold its shape better during baking, so you (yes, even YOU!) can make those gorgeous, decorated pie crusts. Butter will give your crusts a little richer flavor, but it is very hard to work with. The biggest trick to using butter is to make sure it stays as cold enough so it doesn’t melt and tear the dough, but warm enough that it isn’t too difficult to roll out. If you want that buttery flavor and light texture, you can use half shortening and half butter, or use Butter Flavored Crisco shortening.
Sometimes because the crust is thin around the edges, it will cook a lot faster than the middle. If you are noticing that the edges are too brown, you can use this easy trick to cover the edges of the pie. Grab some tin foil and scissors and you are good to go! You can also buy pie edge covers, but this hack is super easy. Cut a square of tin foil large enough to cover the whole pie plus a little. Fold that piece in half twice to make a smaller square. Cut out the corner of the tin foil where all the sides are connected. Unfold the tin foil and place over your pie and fold the edges over. 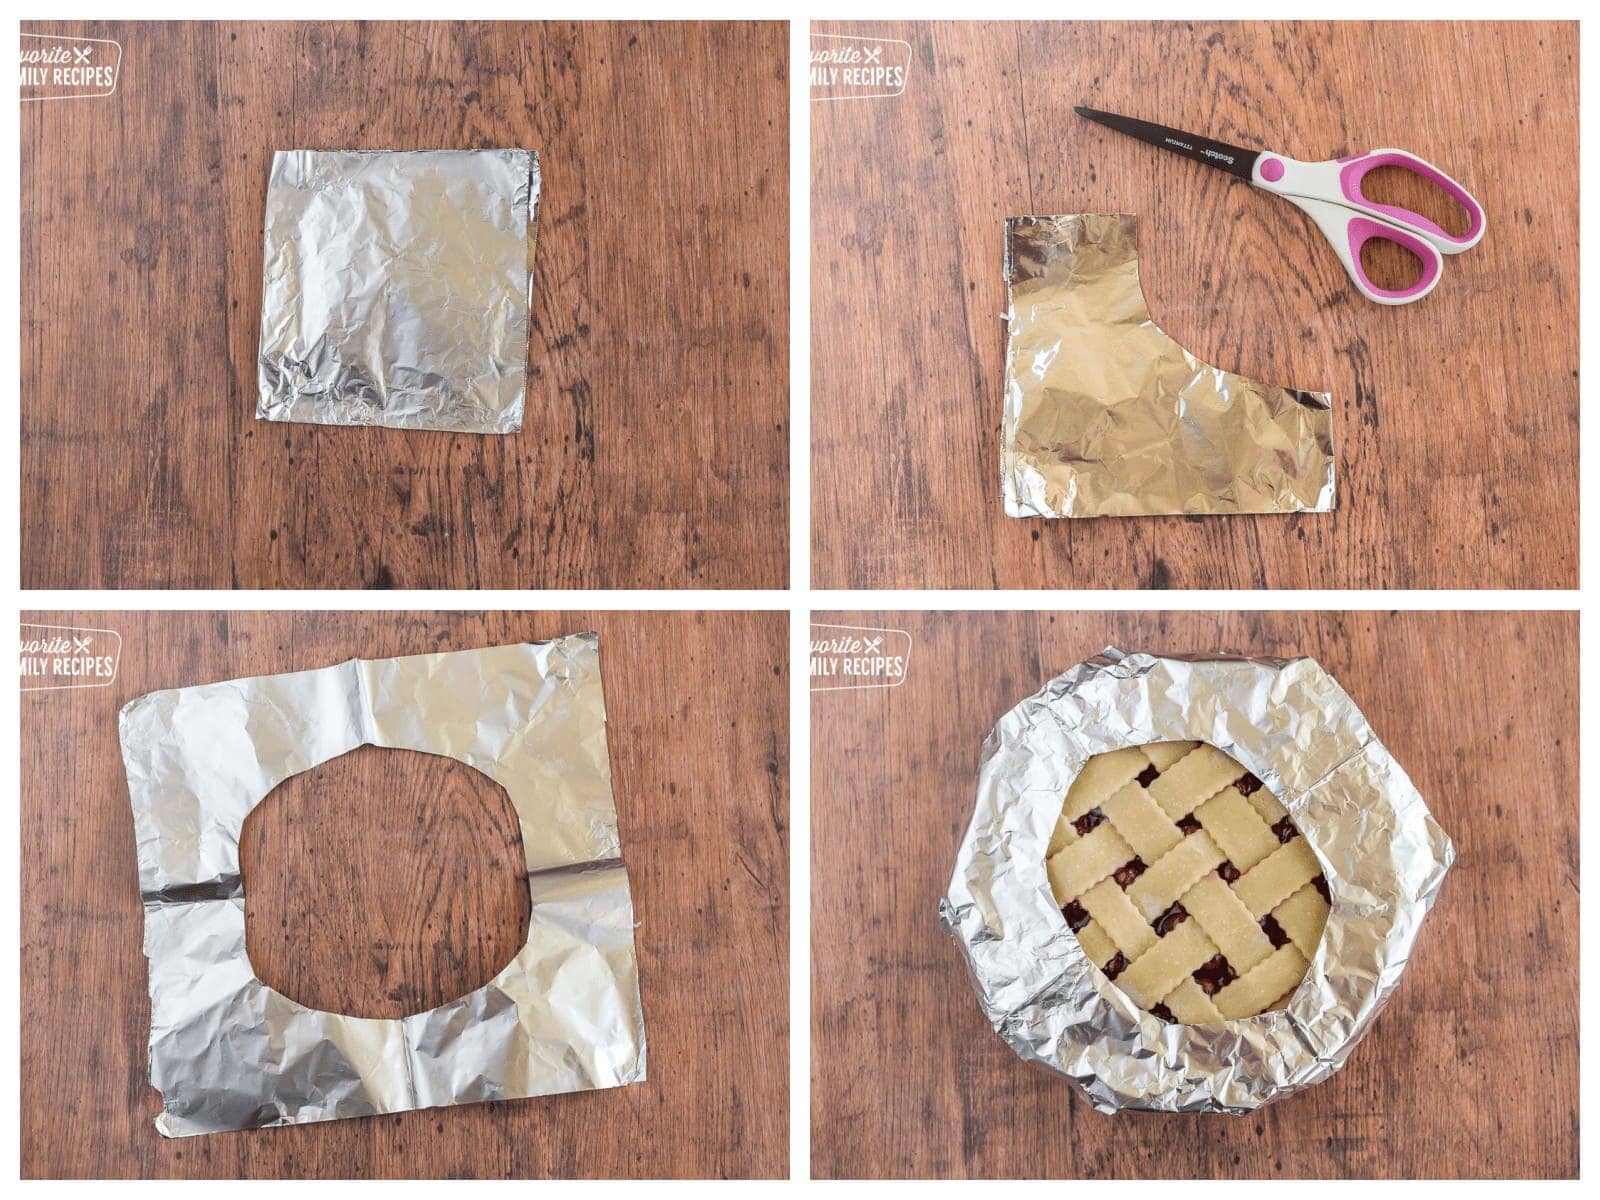
Read More: 33+ Easy Dessert Ideas (with Pictures + Simple Recipes)
Now for the Filling!
There are so many possibilities with a good pie, and from apples to egg wash, we’ve got you covered. Here are just a few delicious ones to try:
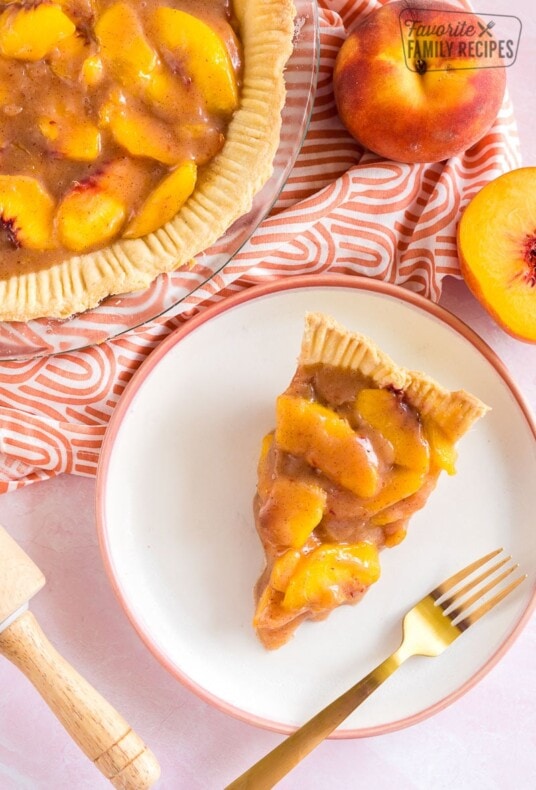
- Peach Pie with Perfect Pie Crust
- Traditional Pumpkin Pie
- Brown Butter Pecan Pie
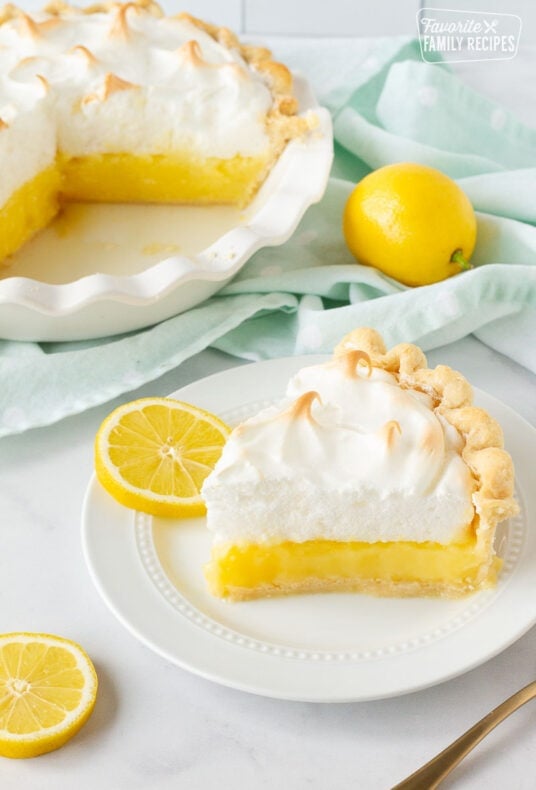
- Lemon Meringue Pie
- Coconut Cream Pie from Scratch
- Butterscotch Pie
- Easy Berry Pie
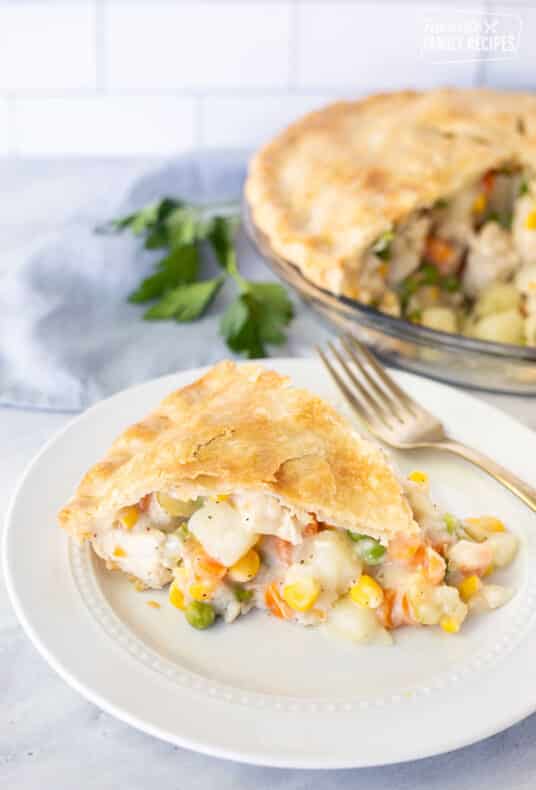
- Easy Turkey Pot Pie
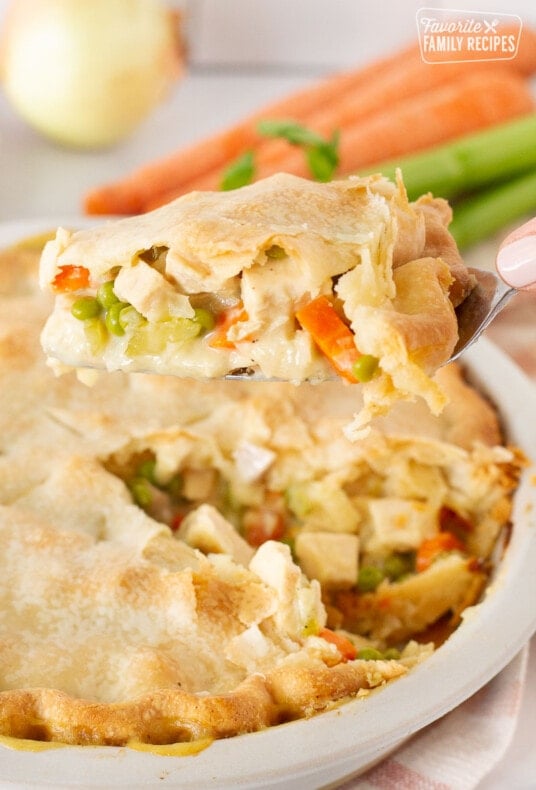
- Homestyle Chicken Pot Pie
How to Make the Perfect Pie Crust
How to Make the PERFECT Pie Crust
Video
Ingredients
- 3 cups all-purpose flour
- 1 teaspoon salt
- 1 tablespoon sugar
- 1/2 teaspoon baking powder
- 1 1/4 cup shortening divided
- 1 egg
- 1/2 cup ice water yes, really ice cold water – it needs to be extremely cold
- 1 tablespoon white vinegar
Instructions
- Preheat oven to 425 degrees. In a large plastic bowl, sift together all dry ingredients. Add ½ cup of shortening and cut it in with a pastry blender or with your hands. Work all of the fat into the flour mixture until fine crumbles form.
- Add the rest of the shortening and cut it again. Make sure it is evenly and fully blended in. It should form larger crumbles this time.
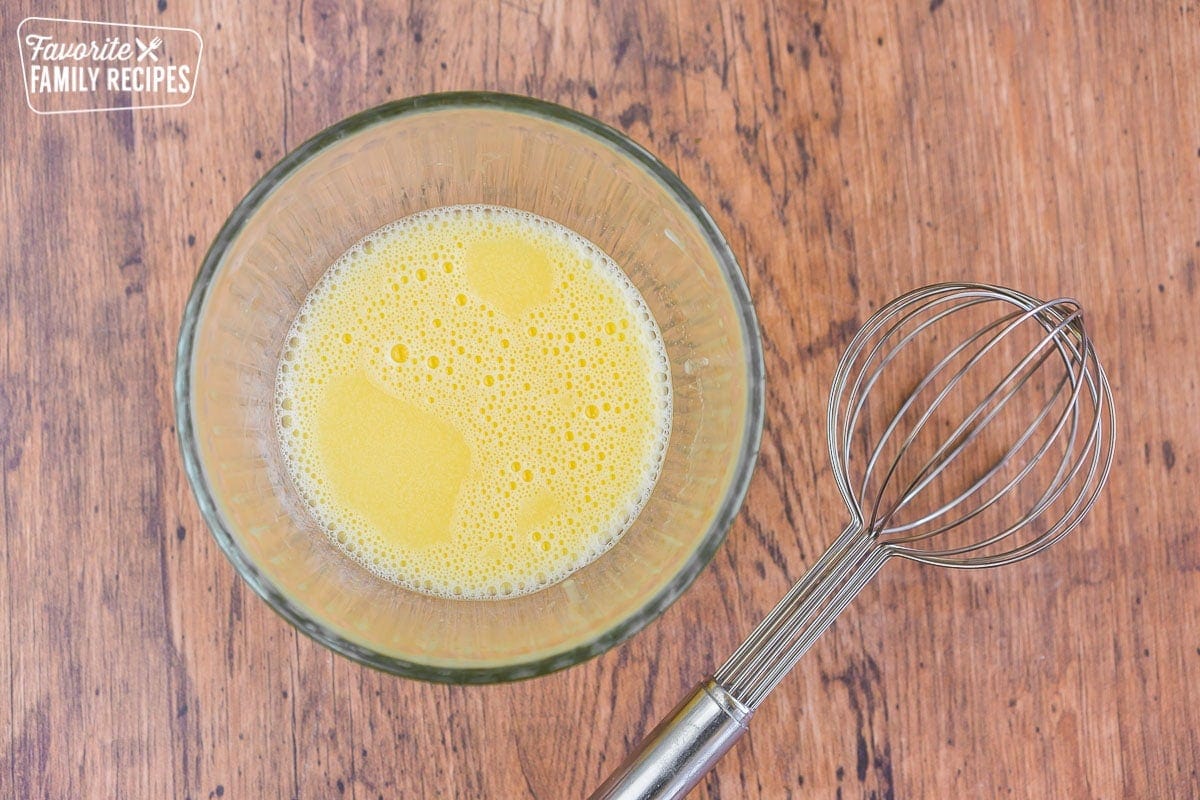
- In a small bowl, whisk egg, ice water, and vinegar.
- Add the egg mixture into the flour mixture. Use your hands to fold the ingredients together. DO NOT OVER MIX. Mix just until the dough comes together.
- Divide the dough into halves and form a ball with each half. Push the dough down to compress the cracks. Cover the half you aren't working with with plastic wrap so it doesn't dry out. Flour a large surface and a rolling pin. Slowly roll out the dough. Smooth out any cracks. Roll the dough until it is 2 inches larger in diameter than the pie plate. It should be about ¼ inch thick.
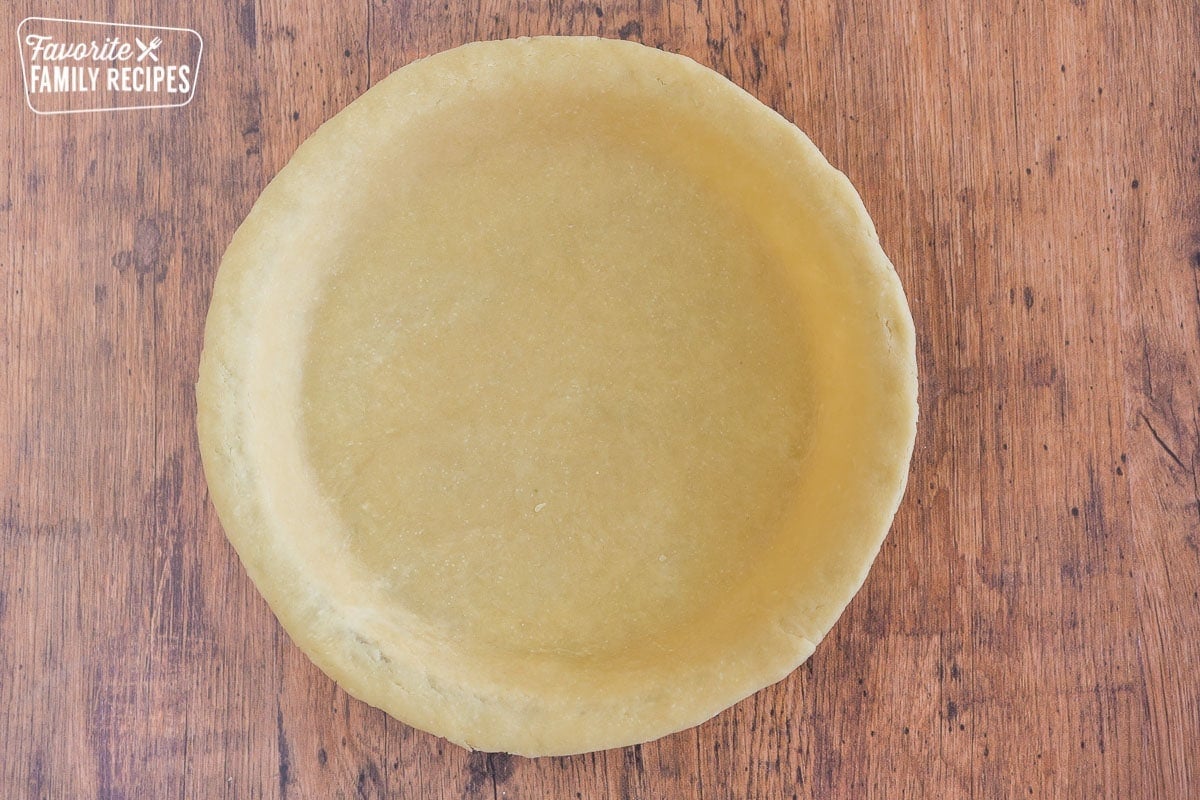
- Use the rolling pin to roll up the pie dough and transfer it to the pie dish. Don't stretch the dough. Gently mold the crust into the pie plate. Trim edges with a butter knife. Press the dough so that it extends slightly past the edges of the plate because it will shrink a little while baking.
- Add your top crust or decorations as desired. (See note below about top crust and decorations) Bake for 35-40 minutes or until crust is golden brown and filling is bubbly. If pre-baking the crust, poke holes in the crust with a fork and bake for 10-12 minutes.
What size pie plate does this require? I only have a 9.5 inch…
This pie crust should fill a 9.5 inch!
Unbelievably delicious crust – easy and so, so good!
Will try this recipe-thanks. Haven’t found a full-proof recipe yet. The others I’ve tried are a hit and miss.
I hope it is a success! This is the most tried and true recipe we have tested!
This crust really is perfection! So simple to make too!. Thanks for all of the great tips!
Loved the step by step instructions! Thanks for such an easy to follow recipe that turned out perfectly. Can’t wait to use it again for Thanksgiving pies!
This looks so easy and perfect for the pie I was going to make soon! Can’t wait to give this recipe a try!
This is so easy to make and I get a perfect pie crust every time!
Just in time for the holidays! Thanks for sharing!
Making pie crust is definitely not easy. Thanks for sharing this simple approach. I’m excited since I’ll be doing some baking for Thanksgiving.
Awesome! Thank you for sharing <3 love it!
Definitely not complicated or intimidating! Love how easy this was to make for a new baker!
This was amazing, so buttery and perfect. This is the best pie crust I have ever tried, and it’s easy. I plan on using this recipe again for my pecan pie next week!
My grandma was one of the best pie makers I ever knew. She always used shortening in her crusts. Perfect results every single time. Great recipe!
Thank you for all the tips on how to make the perfect pie crust! This was my first time and it came out awesome!
This is such a great tutorial! The pie crust came out perfect!
It had been a while since I made a homemade pie crust and your recipe and tutorial made it easy for me! The result was fantastic. Thanks!
Pie is my absolute favorite food and I am loving this crust! I cant wait to make it!
Pie crust really can be difficult, but this recipe is fail proof! Great tip on using the shortening!
I know in your gluten-free apple pie recipe you said that the substitute flours just didn’t taste the same; but have you tried this recipe with a gluten-free flour?
We have not tried it yet but it should definitely work if you get a good cup for cup gluten free flour. We like the Namaste Gluten Free flour blend that you can find at Costco.