We may earn a commission when you click on the affiliate links in this post.
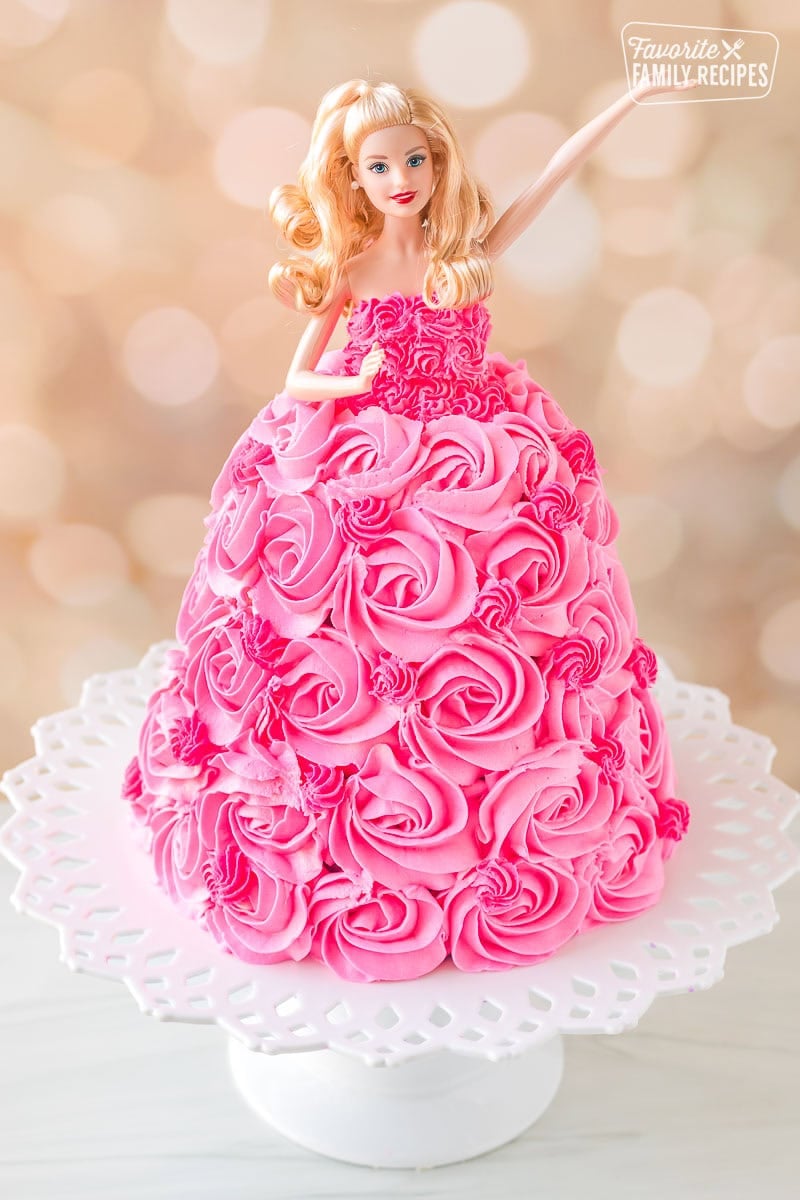
This stunning homemade Barbie cake is every little girl’s dream! Perfect for any size Barbie, it’s a beautiful, fun, and easy cake for birthdays or any special occasion.
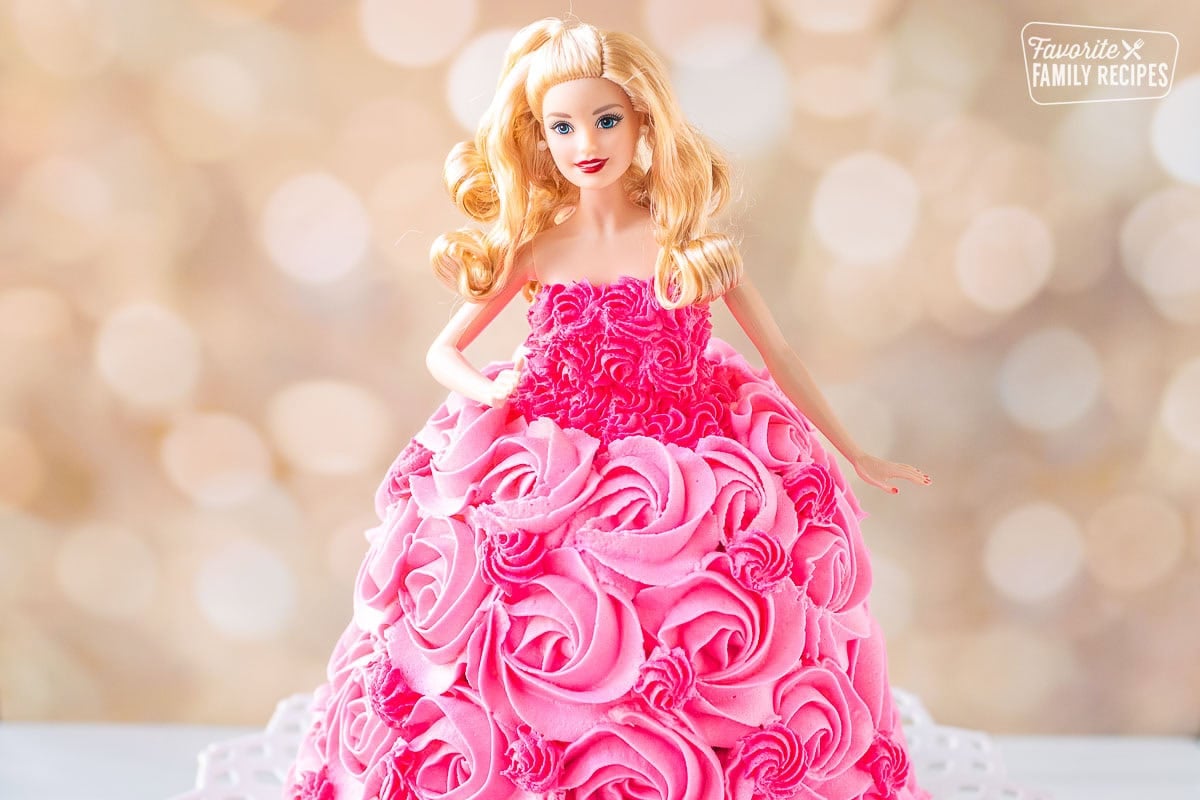
Table of Contents
Barbie Birthday Cake
There are four girls in our family and each of us had at least one Barbie cake when we were growing up. And let’s be honest, those were the best birthdays ever. As a little girl, who could ask for a better cake? Our mom is such a talented cake decorator and she always made them over-the-top beautiful with frosting roses and ribbons and edible decorations. It always made us feel so special getting such a beautiful custom birthday cake made with love from our mom. Plus, it was always so fun knowing that after the cake was eaten, we got a new Barbie! Beautiful birthday cake plus brand new barbie = win-win!
How to Make a Barbie Cake Skirt
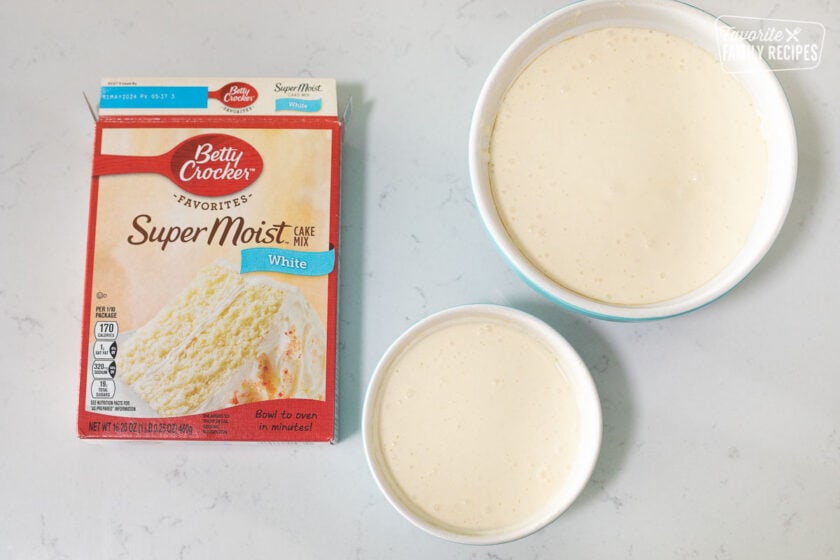
- Find your “molds”. The “skirt” of the cake is baked in two oven-safe glass bowls. I used one medium-sized bowl and one small bowl. That’s all you’ll need for the base of the cake, or the skirt. Get creative with what you have. Just make sure the bowls you are using are oven safe and that your Barbie will fit in them when the cakes are stacked. A ceramic or stoneware mixing bowl will work great. The size of cake will fit any Barbie-size princess doll or Barbie doll.
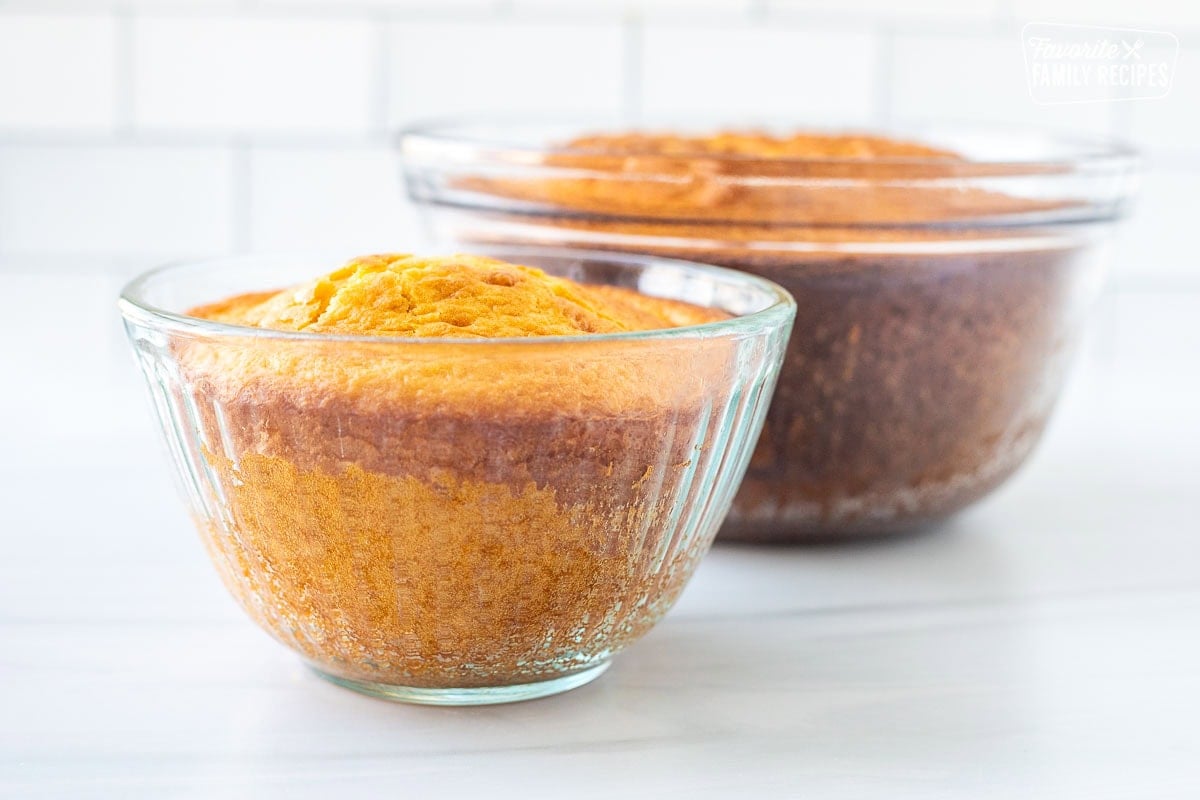
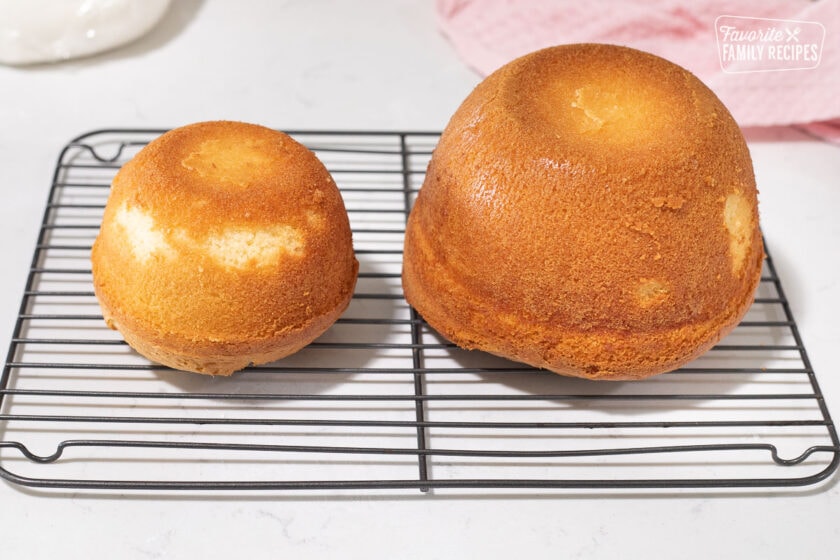
- Make and bake the cakes. Mix two box mixes of cake mix (you can mix and match or use all one flavor, totally up to you. Following the directions in the recipe card below, bake until cooked through. This takes up to an hour depending on the depth and size of your bowls. Because they are different sizes they will be done at different times. Just keep an eye on them. To avoid sticking, grease or butter your pans and then lightly dust with flour before adding the batter. Tip: If the tops are getting too brown before the middles are done, lightly cover with foil to prevent further browning.
- Cool and flip. About 10 minutes after removing from the oven, flip the round cakes and/or bowls over and release the cakes from the pans and/or bowls. You may need to gently slip a knife around the edges to loosen, and then invert onto a wire cooling rack. This way the cakes can finish cooling and you will avoid the cake sweating and sticking to the bowl.
- Stack the layers. Stack the cakes one on top of the other, with a layer of frosting in between. Then trim off the excess to make a full skirt or to shape it if needed. You may need to cut the cakes in half horizontally and add even more frosting in between the layers to add more height. The last Barbie cake I made the Barbie was up on her tippy toes making her super tall so we had to add more frosting layers (which was kind of a pain but it worked).
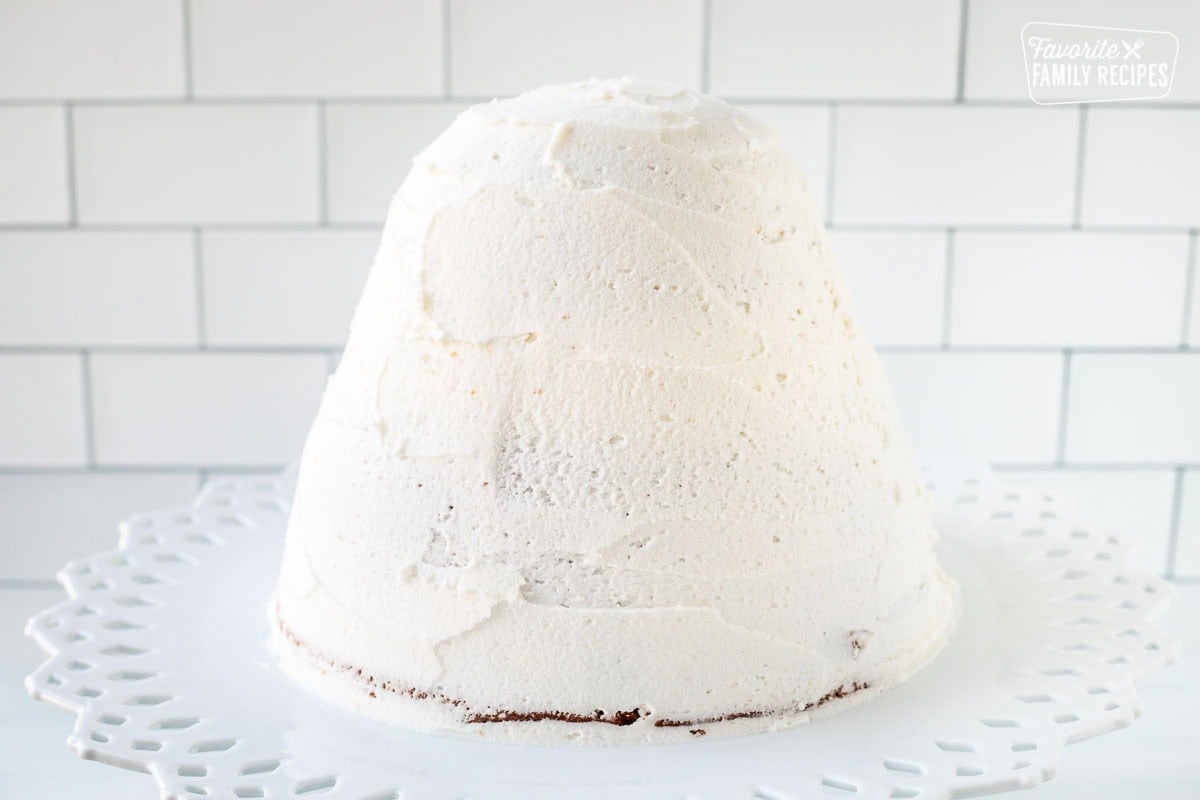
- Freeze and frost. I usually like to wrap the whole cake in plastic wrap and pop it in the freezer overnight after it has cooled. This makes it so much easier to frost later on. Add a “crumb coat” of frosting, which is simply a thin layer of frosting, so the decorating layers have something to stick to. Insert doll into the top of the cake (you may want to use a knife to cut a hole the width of the Barbie doll if it is still fairly frozen) and decorate!
How to Decorate a Barbie Cake
Once the cakes are completely chilled, take your Barbie or princess doll (undressed) and stick her legs into the middle of the cake. Then decorate her bodice and skirt however you like. To make things easier on yourself, get a doll where the bodice is painted on. Then the only part you need to decorate is the “skirt” part.
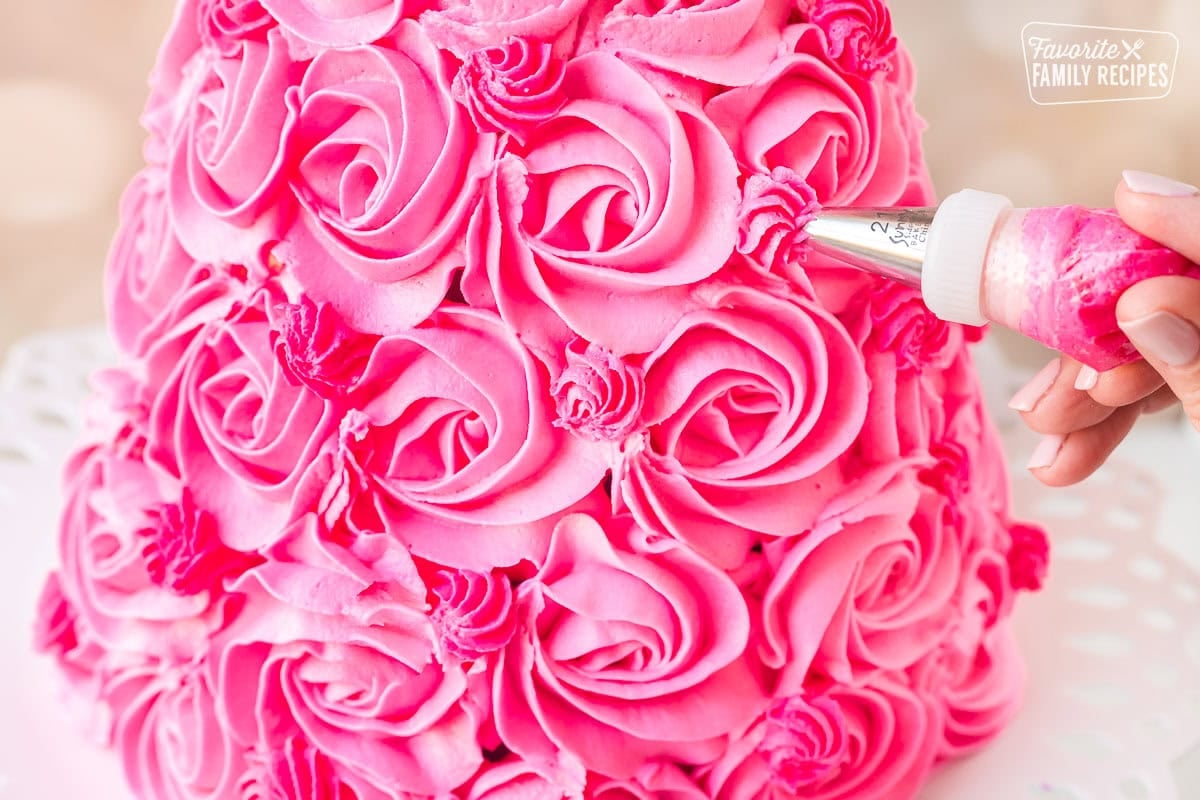
Don’t let the frosting of this cake intimidate you. We made this basic buttercream frosting for this cake and piped giant roses onto the gown and then piped little rosettes to fill in the gaps. It looks more complicated than it actually was. No joke, this took all of about 5-10 minutes to decorate. You can add ribbon, icing, sprinkles, or any other edible decorations you like!
What Frosting is Best?
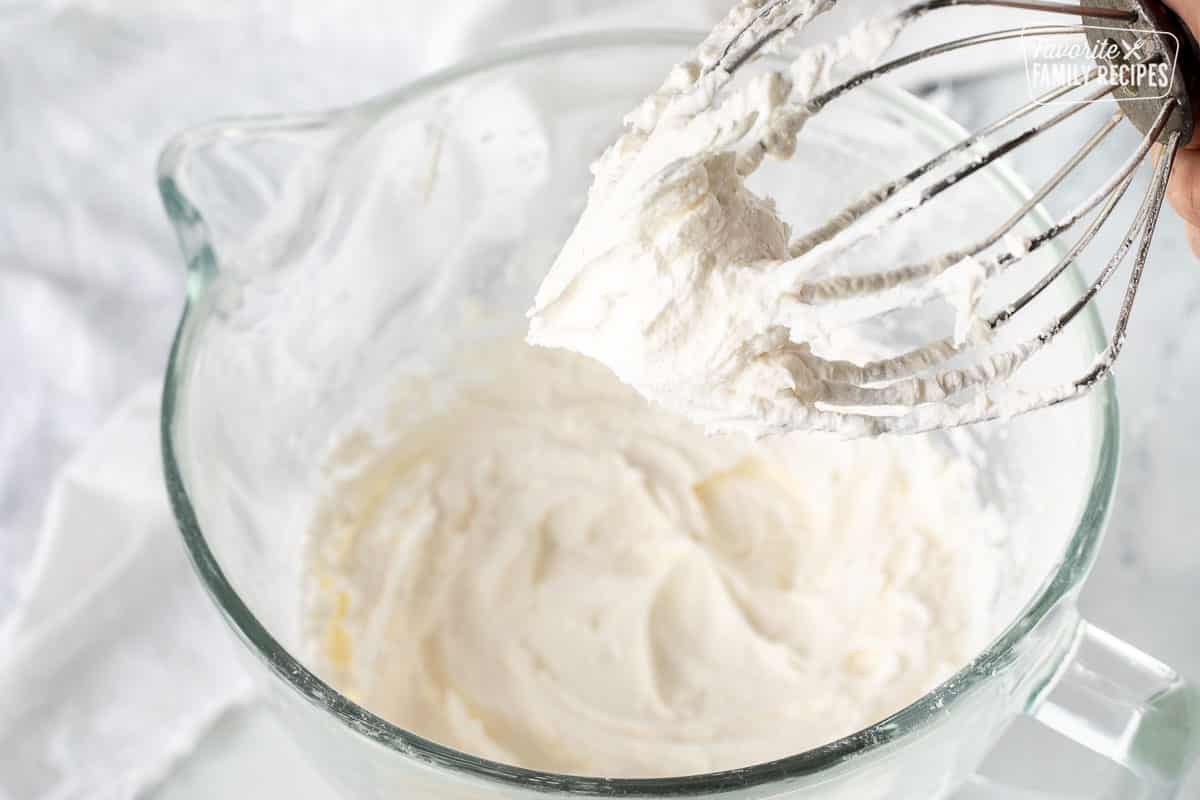
I love using homemade buttercream frosting when I am decorating cakes with beautiful detail like these princess cakes. Buttercream frosting holds its shape well and it is easy to pipe so you can do all kinds of fun designs for your Barbie birthday cake. You will want about 6-7 cups of frosting to cover your cake if you are wanting to pipe the entire cake. This allows for some extra for dividing and color mixing. Fondant is another great choice when making a Barbie cake. It is great for a smooth, flowy look. It is a bit more temperamental to work with but can have beautiful results.
Tips for Decorating a Barbie Cake
- Clip up the doll’s hair or any accessories while decorating.
- Lightly frost the cake before piping or decorating. This is called a “crumb coat”. It adds strength to the cake once the decorating icing is applied and keeps unwanted crumbs from being seen.
- Use a cake plate or lazy Susan when decorating. This will make it easier to turn while piping.
- Separate your frosting into bowls, color with food coloring, then cover with a damp cloth until ready to use so the frosting doesn’t dry out.
- Practice piping on wax paper until you get comfortable creating your designs. Here is a great post on some simple piping techniques to try.
- Use gel food coloring from the craft store. These types of food coloring are far superior to the water food coloring at the grocery story. You will get brighter colors and the perfect tint to match your princess.
- Get creative with decorations! You can use sprinkles or any shape or size, piping gels, or any other fun sugary ingredients you can find.
More Barbie Cake Decorating Ideas
Disney Elsa Barbie Cake
For the Elsa Barbie doll birthday cake we used a Barbie that had a painted on body and a skirt (instead of a full dress). This made it super easy to decorate. We mixed Sky Blue and Lavender food coloring to get the right colors. We kept adding color a drop at a time until it matched Elsa’s bodice colors.


For the skirt, we did 2 colors. The top color was more heavy on the blue and the bottom was heavier on the lavender color. To get the “ombre” look, we filled one pastry bag with the blue, another one with the purple and then put BOTH bags (no tips in either bag) in one bag with the star tip. That way the two colors combined without mixing too much. It gave it more of a swirled look.

We used a star tip to make the “swirls”. We alternated the direction of each swirl to give it more interest. You could also probably do rosettes and it would look beautiful. We finished off the look with pearl sprinkles and sparkly snowflake foam stickers (of course, we removed the stickers before eating).
Disney Rapunzel Cake
For the Rapunzel cake, we mostly piped little flowers using a star tip. We used a flat tip for the ribbon on the front of the dress and a larger star tip for the “shell” looking border along the bottom.

More Delicious Birthday Cake Recipes
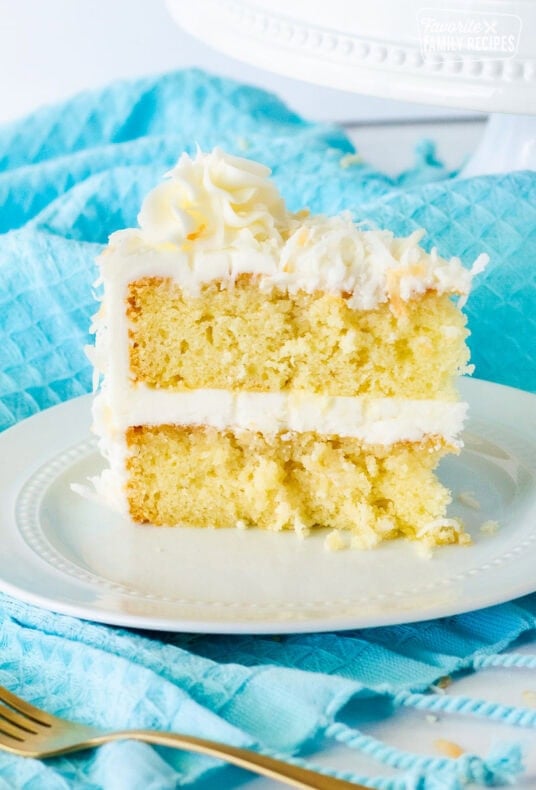
There’s nothing more I love in life than a slice of beautiful, luscious, moist birthday cake. Use a box cake mix (like in the recipe below) or try making your cake from scratch using one of our homemade cake recipes:

How to Make a Barbie Cake

Video
Ingredients
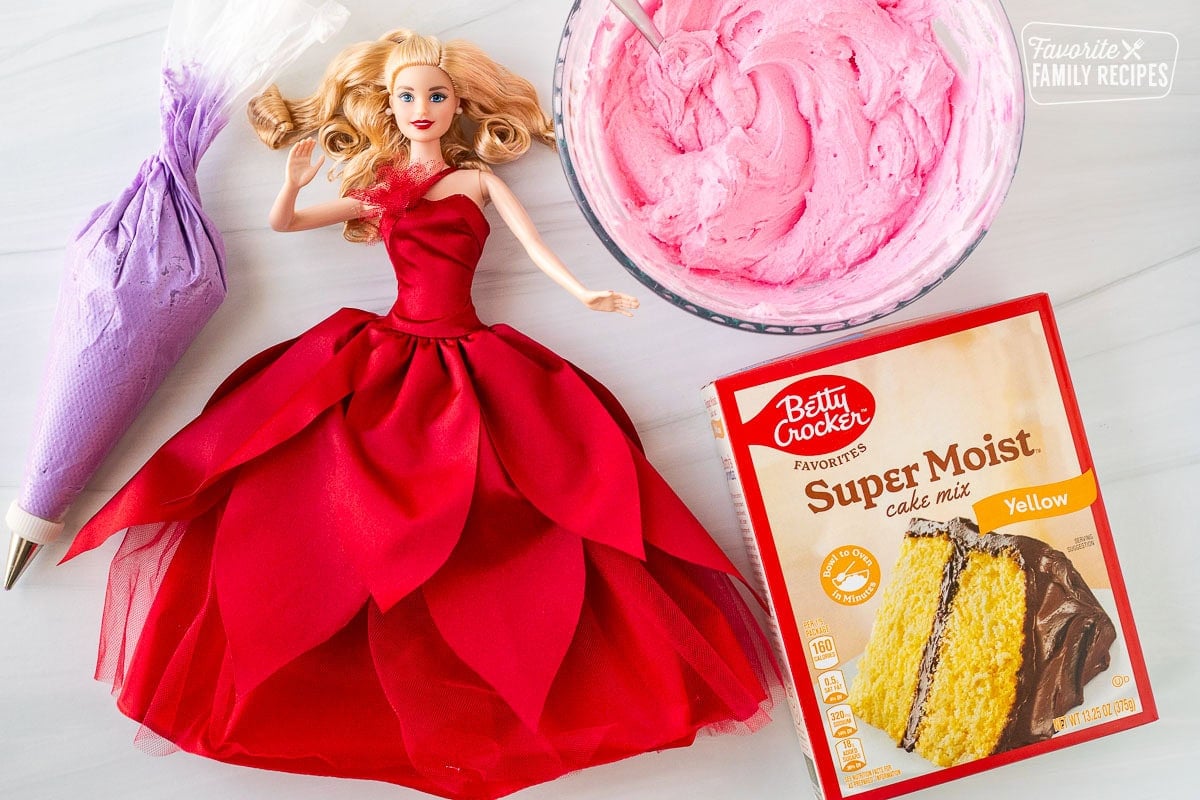
- 2 cake mixes, made according to package directions.
- 1 Barbie or Barbie-sized Princess Doll
- 1 recipe buttercream frosting
Instructions
- In a large bowl, make up cake batter. I almost always need 2 cake mixes for this and almost always have leftovers for a few cupcakes (which no one complains about ever). Grease and flour a medium-sized and small glass oven-safe bowl (see notes above). Measure to make sure your Barbie will fit when both layers are stacked. It's better for the skirt part to be too tall than too short.Spray bowls with cooking spray (or grease with butter) and dust lightly with flour. Turn upside-down and tap the bowls to get rid of excess flour.

- Fill with batter until they are a little over ¾ full. Use remaining batter for cup cakes. You can also fill an 8" round pan with the remaining batter if you want to add some height to the base of the Barbie cake, making it 3 layers instead of 2. Bake at 350 for about an hour or until the center feels set (checking after 30 minutes). The smaller bowl will bake faster than the bigger bowl and need to be removed sooner.If the tops are getting too brown before the cakes are baked through, cover with foil to prevent too much browning.
- About 10 minutes after you remove the cake from the oven, turn out of bowls onto parchment paper. This prevents the cake from sweating and sticking to the bowls.Stick the cakes in the freezer for a few hours or overnight until they are firm.
- About 10 minutes after you remove the cake from the oven, turn out of bowls onto parchment paper. This prevents the cake from sweating and sticking to the bowls.Stick the cakes in the freezer for a few hours or overnight until they are firm. Layer the small cake onto the large cake on a cake plate or stand . You can use some frosting on the stand to keep the cake in place if needed. Trim any over hang if necessary. Depending on the size of your Barbie, you may need to add a frosting layer between the two cakes.
- Layer with a thin layer of frosting to create a "crumb coat" for the frosting to stick to.Carefully place the Barbie Doll into the cake
- Decorate with buttercream frosting using a large rose tip to make roses or use other tips to make different fun designs (see ideas above).
- If your Barbie is bare on the top, pipe frosting directly onto the doll to finish off the dress. If your Barbie has a painted-on top, you can leave it as-is (see the Rapunzel cake above as an example), of you can frost over it.


Equipment
- Oven-safe Mixing Bowls (see notes above)
- Hand Mixer
Notes
- Nutrition represents a standard white cake mix with fondant or buttercream frosting. Nutritional values of other flavors may vary.
- Use extra cake batter to make cupcakes to place around the cake for extra decoration.
Nutrition
Nutrition information is automatically calculated, so should only be used as an approximation.
Love this recipe?
We want to hear from you! Please leave a review.
The frosting effect is called ombré (French for “shaded”), not hombre (Spanish for “man”). Hope that helps!
Thanks for catching that typo for us!😂 We fixed it!
Could you give a link to which doll you used in this cake? So pretty! I’m assuming she’s a Rapunzel doll but I couldn’t find the exact one. Want to make this cake for my daughter’s birthday.
It has been a long time since we made this cake, I don’t know if they sell that specific doll anymore. But any Rapunzel Barbie doll will work!
Love it sweetheart
These are so fun! I remember when I was little my mom made one for me one year. I don’t have any little girls of my own, but I love this recipe and will pass it on to my friends with girls. <3
very cool!! My friend’s daughter would love this princess cake.
This is such a showstopper for any birthday party! I love this idea.
I’m going to make it for my granddaughter last time I made one was for my mother she was 80 years old. And she use to make them for my birthday I still have the cake doll with real hair she used .
Wow, this cake looks amazing! Unfortunately, only boys in my family but I am definitely showing it to my sister as she has two girls!
This is SO cute. It’s my daughter’s birthday in a few weeks and she would LOVE this.
What an amazingly creative cake idea!! I feel like this would be every little girl’s ideal birthday cake! Love that it looks super fancy but is pretty easy to make too!
This is a delightful birthday cake and I love the idea of it. I bet any girl would love this for her special day and be thrilled to get such a pretty cake!
It looks Fantastic. Probably every girl dreams of this. This is every little girl’s dream! Great share with easy directions!
Could you make the cake the day before and then frost it the day if party? Would you you still freeze it or just store in the fridge overnight? Or is it best to do it all the day of?
Yes! You can store it in the freezer overnight. That way it will be really easy to frost. Just make sure it has about 30 minutes to thaw after frosting.
Fantastic! This is every little girl’s dream! My mom made me one for one of my birthdays. Actually…she made one LARGE one and like 6 small ones! Nothing like over doing it! lol …. Great, easy directions!
Am I too old to have one for my birthday, lol?? This is so precious!!
I remember these being so popular! This is such a sweet cake idea.
We are going to attempt this for my daughter’s birthday in a few weeks. Such an awesome idea, thank you so much!
My little girl loved this! The perfect birthday cake!