We may earn a commission when you click on the affiliate links in this post.
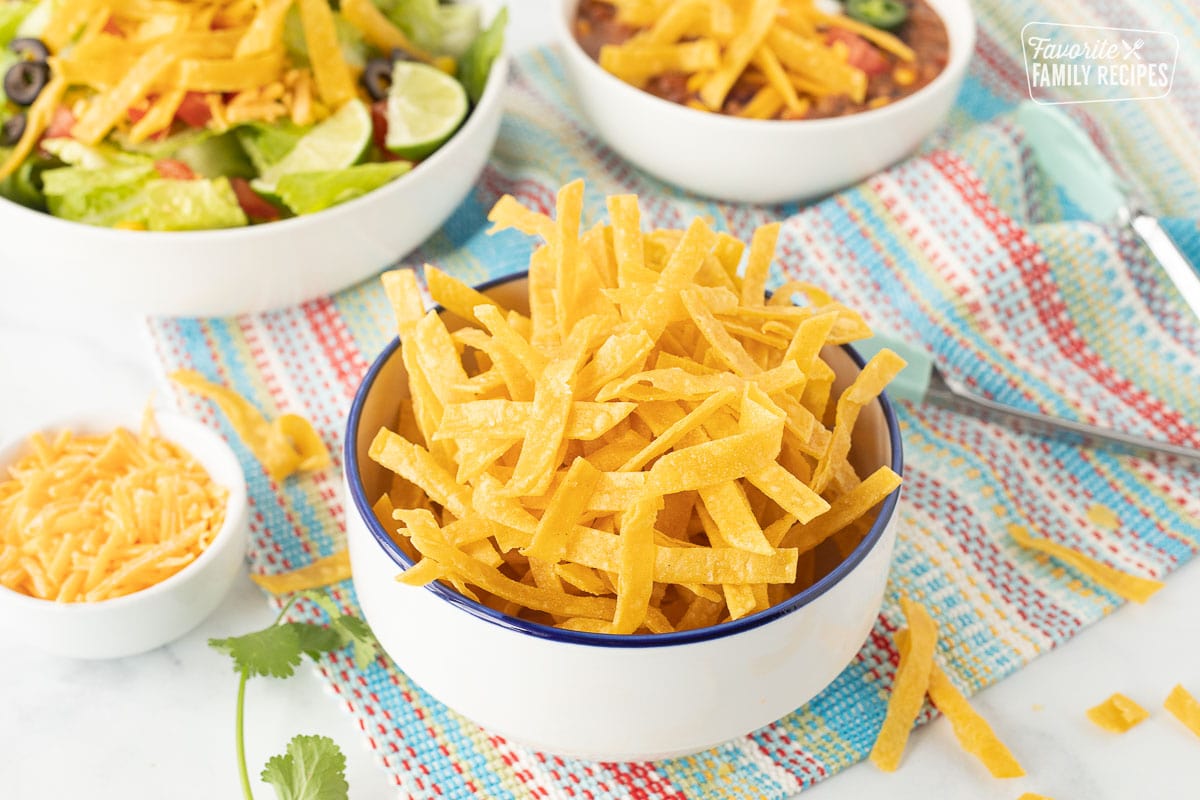
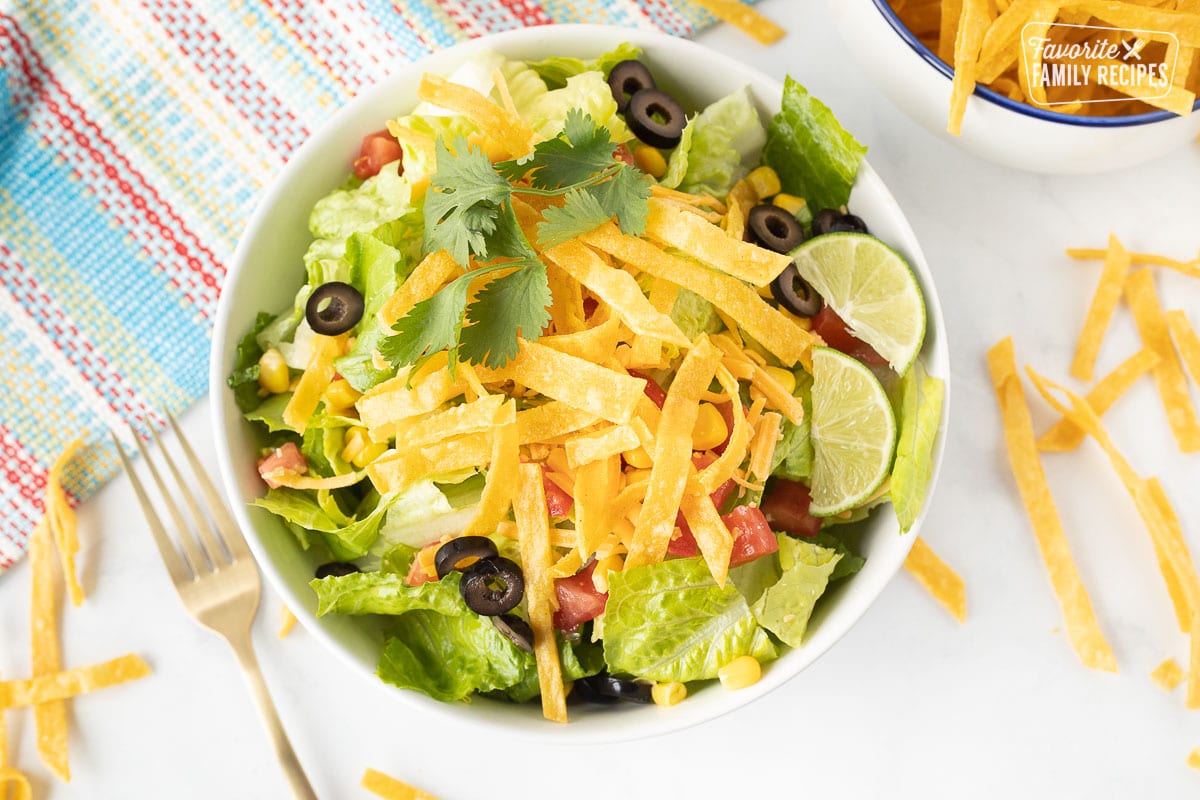
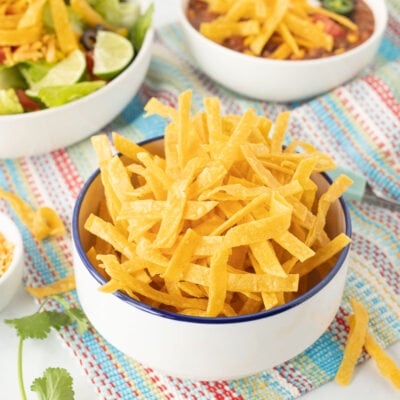
These Homemade Tortilla Strips are my go to way to add a salty, crispy crunch to salads, soups, burrito bowls and wraps. They take just a few minutes, use only three simple ingredients, and taste so much fresher than anything you can buy at the store. Make a big batch, stash them in the pantry or freezer, and you will always have the perfect crunchy topper ready to go.
5 Star Reviews ⭐️⭐️⭐️⭐️⭐️
“I love making taco soup and these tortilla strips are the perfect topping! thanks for the tasty recipe!” – Liz
“These tortilla strips are so easy! Thanks for the recipe, I want to use them on EVERYTHING!” – Katherine
“These were the perfect topping for a bowl of chili. Thanks for sharing!” – Allison
Why I Love This Recipe
I love this recipe because it proves that something so simple can make a meal feel special. These Homemade Tortilla Strips use just corn tortillas, oil and salt, but they make every bowl of soup, salad or burrito feel like it came from your favorite restaurant. They are cheaper than store bought strips, plus you control the oil, the salt and the seasonings.
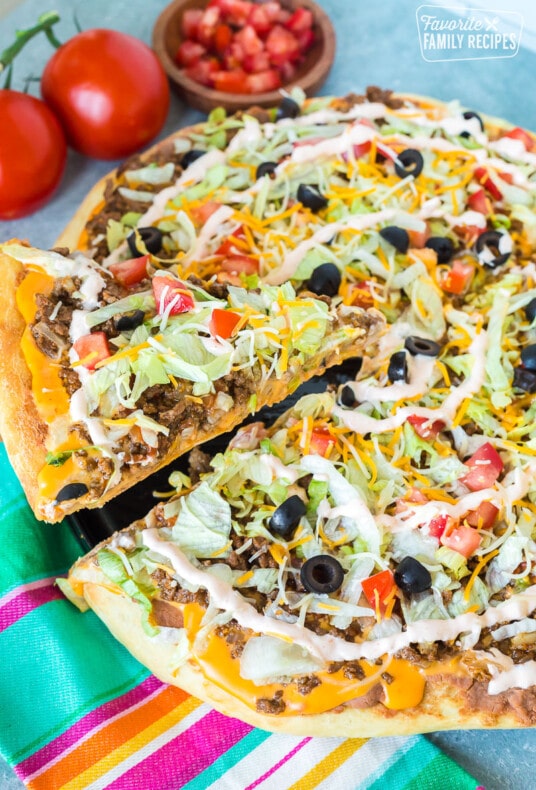
I also love how easy they are to customize. You can keep them lightly salted for everyday use, or turn them into fun flavors like cheesy Doritos style or cool ranch style. Once you try making your own, it is hard to go back to the packaged version. I like to toss them on our Cafe Rio Sweet Pork Salad, Ground Beef Taco Salad, or Taco Bowls. Or sprinkle them over Chicken Taco Soup, Black Bean Soup, Chile Verde, or any Mexican inspired soup.
🩷 Erica
Table of Contents
Ingredients You Will Need
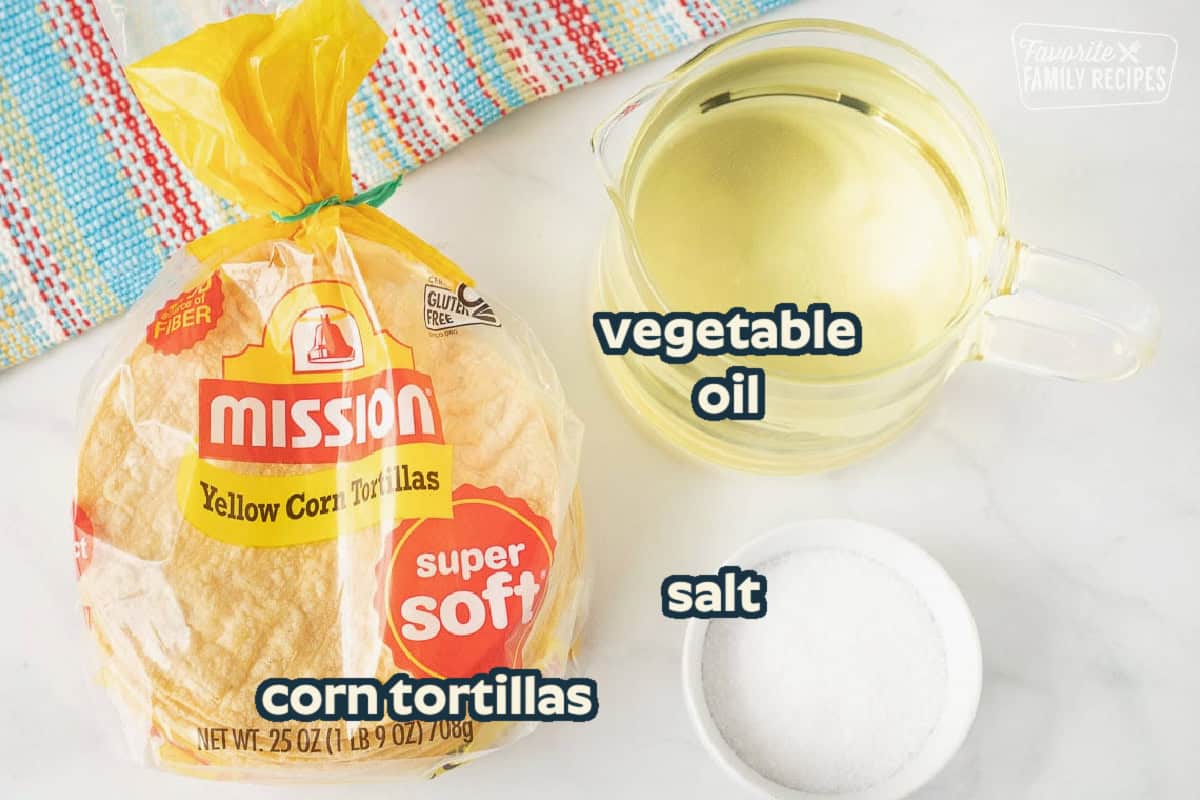
- Corn tortillas – yellow or white corn tortillas crisp up beautifully and keep the recipe naturally gluten free.
- Oil for frying – a neutral high heat oil like vegetable, canola or corn oil lets the tortilla flavor shine.
- Kosher or sea salt – coarse salt clings to the warm strips and gives that classic restaurant style taste.
Ingredient Additions And Substitutions
Here are some easy ways to customize your Homemade Tortilla Strips:
- Cheesy Doritos style – toss hot strips with Parmesan, paprika and chili powder for a cheesy, snackable flavor.
- Cool ranch style – season warm strips with ranch powder and paprika for a creamy, tangy salad topper.
- Garlic and lime – combine garlic powder with fresh lime or lime powder for a bright, punchy seasoning.
- Fajita or taco seasoning – use your favorite blend when you want quick Southwest flavor without measuring spices.
- Tomato and onion – add tomato powder and onion powder to make extra savory strips for soups and chili.
- Flour tortillas instead of corn – swap in flour tortillas when that is what you have, knowing the texture will be softer.
- Low carb or keto version – use low carb tortillas like Mission carb balance for a more keto friendly option.
- Baked instead of fried – brush tortillas with a light coat of oil and bake for a lower fat but still crispy version.
How To Make Tortilla Strips
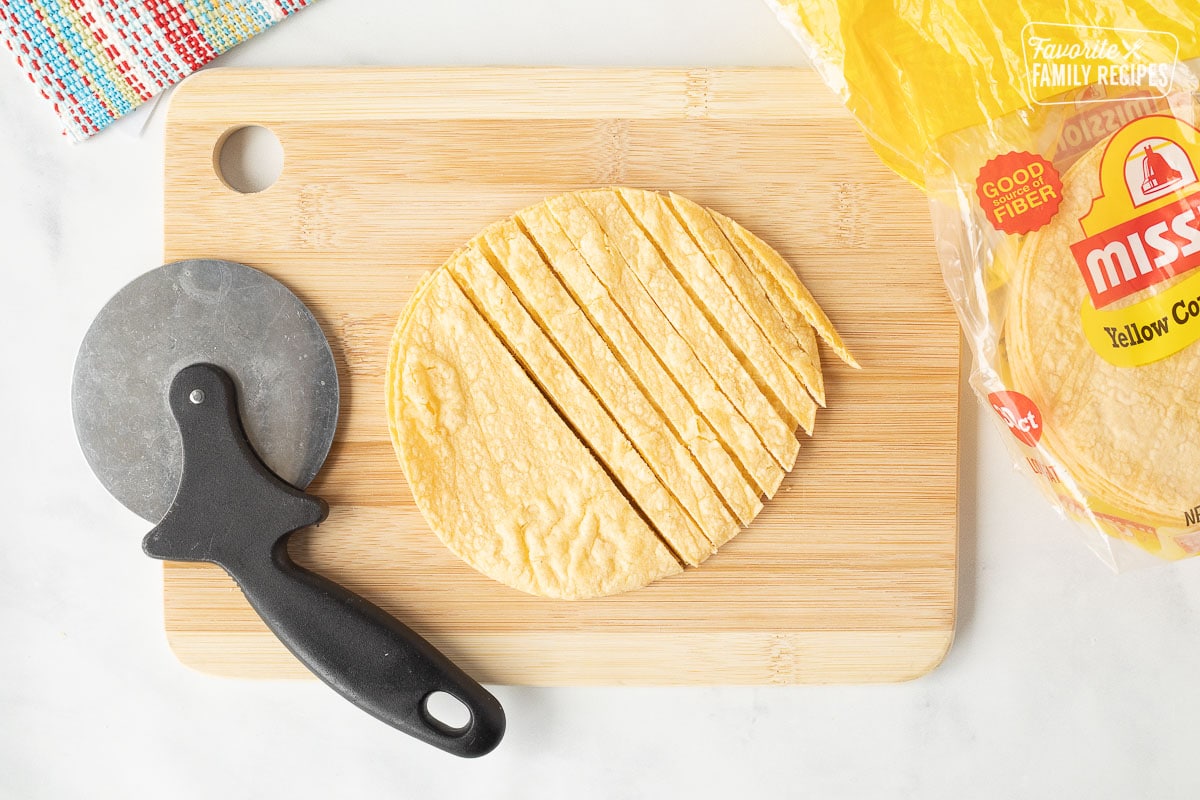
- Cut the tortillas: Stack 2 to 3 corn tortillas and use a pizza cutter or sharp knife to slice them into thin strips about ¼ inch wide, or cut them into triangles if you want chips instead of strips.

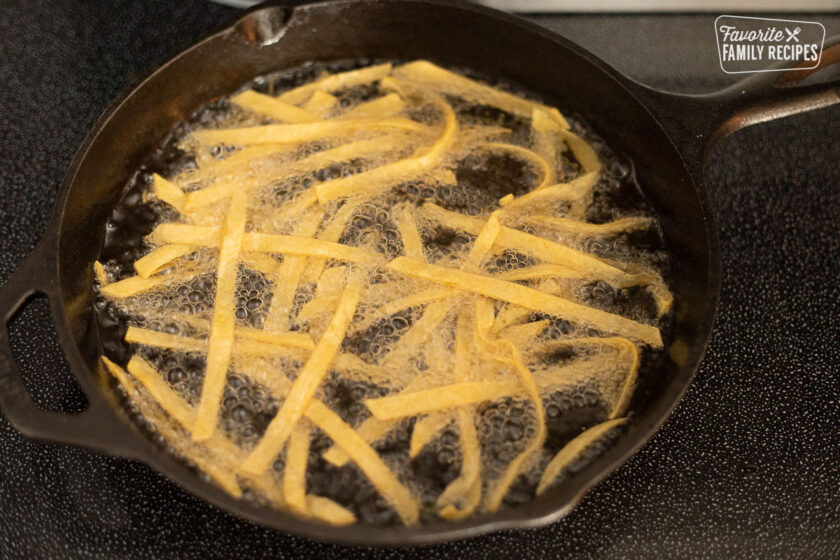
- Heat the oil: Pour oil into a deep skillet, large frying pan or deep fryer so the tortillas can float, then heat it to 350 to 375 degrees F, or until a small piece of tortilla sizzles right away.
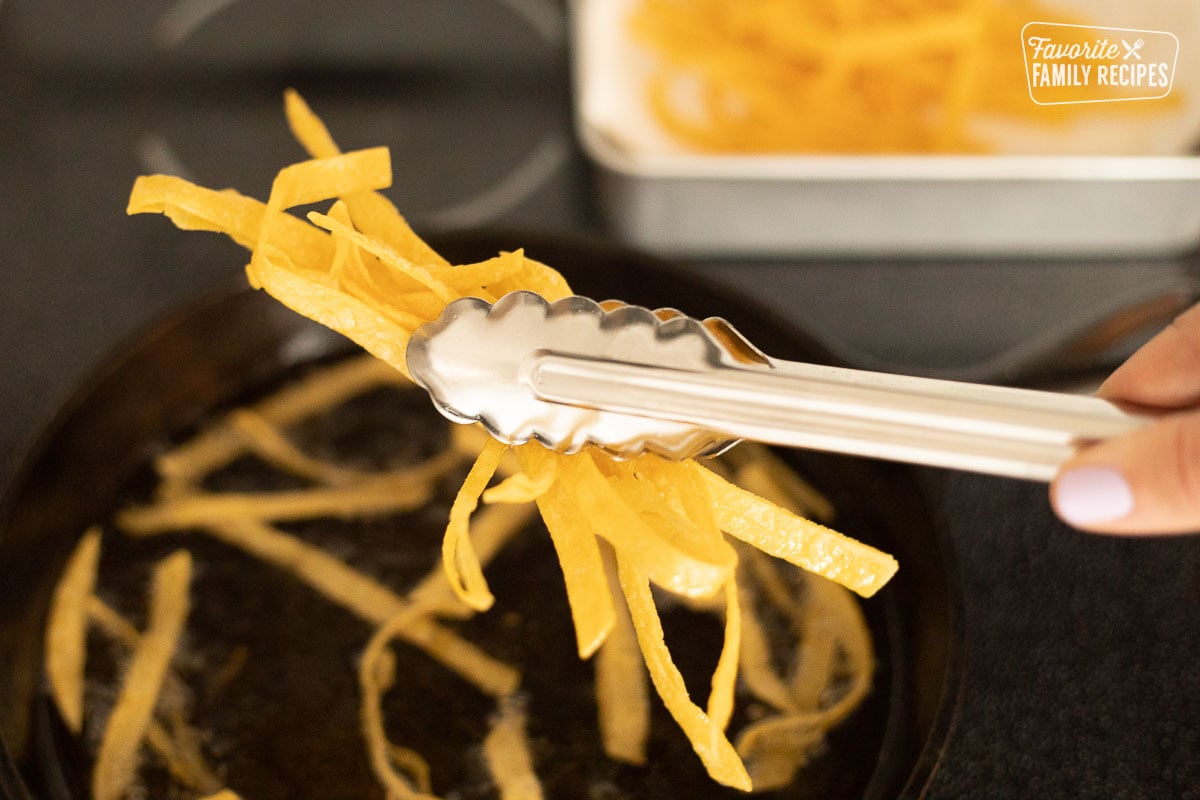
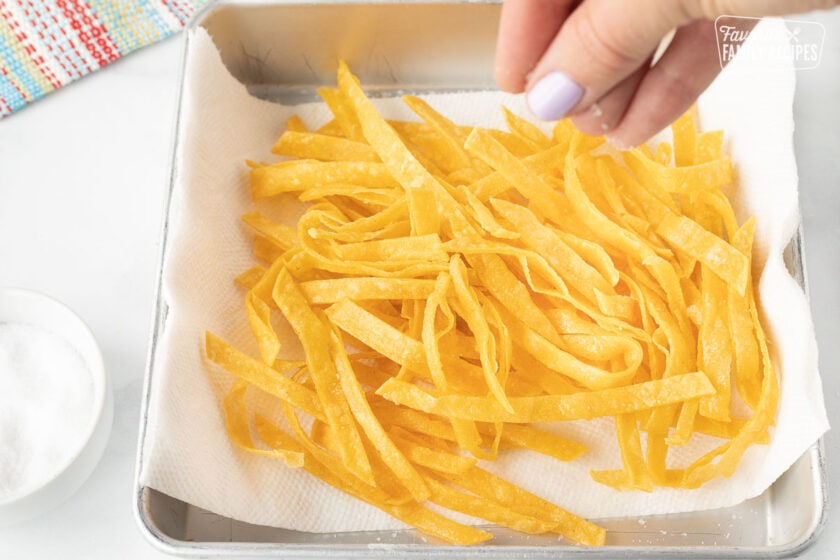
- Fry, drain and season: Working in batches so you do not overcrowd the pan, carefully add tortilla strips to the hot oil and fry until crisp and golden, then transfer them to a paper towel lined plate and sprinkle with kosher salt and any extra seasonings while they are still warm.
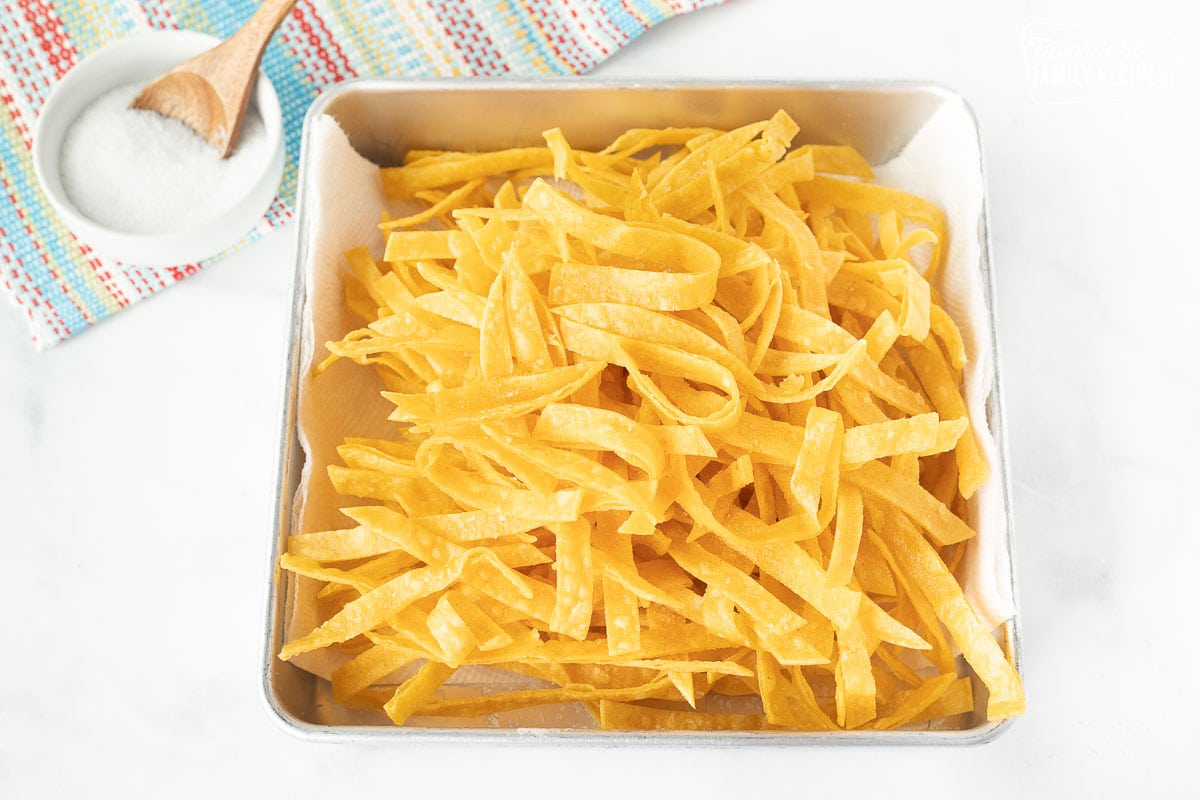
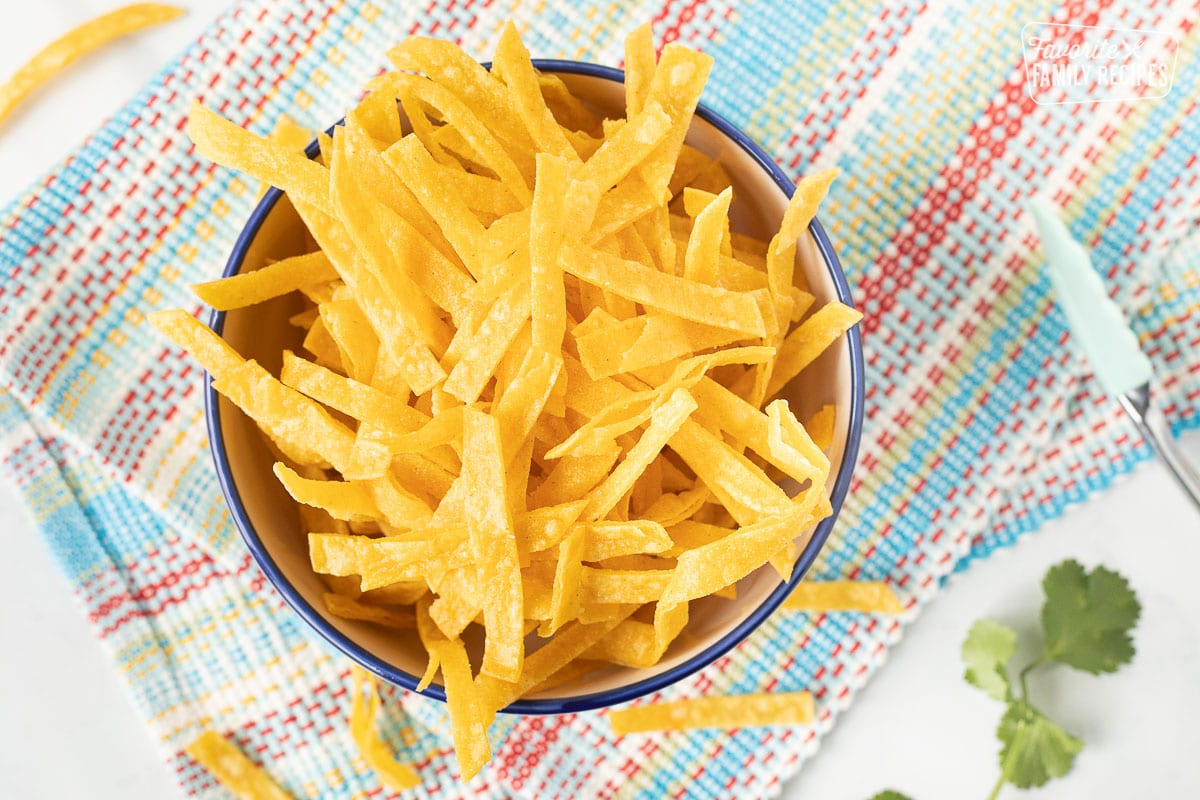
- Cool and store: Spread the Homemade Tortilla Strips out in a single layer to cool completely, then move them to an airtight container or bag and store at room temperature or in the freezer until you are ready to use them.
Baked Version
If you want to skip frying, you can make baked Homemade Tortilla Strips instead.
- Brush or spray both sides of each tortilla lightly with oil.
- Cut tortillas into strips with a pizza cutter just like in the frying method.
- Arrange the strips in a single layer on a baking sheet lined with parchment paper or a silicone baking mat.
- Bake at 400 degrees F for about 9 to 10 minutes, or until crisp and golden, rotating the pan if needed.
- Watch closely near the end of baking since some ovens run hot and the strips can go from golden to too dark quickly.
- While warm, spray with a tiny bit more oil if needed and toss with salt and any seasonings. Let cool completely before storing.
Recipe Tips
- Cut multiple tortillas at once. Stack 2 or 3 tortillas together and cut them all at once. This saves time and still gives you even, uniform strips.
- Use a pizza cutter for straight strips. A pizza cutter glides through the tortillas quickly and makes it easy to control the width of your strips.
- Make sure the oil is hot enough. If the oil is not hot, the strips will soak up oil and turn out greasy instead of crisp. Aim for 350 to 375 degrees F or test with a small piece of tortilla.
- Do not overcrowd the pan. Fry in small batches so the tortillas can move freely and crisp up evenly. Too many strips at once will drop the oil temperature.
- Season while warm. Sprinkle salt and other seasonings on the strips right after they come out of the oil so the seasoning sticks well.
- Cool fully before storing. Any trapped steam will make them soft. Spread them out on a paper towel lined sheet until they are completely cool.
- Try cutting the tortillas into fourths (triangles) to make tortilla chips.
- You can also use flour tortillas instead of corn, the consistency just won’t be quite the same.
Frequently Asked Questions
Yes, as long as you use corn tortillas that are labeled gluten free. Flour tortillas are not gluten free, so stick with corn if you need this recipe to be gluten free.
Make sure they are fully cooked, nicely golden and completely cooled before storing. Keep them in an airtight container away from moisture. If they soften a bit, you can re crisp them in a hot oven for a few minutes.
Corn tortillas give the most classic flavor and crunch. Yellow or white both work. Flour tortillas will work too, but the texture is a little softer and more like a thin chip than a crunchy strip.
Yes, this recipe doubles and triples very easily. Just fry or bake in batches and add more oil to the pan if it starts to get low. Season each batch as it comes out so everything is evenly coated.
Yes. Instead of cutting the tortillas into strips, cut each tortilla into fourths to make triangles, then fry or bake them just like the strips. They make perfect quick tortilla chips.
Make Ahead And Storage
- Storing: Store completely cooled Homemade Tortilla Strips in an airtight container or zip top bag at room temperature for about 1 week. After that they can start to taste stale.
- Freezing: For longer storage, freeze the strips in a sealed freezer bag for up to 1 month. Pull out a handful whenever you make salad, soup or chili. They thaw very quickly.
- Re Crisping: If your strips soften, spread them on a baking sheet and heat in a 350 degree F oven for a few minutes to crisp them back up.
More Mexican Recipes


These crispy Homemade Tortilla Strips are easy to make and incredibly versatile. With just three basic ingredients, you get a big batch of crunchy strips that brighten up salads, soups, wraps and more. If you make this recipe, I would love to hear what you think. Please leave a rating, share your tweaks, and tell me what you served them with in the comments so other readers can get ideas too. 💛
Homemade Tortilla Strips
Ingredients
- 12 corn tortillas
- oil, for frying
- Kosher salt
Instructions
- Cut tortillas into strips using a pizza cutter. You can cut 2-3 at a time pretty easily.

- Heat oil in a deep dryer, large skillet or frying pan. When oil reaches 350-375 degrees F, place strips into hot oil and fry until they become crispy.
- Remove from oil with tongs or a slotted spoon and place on a paper towel. Sprinkle with salt after each batch.

Notes
- Corn tortillas give the crispiest, most classic texture and are naturally gluten free when labeled gluten free.
- For a baked version, lightly brush or spray tortillas with oil, cut into strips, arrange on a lined baking sheet and bake at 400 degrees F for 9 to 10 minutes or until golden and crisp.
- Season the strips while they are still warm so the salt and spices stick well.
- Store cooled strips in an airtight container at room temperature for about 1 week, or freeze for up to 1 month.
- To keep them crunchy, make sure they are fully cooled before storing and re crisp in a 350 degree F oven for a few minutes if needed.
- For flavored strips, try cheesy Doritos style (Parmesan, paprika, chili powder), cool ranch style (ranch powder and paprika) or garlic and lime for salads and soups.
Nutrition
Nutrition information is automatically calculated, so should only be used as an approximation.
Love this recipe?
We want to hear from you! Please leave a review.
I love making taco soup and these tortilla strips are the perfect topping! thanks for the tasty recipe!
These tortilla strips are so easy! Thanks for the recipe, I want to use them on EVERYTHING!
The versatility of these strips is unmatched! I can use them on so many recipes and their crunchy texture will always taste just right!
These were the perfect topping for a bowl of chili. Thanks for sharing!
Can you tell me how many this recipe feeds? Thanks so much.
It should be enough to top 10-12 salads. Hope this helps!
Great recipe! I made this last night with left-over shredded carnitas pork that I had made earlier in the slow cooker. I had a lot of meat so I doubled the recipe. I also, dumped the pork into the soup about 30 minutes before serving. I broiled the tortilla stripes too; didn’t want to deal with hot frying oil. Everyone loved the fresh veggies that get added when serving. Definitely keeping this recipe in my stash of easy meals, especially for leftovers. If I ever make it to Utah I’ll keep an eye out for Cafe Rio.
Thanks you for the ideas! I’m so glad you enjoyed the recipe!
I prefer to bake mine but watch them…
Can I make them ahead? How do you keep them and for how long?
Thank you, Anne
They don’t keep the best, I would say no longer than a week…
Can someone give me the run down on how to successfully pan fry these? I usually have bad luck trying to pan fry anything.
Try to broil them it works out so much better,,rub them down with olive oil then cut into strips and broil
How long are these good for?