
We may earn a commission when you click on the affiliate links in this post.
This Chocolate Peanut Butter Fudge is thick, creamy, and tastes like a Reese’s Peanut Butter Cup in fudge form. Chocolate fudge and peanut butter fudge are swirled together in one pan, giving you both flavors in every bite. It only takes about 20 minutes to prepare, and you don’t even need a candy thermometer!

5 Star Reviews ⭐️⭐️⭐️⭐️⭐️
“Loved this recipe!! My first time making fudge and I followed your directions step by step and it came out delicious! It was a huge hit with everyone!! Thank you :)!” – Claudia
A Little Chocolate, a Little Peanut Butter, and a Whole Lot of Fudge
This recipe is a variation of our See’s Fudge Recipe, but with a peanut butter twist. Instead of making one big batch of chocolate fudge, you make two mixtures, one chocolate and one peanut butter, and swirl them together.
It might look complicated, but it’s actually pretty easy. The trick is to have everything ready before you start cooking because once the sugar mixture is hot, things move quickly! This recipe makes a big pan of fudge, which is great for Christmas treats, holiday candy plates, or giving away as gifts.
🩷 Erica
Table of Contents
- 5 Star Reviews ⭐️⭐️⭐️⭐️⭐️
- A Little Chocolate, a Little Peanut Butter, and a Whole Lot of Fudge
- Ingredients for Chocolate Peanut Butter Fudge
- Ingredient Substitutions (What Works and What Doesn’t)
- Step by Step Instructions
- Tips for Perfect Chocolate Peanut Butter Swirl Fudge
- Frequently Asked Questions
- Make Ahead and Storage
- More Fudge Recipes
- Chocolate Peanut Butter Fudge Recipe
Ingredients for Chocolate Peanut Butter Fudge
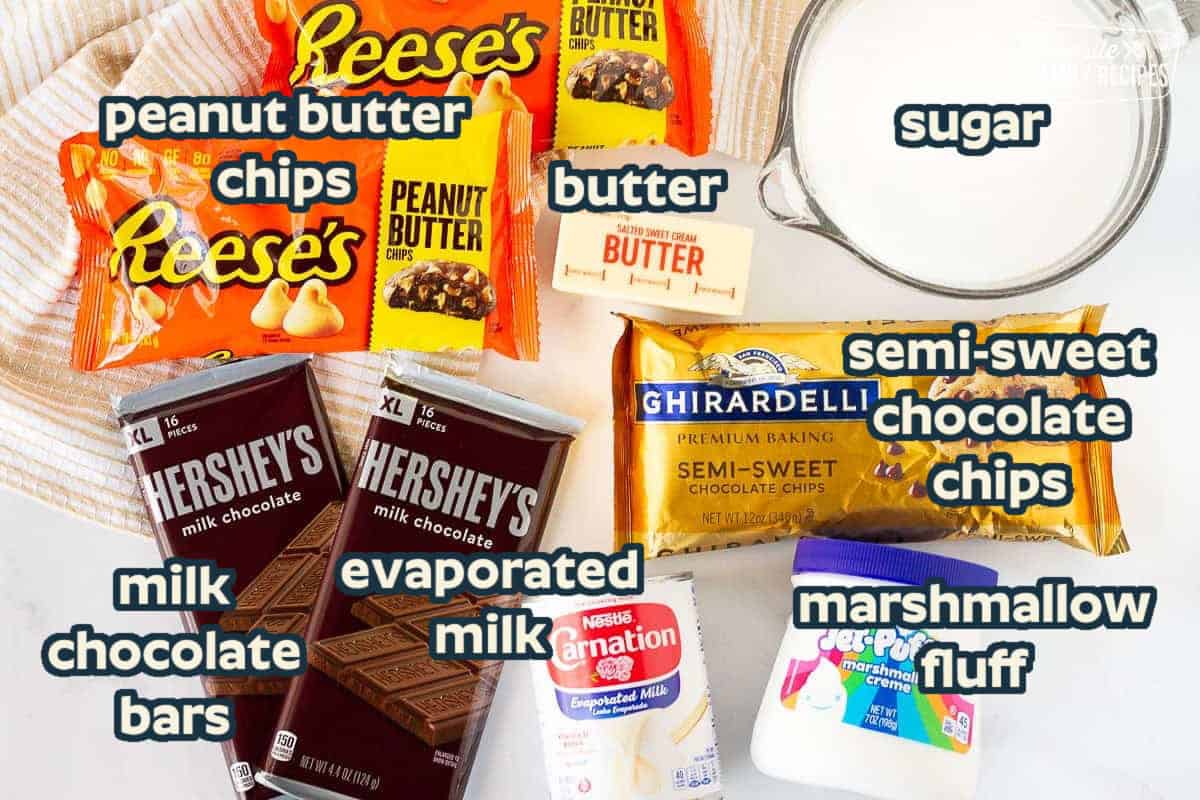
You only need seven ingredients to make this fudge. The exact measurements are in the recipe card below, but there are a few things worth knowing before you start.
- Milk chocolate bars: I use Hershey’s milk chocolate bars. You’ll need 8 ounces total, so check the weight on the package. The regular small Hershey’s bars are only 1.55 ounces each.
- Semi-sweet chocolate chips: These go into the chocolate fudge mixture. Semi-sweet chocolate helps keep the fudge from tasting overly sweet.
- Peanut butter chips: I like Reese’s Peanut Butter Chips for this recipe. You’ll need 20 ounces total, which is usually two 10-ounce bags. Be sure to check the package weight.
- Butter: You’ll use one stick of butter, divided equally between the chocolate and peanut butter mixtures.
- Marshmallow fluff: Also called marshmallow creme or marshmallow cream. The recipe uses one 7-ounce jar, divided between the two bowls.
- Granulated sugar: Use regular white sugar and measure carefully. This isn’t a recipe where you want to reduce the sugar.
- Evaporated milk: Be sure to buy evaporated milk, NOT sweetened condensed milk. You’ll need one 12-ounce can.
Ingredient Substitutions (What Works and What Doesn’t)
I’m usually pretty flexible when it comes to recipes, but fudge is one of those things where the ingredients really do matter. A small change can make the difference between fudge that sets up nicely and a batch that stays soft.
- White chocolate bars: The original recipe used an 8-ounce white chocolate bar along with one 10-ounce bag of peanut butter chips. Because white chocolate bars were difficult for readers to find, I tested replacing the white chocolate with another bag of peanut butter chips. It worked great, and the extra peanut butter flavor is even better! Both versions are options, but the recipe card below uses the updated peanut butter chip version.
- Creamy peanut butter: Don’t substitute regular peanut butter for the peanut butter chips. They’re different products and won’t give you the same consistency.
- Mini marshmallows: Stick with marshmallow fluff. Readers who have tried replacing it with regular marshmallows haven’t had consistent results.
- Chocolate chips: Dark chocolate chips are an option if you prefer a less sweet chocolate flavor. I wouldn’t recommend replacing the semi-sweet chips with milk chocolate chips because the fudge is already plenty sweet.
- Sugar substitutes: I don’t recommend reducing the sugar or replacing it with a sugar alternative. The sugar is important for getting the fudge to set correctly.

Step by Step Instructions

- Prepare your pan and chocolate mixture. Grease a 9×13-inch baking dish. For easier removal, line it with parchment paper. In a large bowl, combine the broken milk chocolate bars, semi-sweet chocolate chips, 4 tablespoons of butter, and half of the marshmallow fluff.

- Prepare the peanut butter mixture. In a second large bowl, combine the peanut butter chips, remaining 4 tablespoons of butter, and the rest of the marshmallow fluff. You don’t need to stir either bowl yet.

- Boil the sugar and milk. Combine the granulated sugar and evaporated milk in a large saucepan. Bring to a rolling boil over medium heat, stirring constantly. Once it’s boiling, continue stirring for 4 minutes. Set a timer so you don’t accidentally cook it too long.

- Melt the fudge mixtures. Working quickly, divide the hot sugar mixture as evenly as possible between the chocolate and peanut butter bowls, adding about a cup at a time and stirring each mixture. The heat will melt the chips, chocolate, butter, and marshmallow fluff. Keep stirring until both mixtures are smooth.

- Add the fudge to the pan. Spoon alternating portions of chocolate fudge and peanut butter fudge into the prepared dish. Work quickly because the mixtures will start to thicken as they cool.

- Swirl and refrigerate. Run a butter knife through the two fudge mixtures to create a swirl. Don’t overmix or you’ll lose the distinct chocolate and peanut butter sections. Cover tightly and refrigerate for several hours or overnight, until completely firm. Cut into squares just before serving.
Tips for Perfect Chocolate Peanut Butter Swirl Fudge
- Have everything measured and ready before you begin. Once the sugar and milk mixture has finished boiling, you’ll need to work quickly.
- Use a sturdy rubber spatula to stir each bowl. Scrape the bottoms and sides so all the chocolate, butter, and marshmallow fluff get incorporated. The fudge should become smooth and thick.
- Don’t overcook the sugar mixture. Bring it to a rolling boil over medium heat, then stir constantly for the full 4 minutes. Higher heat or extra cooking time can affect the finished texture.
- Don’t panic when the fudge gets thick. That’s normal! You want the ingredients completely melted and smooth, but the mixtures will become harder to stir as they cool.
- Swirl the fudge right away. If you wait too long, the mixtures will become difficult to swirl. A few passes with a butter knife are all you need.
- Use a large enough pan. This recipe makes a lot of fudge, so a 9×13-inch dish works best. An 8-inch square pan isn’t big enough for the full batch.
- Leave the pan alone once you’ve finished swirling. Moving or bumping the fudge as it begins to set can leave ripples across the top.
- Wait until the fudge is completely chilled before cutting. A sharp knife will give you cleaner squares. If you’re making the fudge for gifts, keep the pieces covered so they don’t dry out.

Frequently Asked Questions
Yes! You don’t need a candy thermometer for this recipe. Bring the sugar and evaporated milk to a rolling boil over medium heat, then stir constantly for 4 minutes. A kitchen timer is all you need.
I wouldn’t recommend it. Readers who have substituted regular marshmallows have reported problems with the finished texture. Stick with the marshmallow fluff called for in the recipe.
Not for this particular recipe. Peanut butter chips and regular peanut butter behave differently when melted and cooled. For the best results, use the peanut butter chips.
The most important things are using the correct ingredients, following the boiling instructions, and allowing enough time for the fudge to chill. Make sure you used evaporated milk instead of sweetened condensed milk, and that you didn’t substitute regular peanut butter for the peanut butter chips. Refrigerate the fudge for several hours or overnight before trying to cut it.
Cooking the sugar mixture too long or over too high a heat may contribute to a dry, crumbly texture. Use medium heat, stir constantly, and time the 4-minute boil carefully.
The recipe has been tested with the two mixtures swirled together. Layering them separately hasn’t been confirmed to set the same way, so I recommend sticking with the swirl method.
Make Ahead and Storage
Make ahead: Chocolate Peanut Butter Fudge is a great make-ahead treat because it needs several hours to set. Making it the day before serving gives it plenty of time to firm up in the refrigerator.
Storing: Store the fudge in an airtight container in the refrigerator. The existing recipe notes allow up to three weeks refrigerated, but for the best texture, make it closer to when you plan to serve it. Keep it tightly covered so it doesn’t dry out.
Serving: Keep the fudge chilled until you’re ready to serve it. It can soften if left in a warm room for too long. For neat, fresh-looking pieces, cut the fudge shortly before serving.
Freezing: Freezing isn’t recommended for this particular fudge. Refrigeration is the preferred storage method.
More Fudge Recipes
If you’re making fudge for the holidays, these other recipes are worth adding to your list:
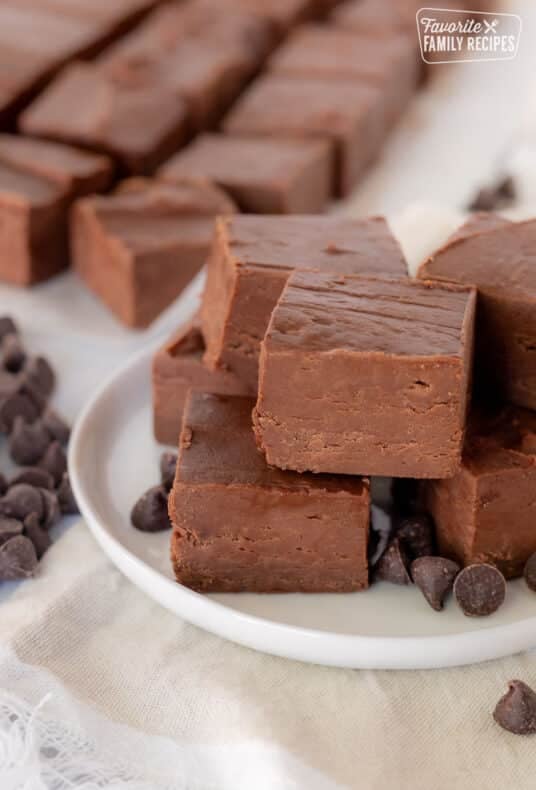


- Also try our Creamy Chocolate Coconut Fudge – it’s rich and creamy, with a hint of coconut!
- And for more treats, take a look at our Easy Dessert Ideas.
Chocolate Peanut Butter Fudge

Video
Ingredients
- 8 ounce milk chocolate bar, such as Hershey Bar, broken into pieces
- 12 ounces semi-sweet chocolate chips
- 20 ounces peanut butter chips, (2 – 10 ounce bags)
- 1/2 cup butter, divided
- 7 ounces marshmallow fluff , (marshmallow whip), divided
- 4 1/4 cups sugar
- 12 ounces evaporated milk
Instructions
- Prepare a greased 9×13 glass baking dish, set aside. In a large mixing bowl, put in the milk chocolate bar pieces, semi-sweet chocolate chips, 4 tablespoons butter, and half of the marshmallow fluff. No need to mix. Set aside.

- In a separate large mixing bowl, put in the peanut butter chips, 4 tablespoons butter and remaining marshmallow fluff. No need to mix, set aside.
- In a large saucepan, combine sugar and evaporated milk. Bring to a rolling boil over medium heat. Stir CONSTANTLY for 4 MINUTES.
- Quickly pour about a cup of cooked mixture into each bowl of chocolate at a time, stirring as constantly as you can for each bowl (you might want a helper for this part). Try to divide the cooked mixture between the two bowls as evenly as you can.
- The boiling mixture will melt the butter and chocolate. Stir each bowl until all chocolate and butter is melted and the texture is smooth.
- Scoop spoon fulls of each fudge (alternating about ¼ of each type) into the prepared baking dish.
- Using a knife, swirl the two types of fudge together to make a pretty, swirled design. Cover tightly and refrigerate until hardened (several hours or overnight).
- Keep refrigerated until ready to serve. Store cut up pieces of fudge in an airtight container in the refrigerator.


Notes
Recipe tips
- To remove the block of fudge from the pan before cutting, line the pan with parchment paper or wax paper.
- Store fudge in the fridge for up to three weeks.
Nutrition
Nutrition information is automatically calculated, so should only be used as an approximation.
Love this recipe?
We want to hear from you! Please leave a review.

There is no white chocolate mentioned in this recipe there is milk chocolate.
I have updated this recipe due to many comments about the difficulty in finding white chocolate bars. The original recipe called for an eight ounce white chocolate bar, but this is now substituted with an additional package of Reese’s Peanut Butter chips. You can still use the white chocolate bars if you can find them, but I’ve found that doubling up on the peanut butter chips gives this fudge a richer peanut butter flavor (no complaints here)! I have tested this substitute with success, and think you’re going to love it!
This is very close to my grandmothers recipe. I’ve been making it for years. However when you bring the sugar and evaporated milk to a boil, I’ve always stirred it constantly and then do the test in ice cold water to see if it’s at softball stage. All this part usually takes me a half an hour. How high do you keep yours set at? I don’t mind shortening cook time, I make a lot at the holidays.
This recipe is a different way of preparing fudge. You heat the sugar and evaporated milk just long enough so it melts the chocolate pieces. In traditional fudge recipes, like I am assuming the one you have, you heat most of the ingredients together until you reach a softball stage, which takes much longer. You don’t need to do that with this recipe. It is not as technical as traditional fudge yet you will get similar results!
A standard Hershey bar is 1.55oz; do I use multiple up to 8oz.?
You can do that but it is more expensive, I like to get the BIG bars that are 8 oz.
Hi – Can you not swirl this recipe, will it set up with the peanut butter fudge on top?
I haven’t tried it that way before so I can’t say for sure. If you try it, please let us know how it turnt out!
I love this recipe its so good.
Your list of ingredients call for Marshmallow fluff but the picture has a jar of marshmallow CRÈME and I know there’s a difference between the two when it comes to texture of the final product. Is it fluff or crème? I have both and just want to know which one to use. Thank you!
I would use fluff! You can use creme, but the original recipe is with fluff.
I love this fudge recipies! And the pie recipies!