We may earn a commission when you click on the affiliate links in this post.
Make your own easy Graham Cracker Pie Crust for any pie filling. With only 3 ingredients it is simple to make and a homemade crust is always best!
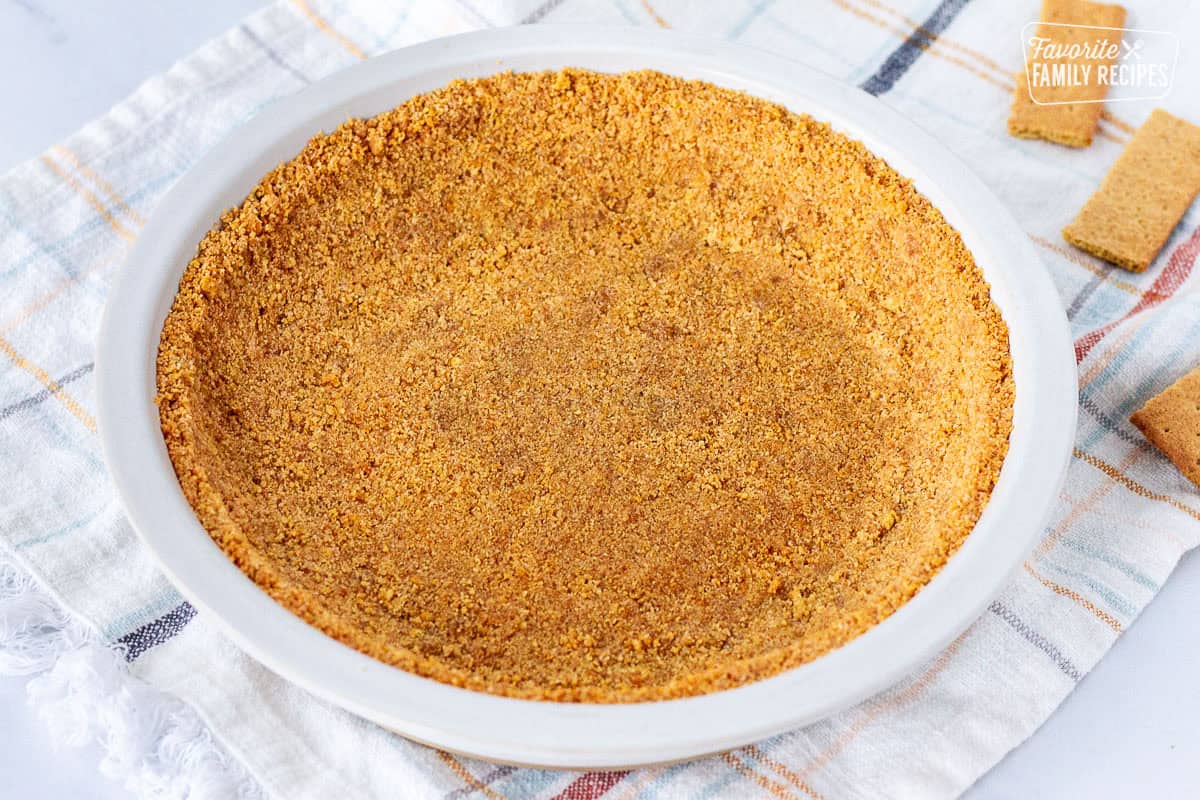
Table of Contents
This graham cracker pie crust recipe is SO easy to make and tastes far better than the pie crusts that you can buy at the grocery store. I’ve been making this homemade graham cracker crust for years and it always turns out perfect! You can use it for so many recipes: cheesecake, key lime pie, lemon cream pie, pudding pie, banana cream pie, coconut cream pie, you name it. It is my go-to every time. I love that this crust is so easy and only 3 ingredients to make. It tastes so much better than any store bought pie crusts.
Ingredients You’ll Need
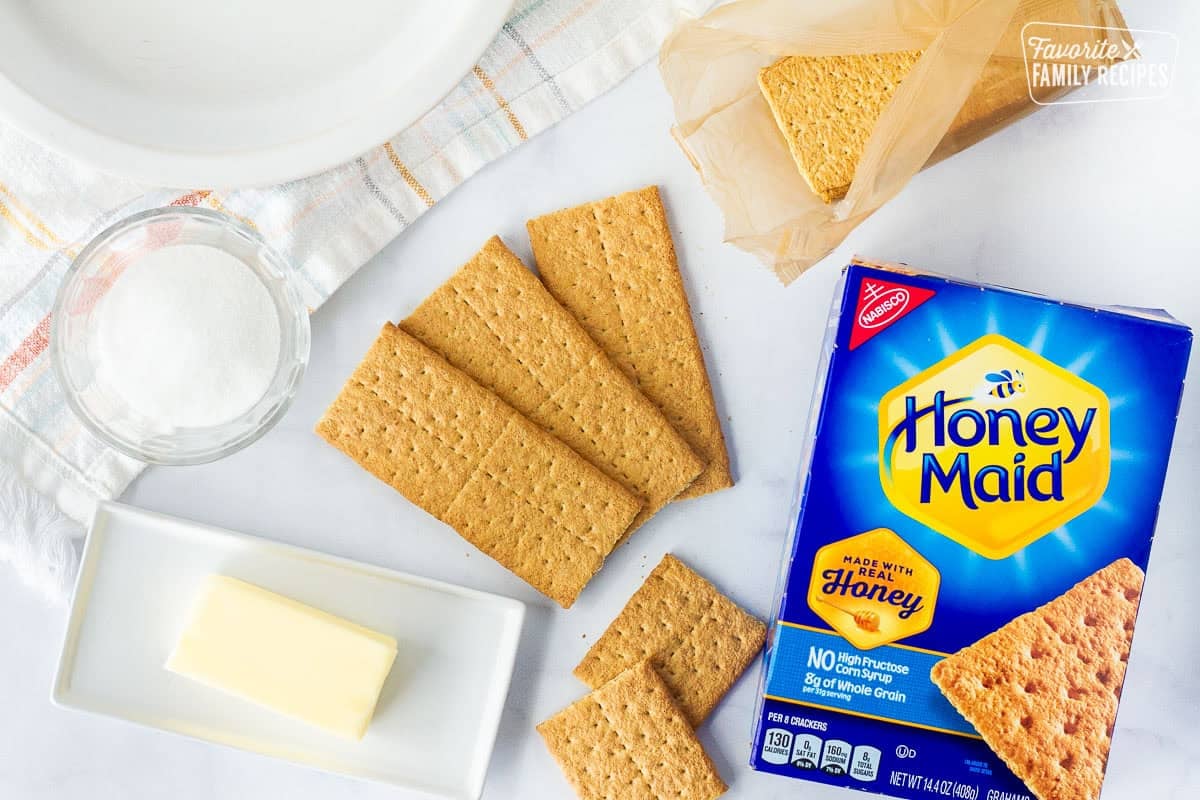
- Graham crackers – I use one package or about nine full graham cracker sheets
- Sugar – regular white sugar
- Butter – melted. I like to use unsalted butter but you can use any kind you have on hand.
How to Make a Graham Cracker Pie Crust
- First, you need to crush the graham crackers into crumbs. You can use a food processor to get an even texture or just place the crackers in a plastic bag, seal tightly and smash the crackers using a rolling pin until you have very find crumbs.
- Next, combine the graham cracker crumbs with the white sugar and melted butter until the crumbs are completely and evenly moist. It should be like the texture of wet sand. I like to stir it with a fork at first, but you may just want to get in there with your fingers.
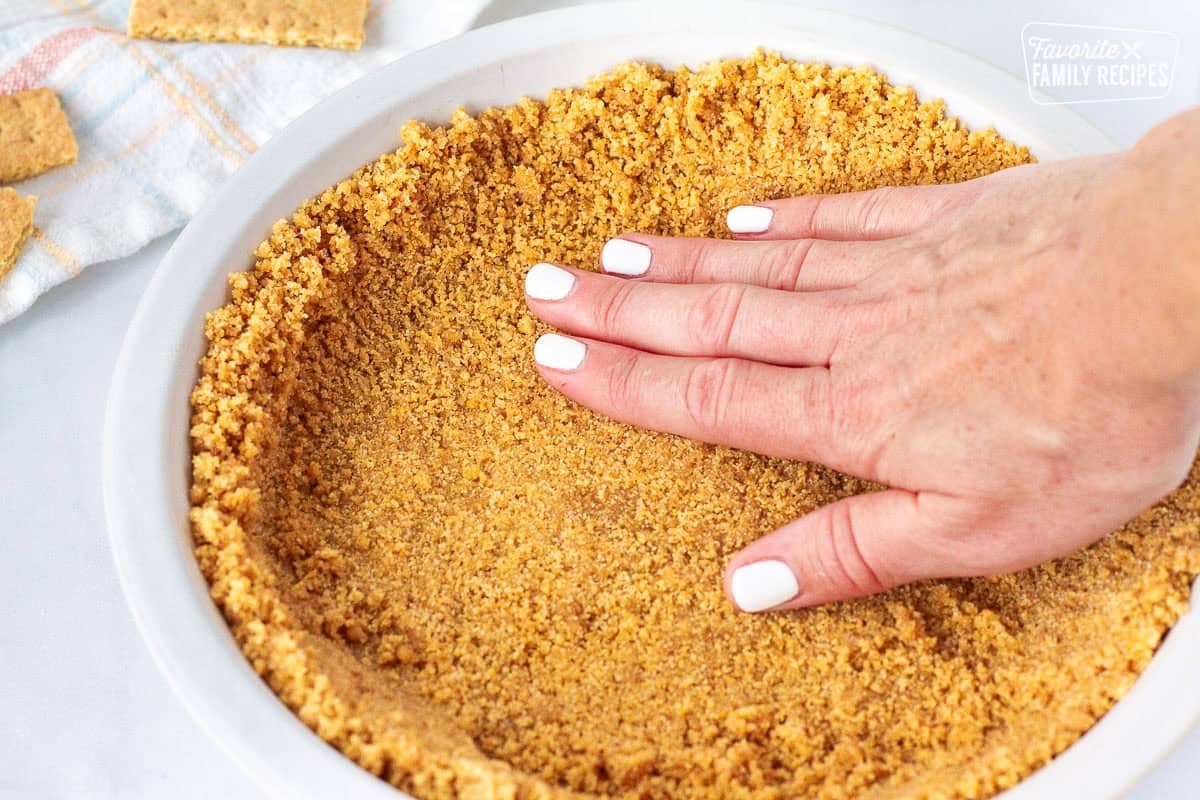
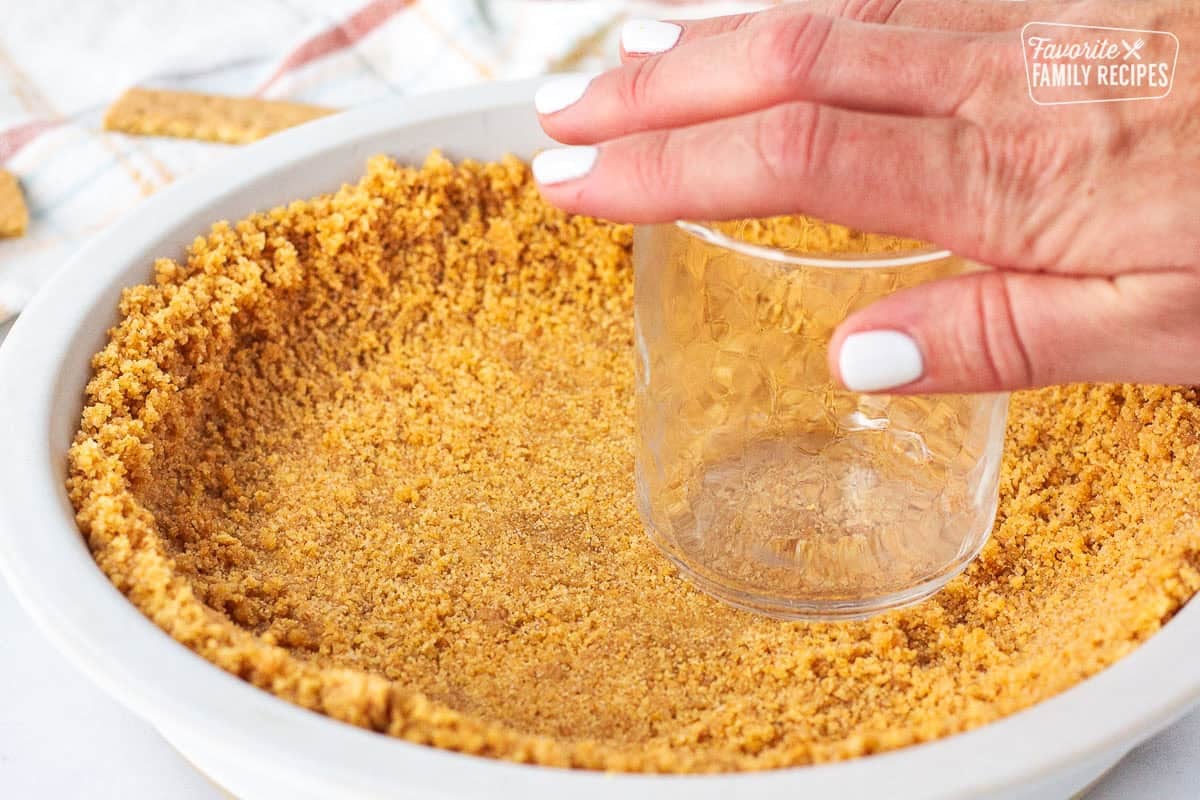
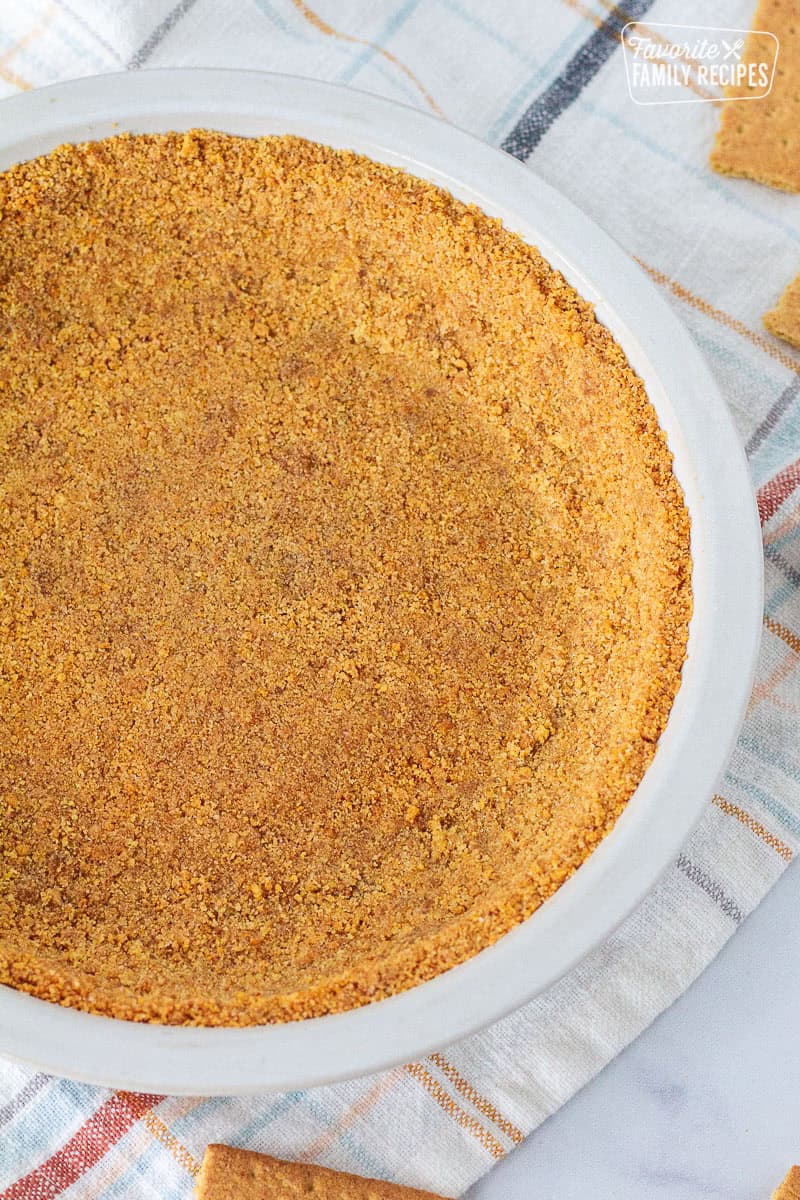
- Then, press the crumb mixture into a 9-inch pie plate. Pro tip: First press the mixture in by hand then use the bottom of a glass or measuring cup to get a perfect finish.
- Finally, bake for about seven minutes. Let it cool slightly, then pour in your favorite filling.
Baked vs. No-Bake Graham Cracker Crust
One of the best things about a graham cracker crust is its versatility—you can use it baked or unbaked depending on the kind of pie you’re making. Here’s a breakdown to help you decide which method is best for your dessert.
When to Bake It
Baking the crust gives it a firmer, crunchier texture and helps it hold together better—especially important if you’re using a heavy or custard-based filling like cheesecake, pumpkin, or key lime pie. The heat helps the sugar and butter melt and bind the crumbs together, so the crust won’t crumble when sliced.
When to Chill It (No-Bake)
A no-bake crust is ideal for quick, easy desserts that don’t require the oven—think icebox pies, pudding pies, or frozen treats. As the butter chills, it hardens and holds the crust together without the need for baking. To help it firm up, chill the crust in the refrigerator for at least 1 hour before adding the filling. If you’re short on time, 15–20 minutes in the freezer works too.
Frequently Asked Questions
Yes! You can make this pie crust gluten free! It’s as simple as this: substitute gluten free graham crackers for the regular graham crackers. A delicious pie can still be enjoyed by those on a gluten restricted diet.
Make sure you’re adding enough butter to the recipe. This recipe calls for six tablespoons, so make sure you stir all of that in. If it’s still crumbly, add another tablespoon or two of butter to the mixture.
Occasionally the pie crust can stick to the pie plate, even with enough butter. You can spray your pan with non-stick cooking spray just to be sure.
Yes! Graham cracker crusts are perfect for making ahead. You can prepare the crust and store it in the fridge for up to 3 days before adding your filling. If it’s a baked crust, let it cool completely before wrapping and storing.
Absolutely. A graham cracker crust freezes very well. Just press the crust into your pie plate, cover it tightly with plastic wrap and foil, and freeze for up to 3 months. Thaw in the fridge before using, or bake it straight from frozen if your recipe calls for a baked crust.
Ways to Use Your Pie Crust
Starting with the perfect crust means everything inside the pie is going to taste even better than before. Fill it with chocolate pudding, ice cream, pie filling, anything you like! If you’re looking for ideas on which pies to make that feature a graham cracker crust, try a few of these tasty ideas:
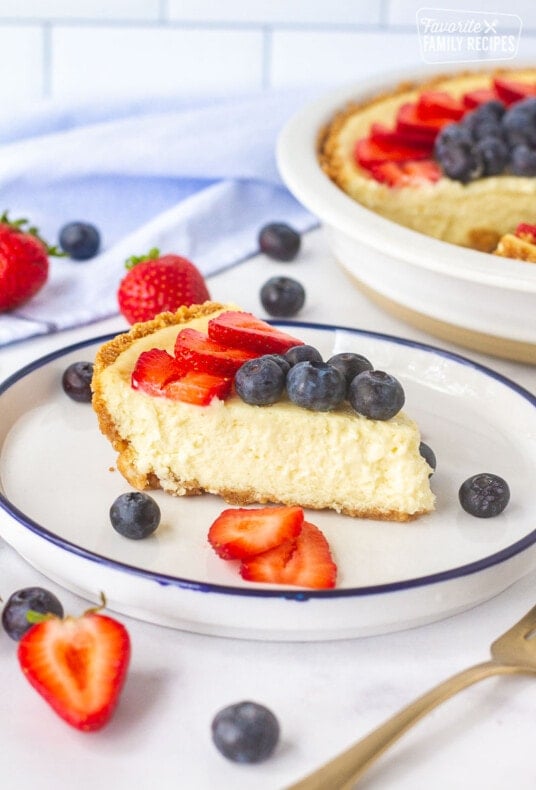
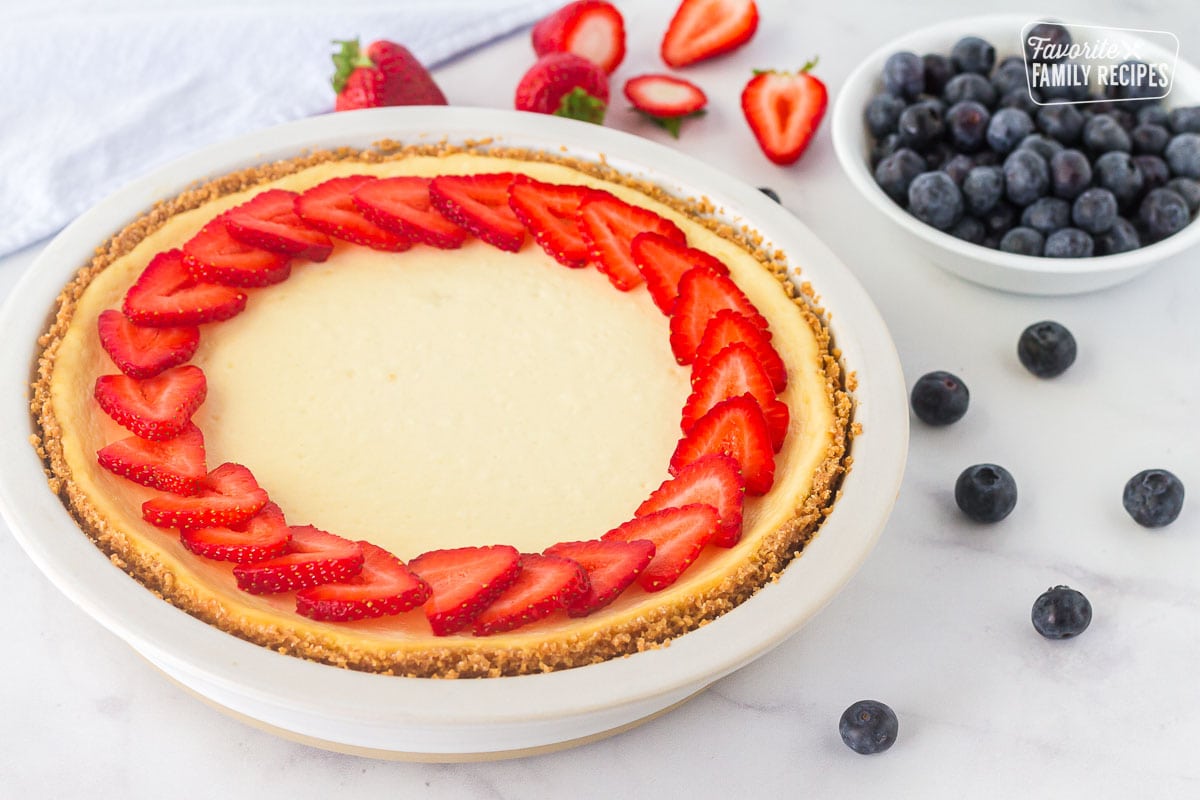
- Cheesecake is a popular item that starts with a graham cracker crust. This recipe is the ultimate indulgence; deliciously light and creamy, yet surprisingly simple to make.
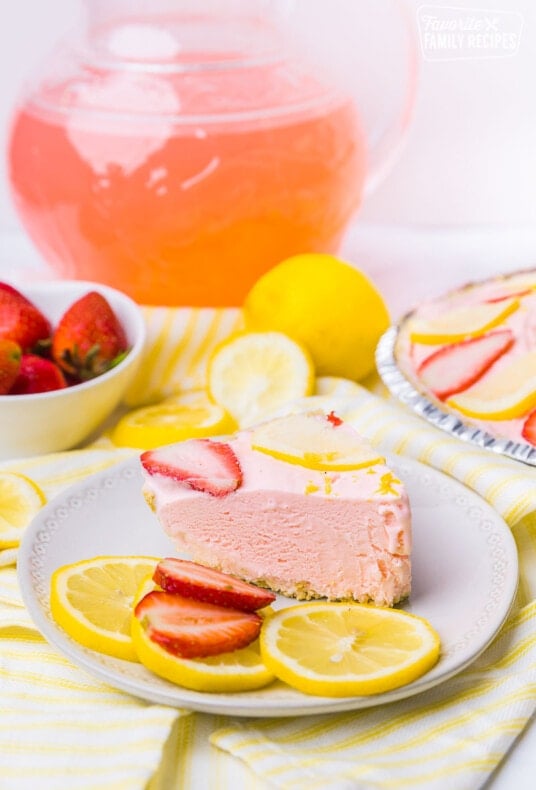
- Pink Lemonade Ice Cream Pie is the perfect cold, creamy, tart summer treat. And, with only three ingredients, its very simple to make.
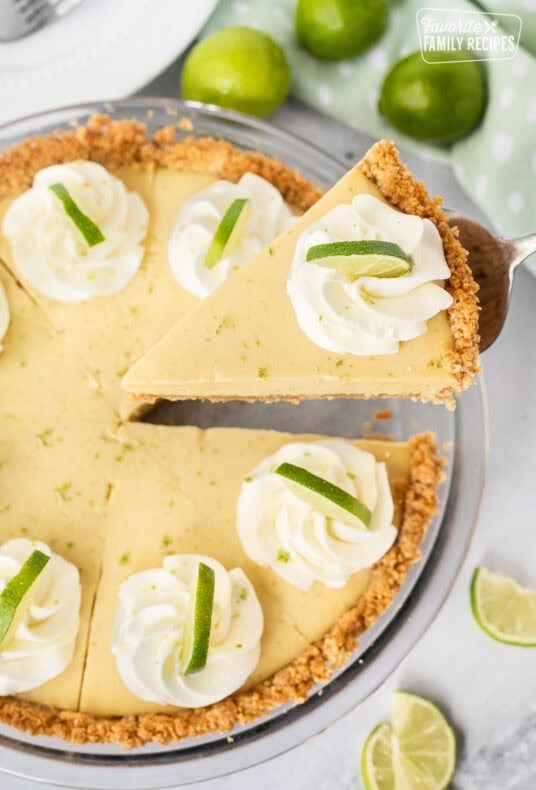
- Easy Key Lime Pie is smooth, creamy and the perfect blend of tart and sweet.
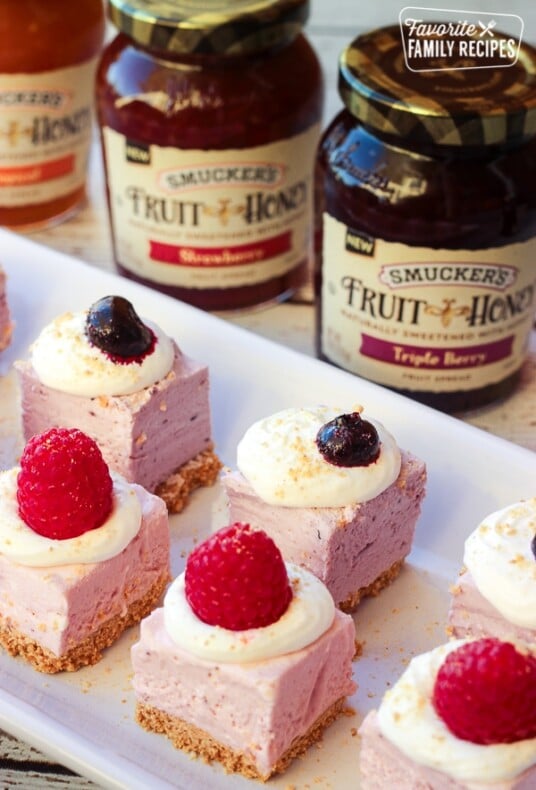
- Triple Berry Cheesecake Bites are little creamy morsels of heaven. Perfect for parties, the smaller size of these treats allow you to have a bite of each flavor.
Graham Cracker Pie Crust Recipe

Video
Ingredients
- 1 package graham crackers, or 9 full graham crackers (1 and ½ cups crushed)
- 1/3 cup sugar
- 6 tablespoons butter, melted
Instructions
- Preheat oven to 350-degrees and gather ingredients.

- Place graham crackers in a gallon-sized Ziploc bag. Squeeze as much air out as you can and seal tightly. Using a rolling pin, crush the crackers and roll out until you have very fine crumbs.
- In a medium-sized bowl, combine crumbs, sugar, and butter until all the crumbs are evenly moist.
- Press crumbs into pie plate.
- Bake for 7 minutes in preheated oven.
- Wait until crust cools before adding filling. If your recipe calls for an “unbaked” graham cracker crust, chill in the fridge for at least an hour before adding filling.


Notes
- For a gluten free graham cracker crust – just substitute gluten free graham crackers in the recipe.
- To freeze your crust – press the crust into your pie plate, cover it tightly with plastic wrap and foil, and freeze for up to 3 months. Thaw in the fridge before using, or bake it straight from frozen if your recipe calls for a baked crust.
- Making ahead – prepare the crust and store it in the fridge for up to 3 days before adding your filling. If it’s a baked crust, let it cool completely before wrapping and storing.
Nutrition
Nutrition information is automatically calculated, so should only be used as an approximation.
Love this recipe?
We want to hear from you! Please leave a review.
So super easy, thank you! I need something delicious and fast and this was perfect.
No more store-bought cracker crust! This recipe is perfect! Thank you for sharing!
This turned out absolutely wonderful with the cheesecake that I made. Thank you!
This is one of my favorite crusts of all time! So easy & perfect for so many recipes!
This is such an easy recipe. I love to make a few crusts at a time and freeze them!
Great recipe – very tasty!
Graham cracker crust is my favorite!
This recipe made a really great crust! It’s my go to now. 😉
How many cups of crumbs should I have before I add the sugar and butter.
Thank you.
The measurement isn’t by “cups” so much as it is by “crackers”.. you want to use 1 sleeve of graham crackers (about 9) I am GUESSING this would be around 2 c. of crumbs.
Thank you for your response
Based on your 1 package graham crust, what does it measure out to? 1 cup?
1 1/2 cups?
This would be very helpful
Thanks
Hey : )
l live in Canada, the Graham crackers we buy in a box has 2 sleeves in it and they are single squares in each sleeve do l use them all? Or once crushed what is the cup(s) measurement we need?
Thanks so much
A box in the U.S. typically has 3 packs, totalling about 14-15 oz.
If your squares are about 3″x3″ you will want to use 18 squares. Hope this helps!
I keep coming across Graham crackers. Here in United Kingdom crackers are for eating with cheese. Are they perhaps a digestive sweet biscuit. I would very much appreciate your advice. Many thanks
They are a sweet, flat “cracker”.. probably closer to what you would call a biscuit because it is sweet like a cookie. It is flat and rectangular. haha I know, so confusing! If you google it, you will see what I’m talking about haha! Hope this helps!
I like this recipe. It is very similar to the one my grandma taught me. If you want to try something a little different it also works well with chocolate or cinnamon graham crackers.
So I’m kind of new to making desserts…I typically hate baking, but lately I’ve been wanting cheesecake! Would this recipe work for a spring form pan, too? Or do you have an idea of how much more graham crackers, etc. you would need for a spring form pan?
Yes! It works in a spring-form pan as well. Unless you want a really thick crust you wouldn’t need to add more graham crackers or anything. Typically I just press it into the bottom of the pan and don’t try to go up the sides at all. It is just a bottom crust. be sure to line it with parchment paper around the sides! That will make it stay nice and pretty and your cheesecake won’t get stuck to the sides when you take it off.
Thank you. I’ll keep this one on hand.