We may earn a commission when you click on the affiliate links in this post.
These adorable Halloween sugar cookies are a perfect treat this spooky season! A simple cookie recipe topped with tasty royal icing, they’re so fun to decorate and eat!

Table of Contents
- Ingredients for the Best Halloween Sugar Cookies
- Homemade Royal Icing Ingredients
- How to Make Classic Sugar Cookies for Halloween
- Royal Icing Instructions
- Step by Step Instructions on How to Decorate Halloween Cookies
- Tips for Storing Homemade Halloween Sugar Cookies
- Can I Make Halloween sugar cookies gluten-free?
- How can I prevent my Halloween sugar cookies from spreading too much when baking?
- Storing Easy Halloween Sugar Cookies
- More Holiday Cookie Recipes
- How to Make Halloween Sugar Cookies Recipe
- Halloween Sugar Cookie Recipe
These Halloween sugar cookies are so much fun to make! Sugar cookie decorating is a delicious and creative way to express yourself artistically even when you don’t think you are much of an artist. Pick out your favorite Halloween cookie cutters and start making these perfect Halloween cookies! It is an enjoyable activity for kids and adults alike!
Gorgeous, decorated Halloween sugar cookies are all the rage these days, and with the help of our easy step-by-step instructions, you’ll have the cutest treats to share with your favorite ghosts and goblins. These Halloween treats are so cute you will want to make them over and over again. Perfect for a Halloween Party!

Ingredients for the Best Halloween Sugar Cookies
These Halloween cookies start out with a simple sugar cookie recipe that is all from your pantry! It is not a super sweet stand-alone cookie, so you will definitely want to add icing to make it the perfect sweetness. Decorate these Halloween sugar cookies with our delicious and easy royal icing recipe that pairs perfectly with these cookies.
- Sugar – Regular granulated sugar is the main ingredient in sugar cookies.
- Powdered sugar – Make sure to sift the powdered sugar before adding it to the bowl so it’s light and airy when baking.
- Butter – Softened the unsalted butter to room temperature. This will help the butter and sugar mix together more easily.
- Shortening – Adding shortening to the butter mixture helps the dough keep its shape when baking.
- Eggs – For best results, let your eggs come to room temperature before adding to the mixture. The eggs will be the binder of the dough and help keep it together.
- Vanilla extract – Just a splash for flavor!
- Almond extract – Adding almond extract along with vanilla extract gives these cookies a rich flavor that can’t be beaten! It is always a special tip when making sugar cookies.
- Flour – White, all-purpose flour works best for these cookies. You will want to keep a little on hand for rolling out the cookie dough and cutting your shapes out. Flour adds thickness and helps build and lift the dough as it is baking in the oven.
- Baking powder – Together flour, baking powder, and salt combine and create the shape of the cookies and help raise the dough.
- Salt – Just a pinch will help raise the sugar cookie dough while baking.
Homemade Royal Icing Ingredients
This homemade royal icing is going to create cute Halloween sugar cookies! Take your sugar cookies to the next level with this sweet icing that will create and decorate cookies like ghosts, pumpkins, and candy corn cookies. Use food coloring to make special icing colors that will decorate artistic shapes, colors, and faces on these Halloween sugar cookies!
- Powdered sugar – About a pound of sifted powdered sugar. You can use more or less depending on the consistency of the icing.
- Meringue powder – You can find this at most grocery stores or craft stores. It will help thicken and give the royal icing that extra stiffness when decorating.
- Water – The water helps keep the consistency of the royal icing. It will make sure the icing is not too runny but not too thick either.
- Piping bag – You can use a ziplock bag and cut the tip-off, a disposable piping bag, or even lay plastic wrap on the counter and wrap the icing into the wrap tightly for icing Halloween sugar cookies.
How to Make Classic Sugar Cookies for Halloween
Make October extra fun this year with this delicious Halloween sugar cookie recipe! These are a tradition in our family and always a fun time to get out our fun side and make the best sugar cookies with cute Halloween cookie cutters!
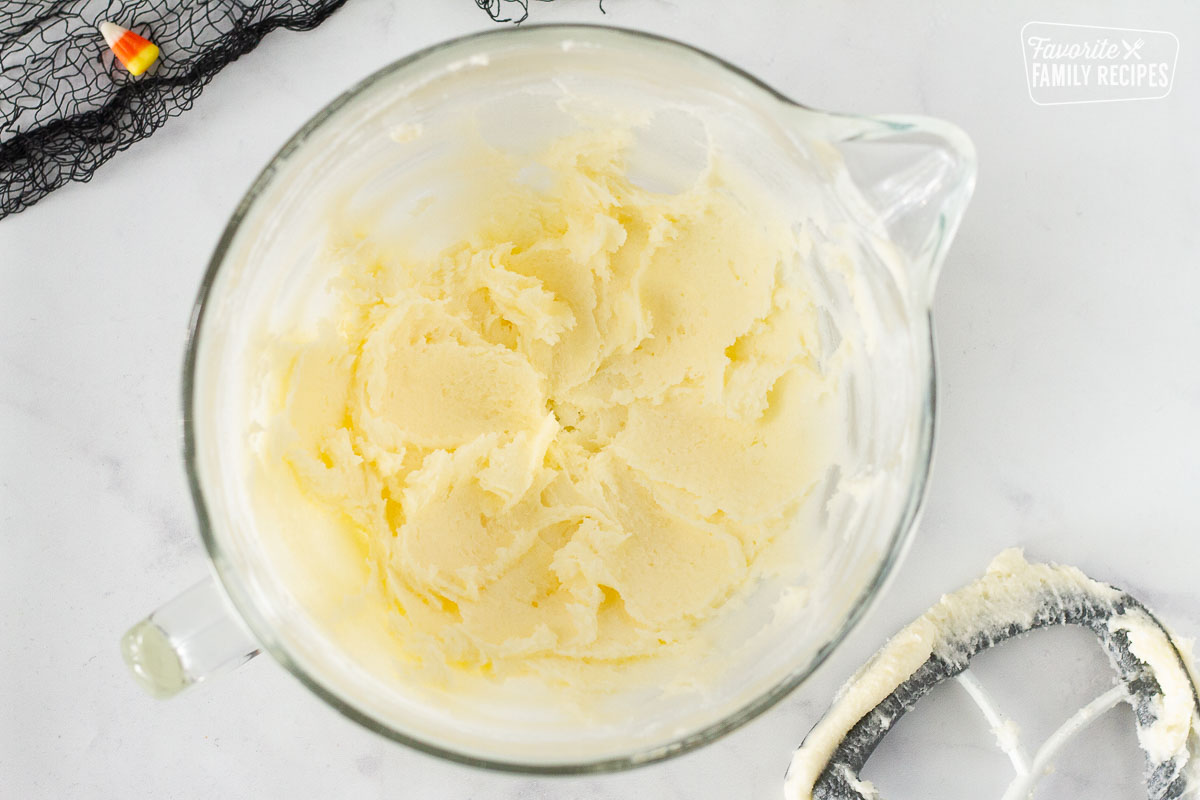
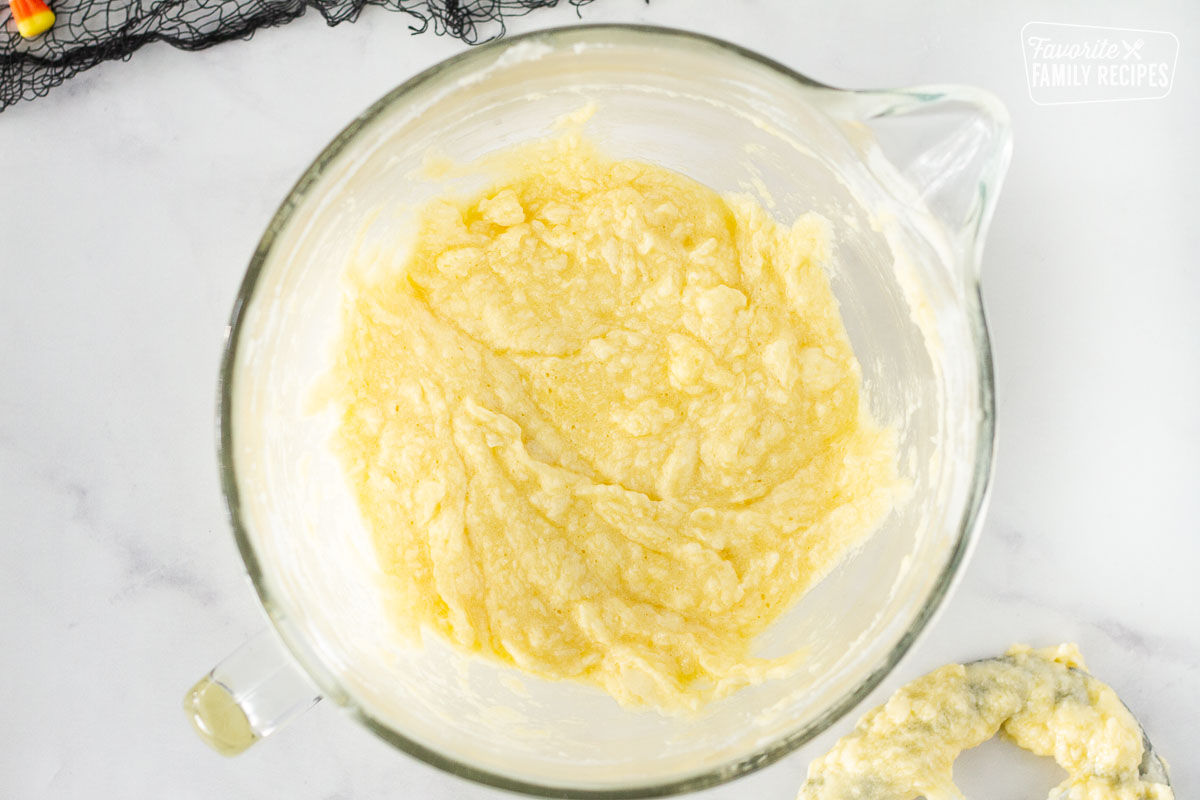
- Combine – Combine sugar, powdered sugar, butter, and shortening in a stand mixer with the paddle attachment or an electric mixer. Mix until well combined.
- Add in – Add eggs, vanilla, and almond extract and mix until combined.
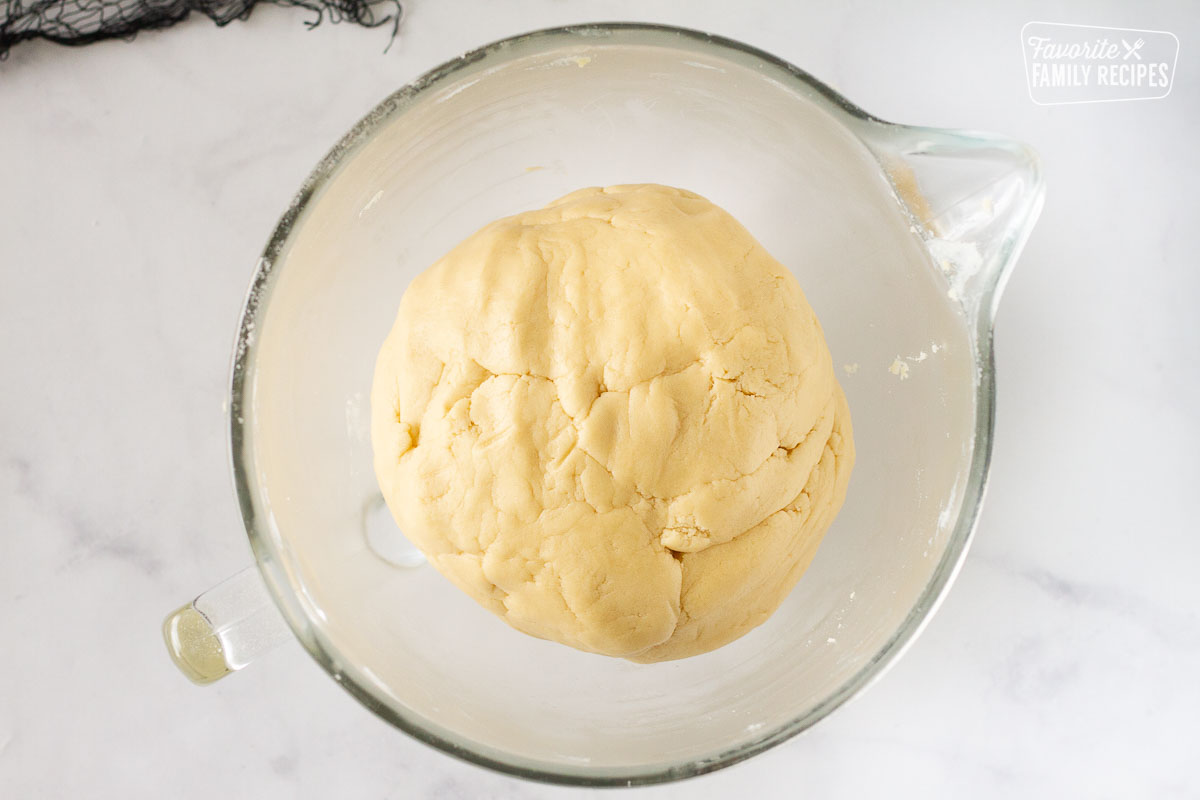
- Dry ingredients- In a large bowl, combine flour, salt, and baking powder.
- Mix – Add the flour mixture to the sugar mixture a little at a time. Mix until the dough pulls away from the sides and forms a soft ball when pressed together.
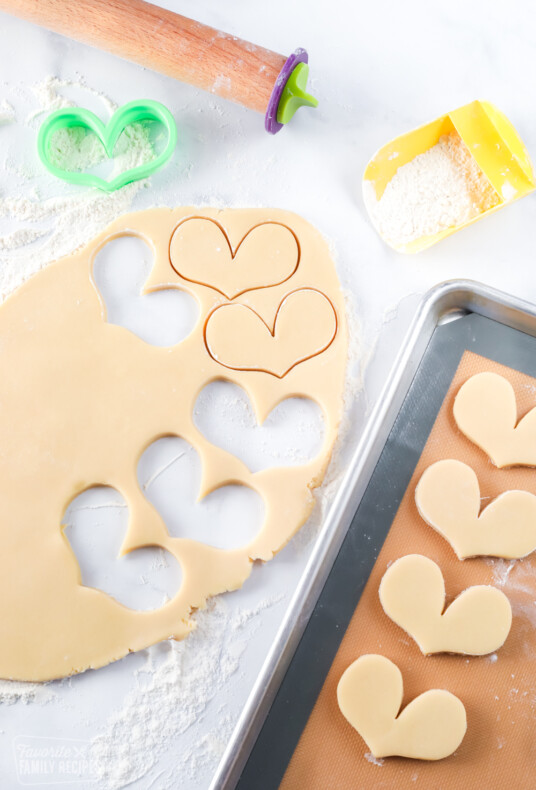
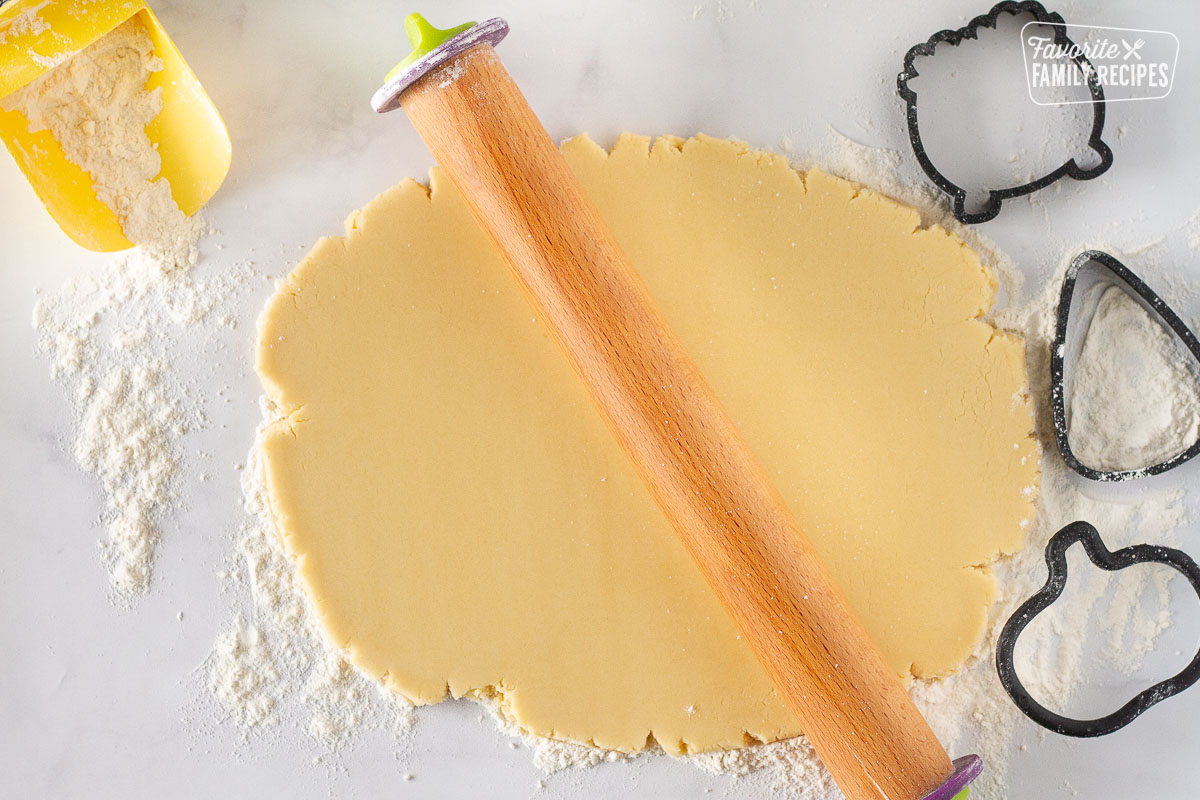
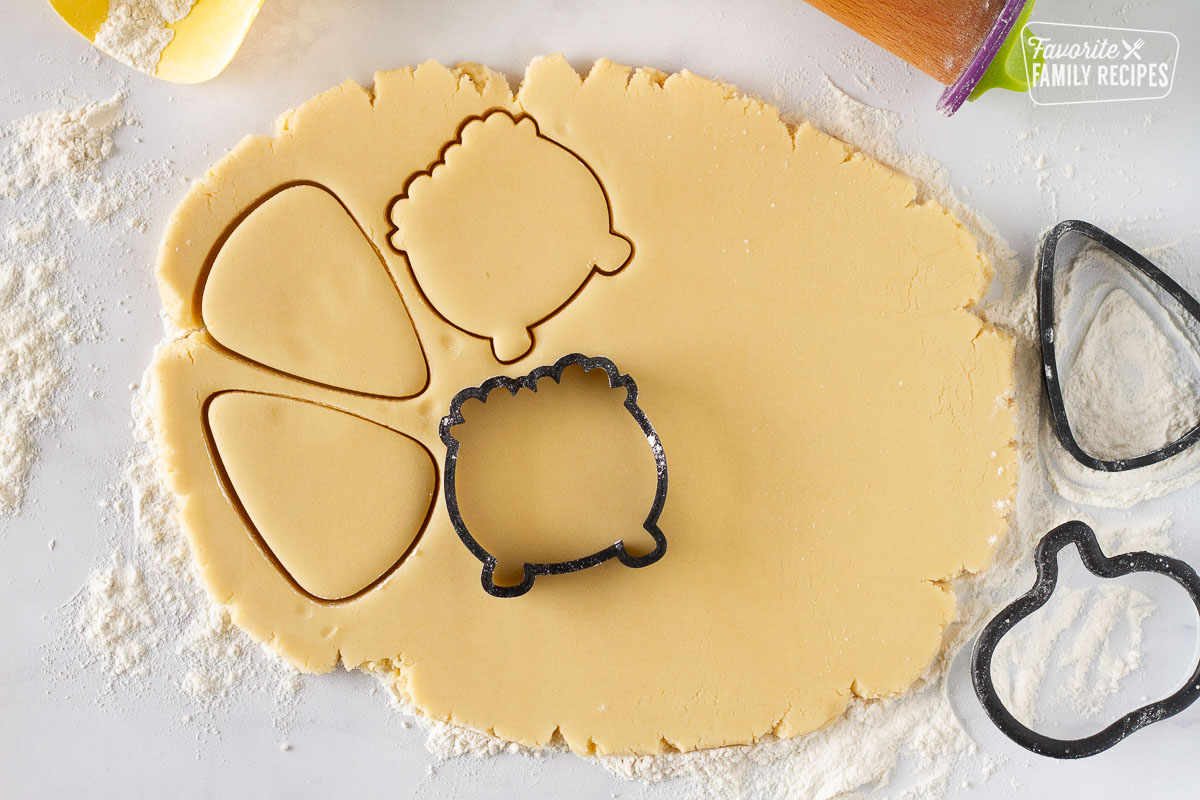
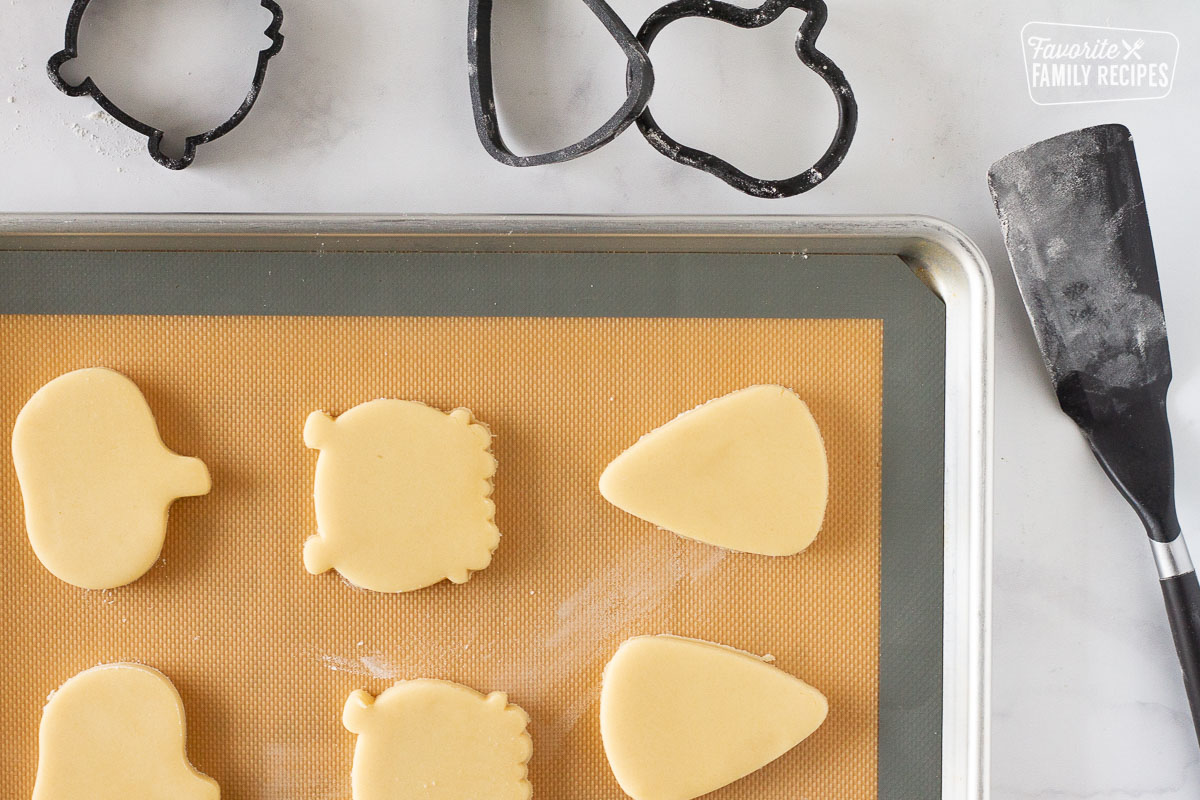
- Dough – Remove the dough from the bowl and roll it out onto a lightly floured surface. Use a rolling pin and roll out to 3/8-inch thickness. Cut out shapes using cookie cutters.
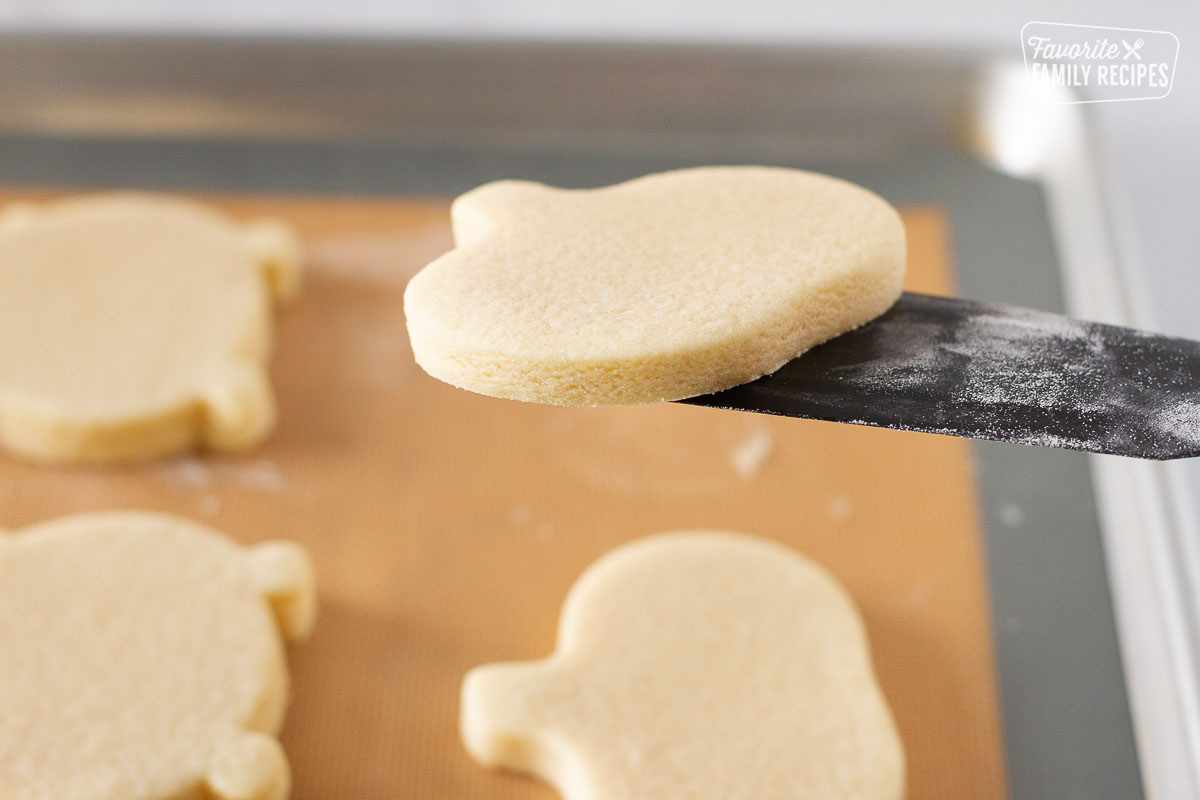
- Bake – Bake cookies on a lined baking sheet or with silicone mats for 7 minutes. Remove cookies from the pan and allow them to cool on a wire rack.
- Frosting – After the cookies have completely cooled, they are ready for decorating.
Royal Icing Instructions
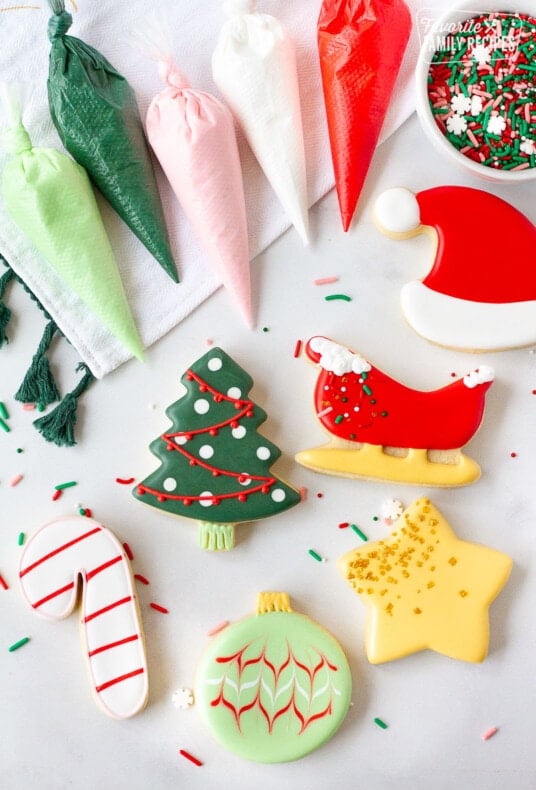
Simply mix the ingredients together easily and start decorating! Choose your color of food coloring and spoon it into the piping bags. Carefully create the best-looking Halloween sugar cookies yet!
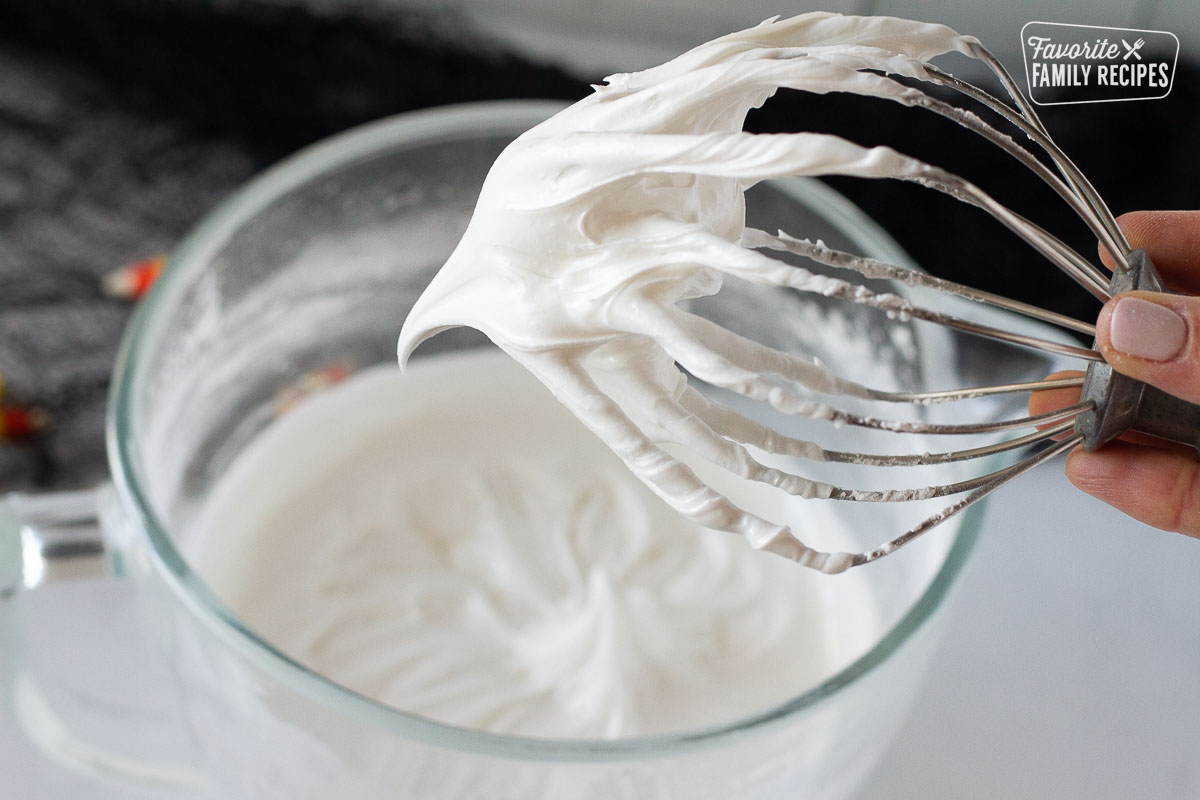
- Mix – Combine all the ingredients in the stand mixer or a hand mixer and let it whisk on high for 3 minutes scraping the sides as needed.
- Color gel – Use gel food coloring or liquid food coloring for desired colors. We used green, white, orange, yellow, and black food coloring. Get creative and use your favorite Halloween colors!
Step by Step Instructions on How to Decorate Halloween Cookies
Once you have rolled out and baked your cookies, the fun part begins! Follow these step-by-step instructions for decorating the cutest cookies you have ever seen! Grab your piping bag and let’s get started on these piping tips. These cookies are delicious and cute all in one!
Ghost Halloween Sugar Cookies
Only two colors for these cute ghost Halloween sugar cookies. Outline the outside in white, add a nose, then two eyes. It is a simple Halloween sugar cookie!


- First, outline the ghost shape in white royal icing.
- Second, completely flood the ghost cookie with white flood-consistency icing, then immediately place a black oval with black flood-consistency royal icing.
- Allow the ghost to crust over for about 15 minutes, then you can add the big black eyes to your ghost cookies.
Cauldron Halloween Sugar Cookies
Take your time on this cauldron Halloween sugar cookie! It does take a few extra steps but can be a lot of fun to make. Fill the outline in black, use green for the bubbles and potion, and then add sprinkles for a fun and delicious sugar cookie!


- First, outline the cauldron Halloween cookie with black outline icing leaving the cookie empty on the top for a different color.
- Second, flood the cookie with black icing then outline the bubbles on the top of the cauldron with green outline icing.
- Fill in the bubbles with the same green outline icing. It doesn’t have to be smooth and perfect in this step.
- Immediately top the green icing with any kind of sprinkles. The sprinkles may stick to the black food part of the cauldron. They will easily flake off when it’s all dry.
Spider Web Halloween Sugar Cookies
Take your circle sugar cookie to the next level with a simple spider web decoration! Simply draw your outline, fill it with white, make more circles with black, and spread the lines out. Make this spider web and impress all your friends and family!


- Outline a circle cookie with white icing.
- Flood the cookie with white icing and use black flood icing to make a dot in the center followed by three evenly spaced circles around the dot.
- Using a toothpick, start from the center of the cookie and pull from the black dot of the icing to the outer rim of the cookie.
- There will be a total of six pull lines creating the spider web.
- You do not have the push hard on this part, just lightly scrape the toothpick across the surface of the icing.
- Allow the cookie to crust over for 15 minutes, then place a green spider anywhere on the web.
Pumpkin Halloween Sugar Cookies
Isn’t this pumpkin Halloween sugar cookie so cute and fun? I love the stem! You can even do the stem in brown or black. Outline, fill, and decorate a stem. It is that easy!


- Outline the pumpkin with orange icing leaving the space for the stump empty.
- Flood the pumpkin with orange flood-consistency icing.
- Allow the orange icing to crust over for fifteen minutes, then finish this cute pumpkin cookie with squiggly lines to cover the stump and loopy lines for the pumpkin vines.
Candy Corn Halloween Sugar Cookies
This is a fun one! Divide the candy corn sugar cookie into three sections and outline the three colors. Fill in the top and then the bottom leaving the middle open. Lastly, fill in the orange and enjoy a life-size candy corn!


- First outline the cookie with yellow, orange, and white icing in order of a candy corn candy.
- Second flood the yellow and white portions of the cookie using a toothpick to swirl the icing to the edges.
- Flood the orange portion of the candy corn center last.
- If you want there to be a definition on the cookie, allow the yellow and white to crust over for fifteen minutes first.
- For a smooth connecting finish, flood the orange section right away.
Tips for Storing Homemade Halloween Sugar Cookies
Follow these helpful tips when making and storing your Halloween sugar cookies! It is simple to follow and will allow for your cookies to be the best decorated, stored, and gifted sugar cookies. Take your time and enjoy making these quick and easy Halloween sugar cookies!
- Let completely dry – You must let the cookies completely dry for 24 hours on a cookie sheet or a counter or table. The cookie actually absorbs moisture from the icing allowing them to stay in the open and remain soft. Trust me on this one, it will ruin your beautiful designs if you don’t give them the proper time to dry.
- Cookie sheet – Be careful moving your cookies while they are drying. It’s best to decorate them on a cookie sheet where they can remain there to dry and transporting them is much easier. Lay parchment paper on the cookie sheet when adding the sprinkles.
- Single layer – Do NOT stack each decorated Halloween sugar cookie on top of each other as it may destroy the design.
- Bags – Once the cookies are dry, I like to individually bag them with cello bags or ziplock bags. They can also be stored in a large container.
- It takes time – Allow yourself time to make these cookies. They still taste good to eat a few hours after decorating, but they are very fragile to handle.
- Assembling – I usually bake and decorate on one day, allow one day to dry, and package them the following day.
- More Halloween ideas – Try monster cookies, mummy cookies, black cats, spider cookies, or a witch hat are always fun too!
“I never really thought that I would be able to make these kinds of cookies because the decoration always terrified me, but these cookies are the perfect texture and the icing was so much easier to use than I thought!”
-Jess
Can I Make Halloween sugar cookies gluten-free?
Yes! Substitute the flour for the gluten-free flour if you need to for your friends and family. Make sure the GF flour is good for baking. Some GF flour needs more adjustments to the recipe if it is not.
How can I prevent my Halloween sugar cookies from spreading too much when baking?
This is a no chill sugar cookie recipe, but if you get spreading, you can chill the dough for thirty minutes before baking them. You can also add more flour to the dough if it is too sticky.
Storing Easy Halloween Sugar Cookies
Halloween sugar cookies are irresistible and so delicious day after day! We love a quick and easy sweet treat after school or for parties. These Halloween sugar cookies are easy to store with the icing and without. Learn the best ways to store Halloween sugar cookies!
- Making ahead – If you need to make the cookie dough ahead of time you can chill the dough for 24 hours in advance.
- Storing – If stored properly, these cookies will stay fresh for up to a week. Place the cookies in an airtight container for 5 to 7 days.
- Freezing cookies – Store Halloween sugar cookies in a freezer bag for up to three months in the freezer. Once the cookies freeze, take the cookies out and let them completely come to room temperature before you handle them, as the icing can get sticky when frozen.
Read Next: Royal Icing Recipe
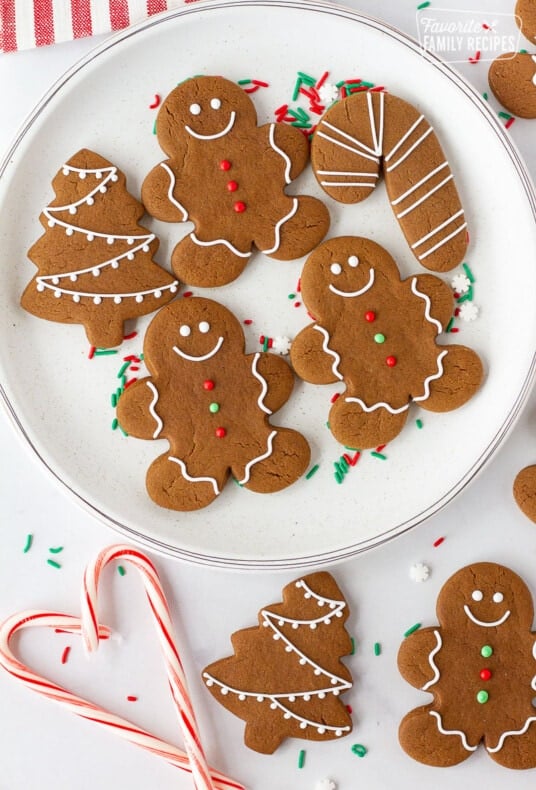
More Holiday Cookie Recipes
It’s truly the season to get into the kitchen and start baking! We do love baking and making cookies is on the top of our list. These holiday cookies are the best way to share with friends and family your favorite cookie recipe. Try one of ours and share it with those around you!

How to Make Halloween Sugar Cookies Recipe
Halloween Sugar Cookie Recipe
Equipment
- Stand mixer
Ingredients
- 3/4 cup sugar
- 1/4 cup powdered sugar
- 1/2 cup butter softened
- 1/4 cup shortening
- 2 eggs
- ½ teaspoon vanilla
- 1/4 teaspoon almond extract
- 3 cups flour
- 1/4 teaspoon baking powder
- 1/2 teaspoon salt
- 1/4 cup flour for rolling out the dough
- 1 pound powdered sugar
- 2 1/2 Tablespoons Meringue powder
- 1/3 cup water
Instructions
For the Halloween Cookies
- Preheat oven to 400 degrees F. Combine sugar, powdered sugar, butter, and shortening in a stand mixer. Mix until well combined.

- Add eggs, vanilla, and almond extract and mix until combined.
- In a medium-sized bowl, combine flour, salt, and baking powder.
- Add the flour mixture to the sugar mixture a little at a time. Mix until the dough pulls away from the sides and forms a soft ball when pressed together.
- Remove dough from the bowl and roll it out onto a lightly floured surface (about ¼ cup flour). Roll out to 3/8-inch thickness (see notes above).
- Cut out shapes using cookie cutters.
- Bake cookies on a lined baking sheet for 7 minutes (6 minutes for smaller cookies). Remove cookies from the pan and allow to cool on a cooling rack.
- After the cookies have completely cooled, they are ready for decorating (see notes above).
For the Royal Icing
- Combine all the ingredients in the stand mixer and let it whisk on high for 3 minutes scraping the sides as needed.
- Use gel food coloring for desired colors. (*See Recipe Notes)
Delicious! Mine are almost as pretty as yours. The kids loved them!
I never really thought that I would be able to make these kinds of cookies because the decoration always terrified me, but these cookies are perfect texture and the icing was so much easier to use than I thought!
Mine don’t turn out as pretty as the pictures by any means, But these are too cute! And surprisingly easy to make.
Halloween Cookies are baked goodies and I prefer to bake it with grass-fed ghee. I wish to replace butter with ghee. Will it be a better choice?
https://milkio.co.nz/grass-fed-ghee/