We may earn a commission when you click on the affiliate links in this post.
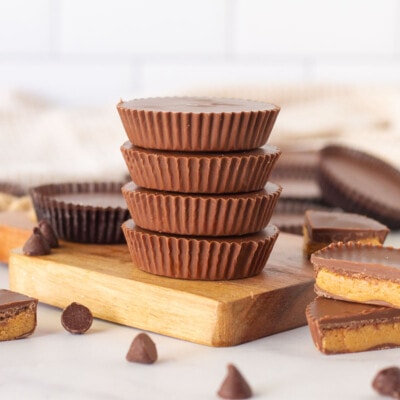
This homemade Reese’s Peanut Butter Cups recipe will satisfy your peanut butter cravings in just minutes, and they taste just like the real thing!
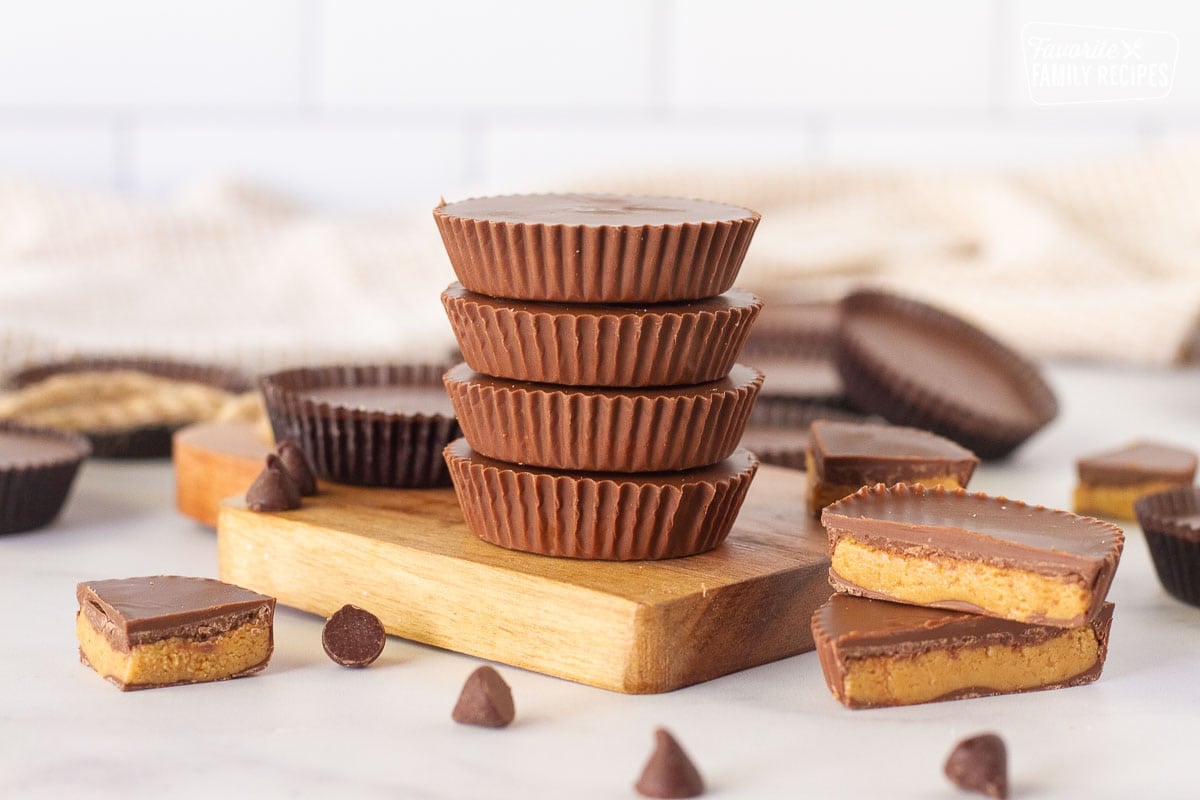
Table of Contents
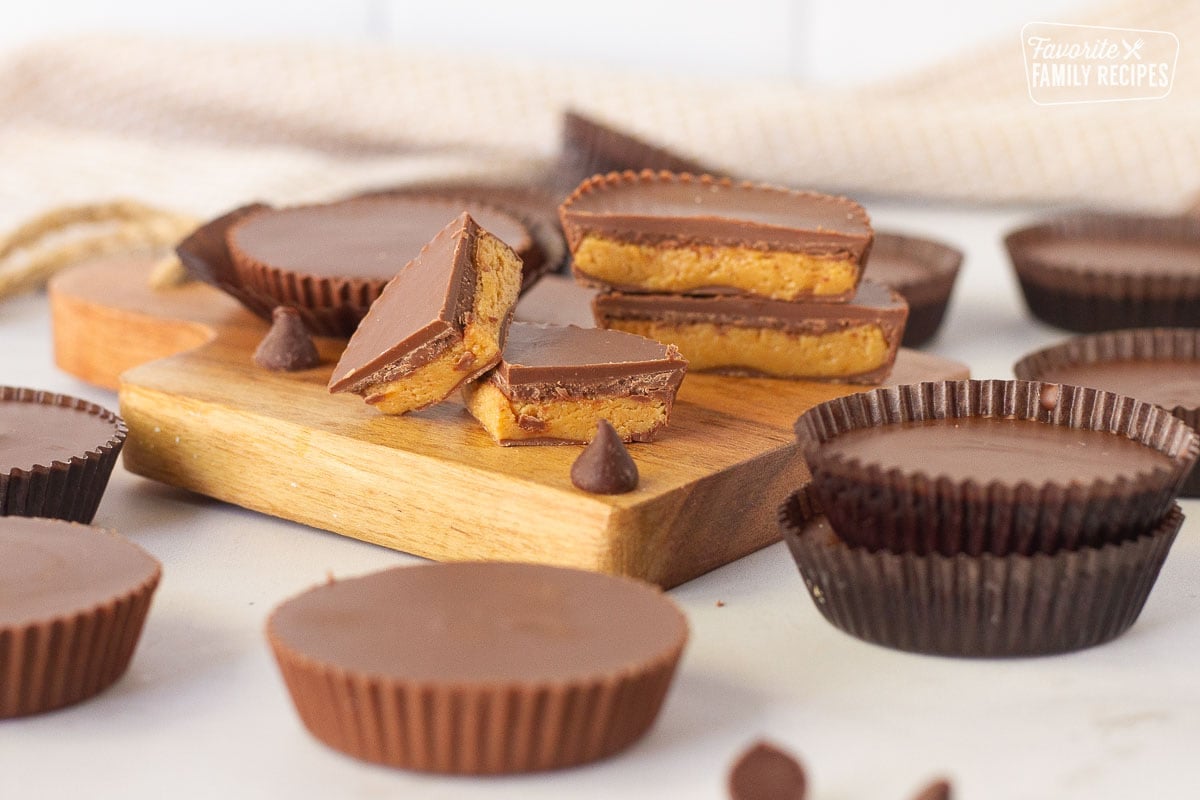
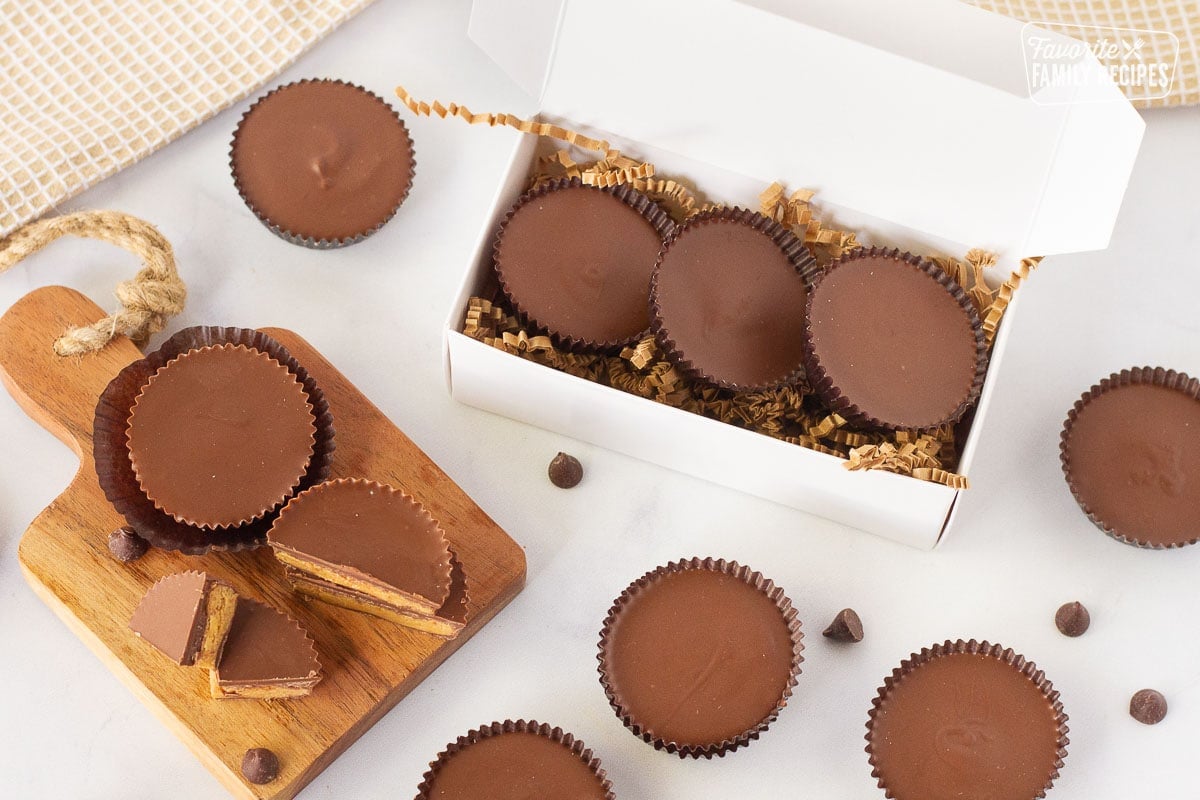
We love peanut butter cups in our family, and take them quite seriously. This homemade Reese’s Peanut Butter Cups recipe came from my grandma, who made them for years. The layer of peanut butter filling has the same creamy texture as the candy you buy at the store, with rich, sweet chocolate on the outside. But these taste even better, because they’re homemade! They’re perfect as a special Halloween treat, or to keep on hand in the freezer for when your sweet tooth hits.
Key Ingredients
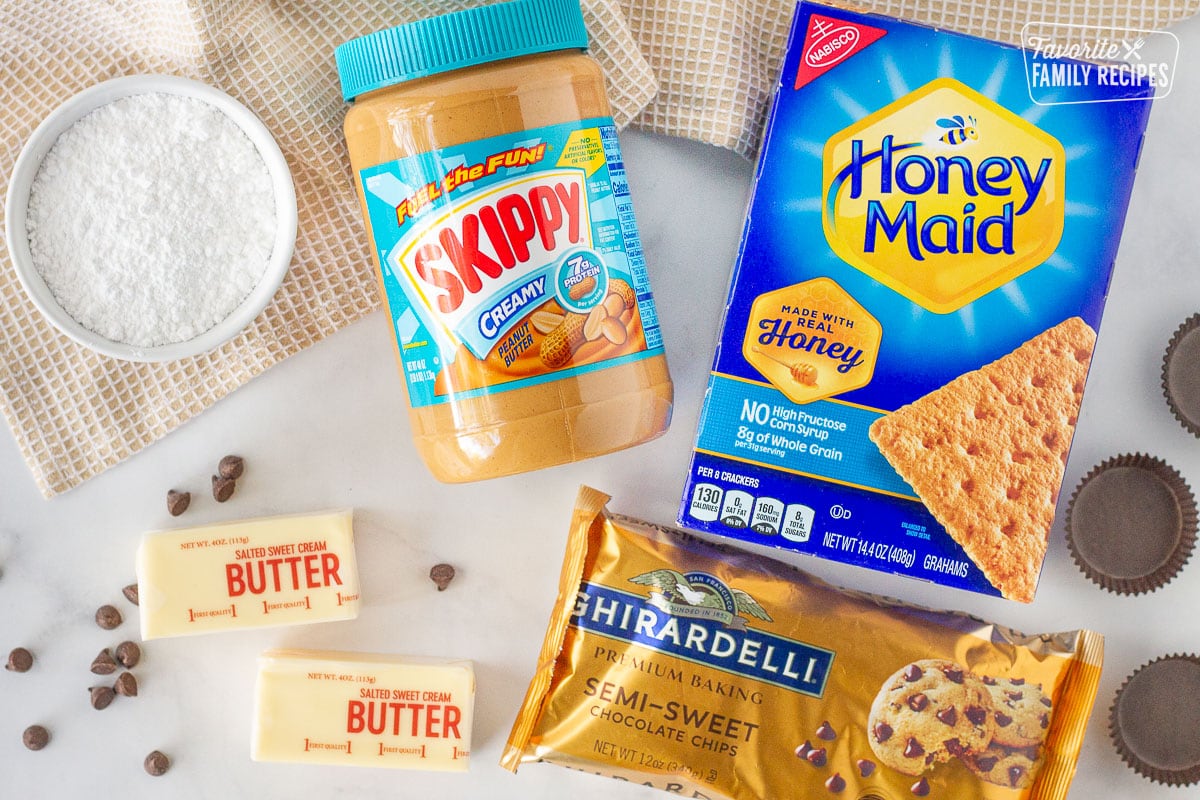
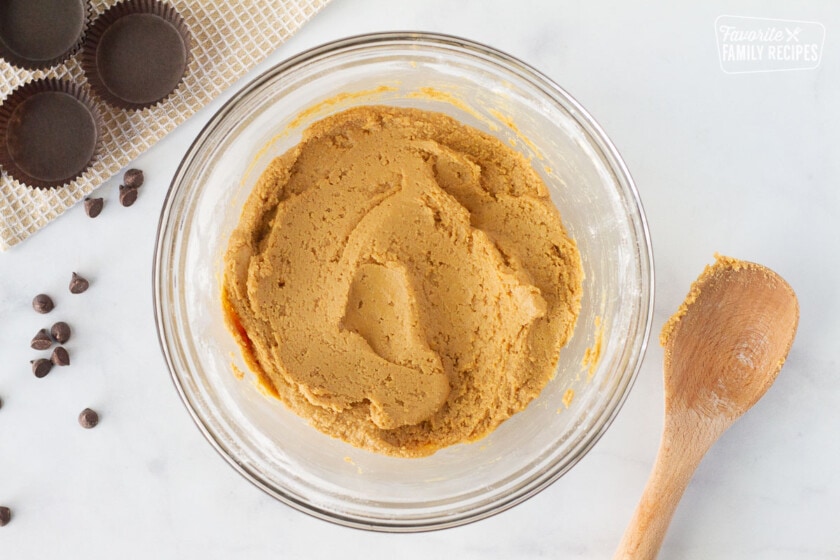
- Peanut butter – The creamy center of every bite. Use smooth or crunchy depending on your texture preference.
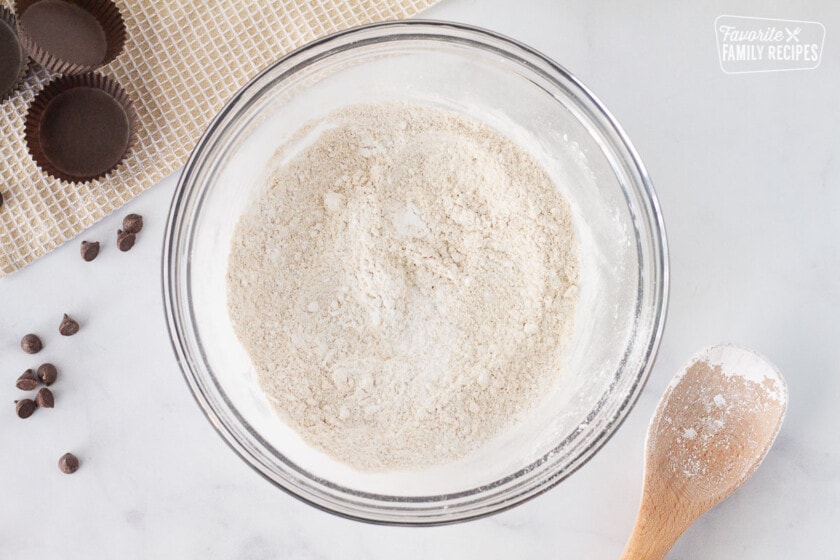
- Graham cracker crumbs – Adds a little crunch and helps hold the filling together.
- Powdered sugar – Sweetens and firms up the peanut butter mixture.
- Butter – Used in both the filling and the chocolate layers for richness and smooth texture.
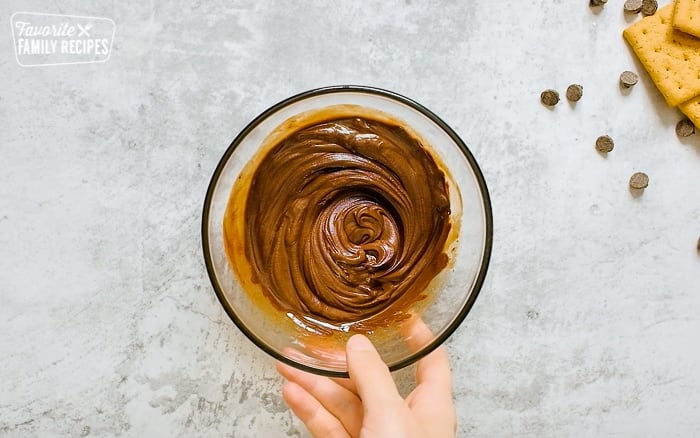
- Chocolate chips – Melted down for the top and bottom layers—semi-sweet works great, but feel free to use dark or milk chocolate too.
How to Make Peanut Butter Cups
- Make the Filling
Mix together graham cracker crumbs, powdered sugar, melted butter, and peanut butter until smooth and well combined. - Melt the Chocolate
Microwave chocolate chips with butter in short bursts, stirring until completely smooth. - Create the Bottom Layer
Spoon a little chocolate into lined muffin cups and brush it slightly up the sides. Chill to set. - Add the Peanut Butter Filling
Press a layer of the peanut butter mixture over the hardened chocolate base. - Top with More Chocolate
Cover the peanut butter layer with more melted chocolate and gently tap to smooth the tops. - Chill and Enjoy
Refrigerate until the cups are firm, then remove the liners and dig in!

A Quicker Method
If you don’t have a lot of time or patience to create the “cups” in the Reese’s Peanut Butter Cups, you can make things a bit easier on yourself. Here’s how:
- You can make these “fondue” or “buckeye” style by first rolling the peanut butter mixture into balls.
- Next, dip them directly into the melted chocolate.
- Then, place them on wax paper to cool and harden. You will get the exact same taste and it’ll only take you about five minutes!
Recipe Variations
- Dark Chocolate: Use dark chocolate for the outer layer.
- White Chocolate: Switch to white chocolate for a sweeter and creamier version.
- Cookie Dough Filling: Incorporate edible cookie dough for a delicious cookie-candy hybrid.
- Salted Caramel: Add a layer of salted caramel on top of the peanut butter filling and sprinkle the top with some coarse sea salt.
- Coconut: Mix shredded coconut into the peanut butter for a tropical twist.
- Nutella Filled Cups: Swap peanut butter for Nutella for a hazelnut-chocolate twist.
- Toffee Crunch: Mix crushed toffee bits into the peanut butter for added crunch.
- S’mores Peanut Style: Layer peanut butter with marshmallow whip and crushed graham crackers.
- Mini M&Ms or Reese’s Pieces Filled: Add Mini M&Ms or Reese’s Pieces to the peanut butter filling for a crunchy (and delicious) surprise.
Frequently Asked Questions
I’ve only used chocolate chips for homemade peanut butter cups, but you can substitute with chocolate melts instead. Follow the same melting process according to the package.
I only refrigerate the peanut butter cups to harden them, but after they set, you can store them at room temperature. If you love cold chocolate, you can store them in the fridge or freezer too.
Yes! I have a family member that doesn’t like peanut butter, so I’ve substituted with creamy almond butter and it was delicious. Cashew butter will also work as a good substitute.
Yes, just be sure to use gluten-free Graham crackers.
Reese’s peanut butter cups were created on November 15, 1928, by H.B. Reese, a former dairy farmer for the Hershey company. These delicious, chocolate peanut butter cups were originally called “Penny Cups,” because they could be bought for one cent. Reese’s (along with its eponymous peanut butter cups) has over time become one of the top selling candy brands worldwide, with billions in annual sales. For several decades, Reese’s has used the tagline, “There’s no wrong way to eat a Reese’s.”
More Reese’s Recipes
If you love the taste of Reese’s Peanut Butter Cups and candies, check out these delicious recipes!
- Really Reese’s Cookies – With three different types of Reese’s candies, these are REALLY REESE’S Cookies! Chocolate and peanut butter in every delicious bite.
- Chocolate Peanut Butter Fudge Swirl – This fudge is so easy to make and it is incredibly delicious! It tasted like a Reese’s Peanut Butter Cup in fudge form.
- Peanut Butter Cup Rice Krispie Treats – It’s so easy to turn a traditional Rice Krispie Treats into Peanut Butter Cup Rice Krispie Treats. Creamy peanut butter and mini Reese’s cups make it an extra special treat!
- Candy Bar Hot Chocolate – You’ve got to try this Reese’s Hot Chocolate. It is amazing how a little peanut butter can give a creamier, richer taste to hot cocoa!
- Reese’s Peanut Butter Cup Cake – This cake is so fun! It is a round cake that looks and tastes just like a giant Reese’s Peanut Butter Cup!
Homemade Reeses Peanut Butter Cups
Video
Ingredients
- ¾ cup crushed graham crackers
- 1 cup powdered sugar
- 9 ounces peanut butter, (creamy or crunchy)
- 10 tablespoons butter, divided
- 12 ounces semi-sweet chocolate chips
Instructions
- Gather your ingredients.

- In a medium-sized bowl, combine graham cracker crumbs and powdered sugar until well blended. Set aside.
- In a microwave-safe dish, combine peanut butter and 6 tablespoons butter. Cook in the microwave in 15-second increments, stirring in between, until melted and combined. Pour over the graham crackers mixture. Continue to stir until well combined. Set aside.
- In a microwave-safe dish, combine half of the chocolate chips (6 ounces) with 2 tablespoons of butter. Cook in the microwave in 15-second increments, stirring in between, until melted and combined. Set aside.
- Place cupcake liners in a cupcake tin.
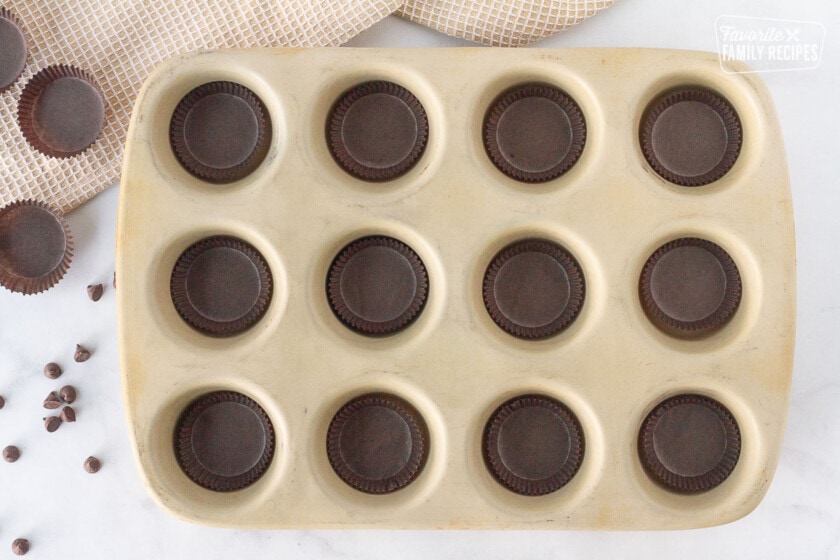
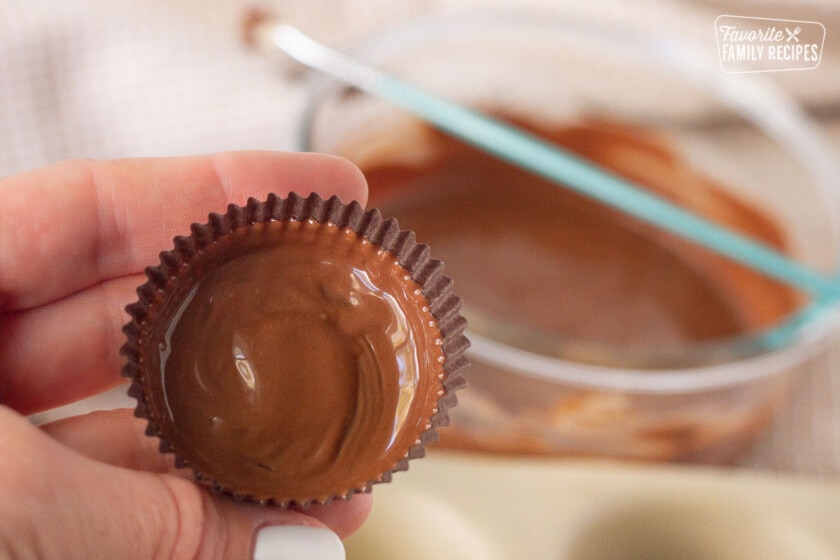
- Using a paintbrush or pastry brush, paint each cupcake liner with melted chocolate. If using full-size cupcake liners, paint about one-third of the way up each cup. If using mini cupcake liners, paint halfway up each cup. Be sure to evenly coat the bottom and sides. You don't need to paint the chocolate super thick, just enough so you don't see any of the liner underneath. Place in the refrigerator to cool for about 5 minutes, or until chocolate hardens.
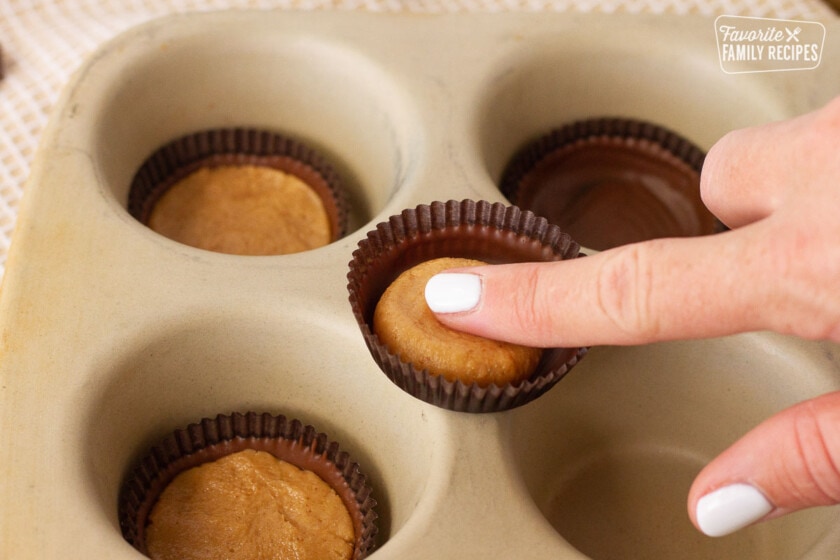
- Press about 1 tablespoon graham cracker mixture in each full-size cup (about 1 teaspoon for mini cups), making sure the top is somewhat flat. It doesn't need to be perfect; just make sure you don't go above where you painted the chocolate on the cup. Set aside.
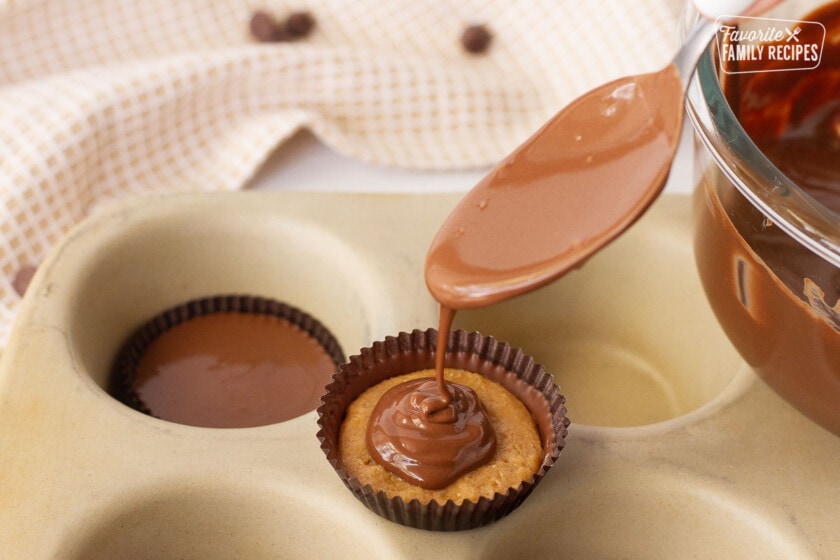
- Add the remaining chocolate chips to the remaining melted chocolate in the microwave-safe dish. Melt with remaining 2 tablespoons butter, stirring every 15 seconds. Spoon a little chocolate over each peanut butter cup until the peanut butter filling is completely covered. You can lightly shake or tap the cupcake pan to even out the chocolate over the filling. You want the top of the peanut butter cups to look completely flat.
- Place in the refrigerator or cool area until chocolate hardens, about 20 minutes, or until the chocolate is no longer shiny, then serve!

Notes
- The paintbrush I like to use is a roughly half-inch-wide flat brush.
- The amount of chocolate needed tends to vary each time, so keep a few extra chocolate chips on hand in case you need a bit more.
Powder Sugar – 140 g
Peanut Butter – 255 g
Butter – 140 g (14 g/Tbls)
Choc Chips – 340 g
Nutrition
Nutrition information is automatically calculated, so should only be used as an approximation.
Love this recipe?
We want to hear from you! Please leave a review.
Can I make these with milk chocolate instead of semi sweet?
Sure!
Wow – these are so good, definitely making them again.
It’s dangerous for me to know this recipe! I will want to make them everyday! They are so good & taste even better than the store bought ones!
Whoa these were amazing. I loved making and enjoying them.
I had 1/4 the amount of dark chocolate in the house leftover from another recipe so I quartered this recipe and made in mini cups. Tasted like the real thing. I must admit I was skeptical about the addition of graham crackers but that did the trick!
Do you use milk chocolate chips or semi-sweet?
Semi-sweet. Thank you for catching that! I fixed it on the recipe.
How long can these last outside the fridge? :O
It depends on how warm it is where you are storing them. I would suggest keeping them in the fridge to maintain their shape!
Although it is not mentioned in the recipe; I think that the quality of the chocolate is critical here. (I guess for experienced bakers/cooks, it’s so obvious that it’s not worth mentioning. LOL). I used inexpensive chocolate chips from Smart and Final. They have always been fine to use in Ch. Chip cookies. But here, there was no place to “hide” the inferior taste. Next time, I’ll happily spend the extra money to buy a much higher quality of chocolate…the “filling” part was indeed delicious and easy to prepare.
Thank you for your comment. Yes! the quality of chocolate makes all the difference. I’m glad you liked the filling!
Have you tried this using Nutella instead of peanut butter?
No, Nutella has a thinner consistency than peanut butter. I’m not sure if it will set up the same. Thank you for asking!
I feel like I did something wrong. I melted the butter and chocolate chips in the microwave, stirring every 15 seconds, but instead of becoming liquidy and easy to pour, it became a crumbly goo. It was really hard to spread evenly, did this happen to anyone else?
The end result was delicious, though.
Chocolate is so tricky! When I melt chocolate in the microwave I usually stop cooking it when there are still a few unmelted chunks. Then, I keep stirring until everything is melted and smooth. If you overheat it even a little bit it will harden and become crumbly, as you explained. I’m glad they still turned out delicious!
I had the same issue where the chocolate turned to more like a dough consistency. As the previous person suggested, the butter mixing with some chocolate brands (I used Ghirardelli) does’t work well if the water content in the butter is high, so I use coconut oil instead.
1 Tablespoon of Coconut oil per bowl with the chocolate in place of the 2 Tablespoons of butter per bowl. Works beautifully. Hope this helps your readers.
if the chocolate comes into contact with even a drop of water, it will turn out like yours. Butter has a lot of water content. You might try using Crisco instead, or a mixture of half Crisco and half butter. I wouldn’t use oleo. An activated carbon is frequently used for decolorizing, deodorizing and purifying the fatty acids and derived chemicals to make it. I’m no chemist, but I have heard that it is a very few
molecules more and it’s actually plastic!
When melting chocolate in the microwave you have to use 50% power. Or sometimes you can half the time, stir, then the other half of time and stir. That takes longer.
You may have burned the chocolate or the addition of butter took the fat from the chocolate and made it split is suggest using a Bain maire
Where the items are measured in ozs, is that fluid or weight?
Weight!
Took me 2 hours to make these! They are freezing right now, cant wait to eat them 🙂 the peanut butter concoction tasted good so Im assuming they will after they are done as well, thank you for this!
LOVE that I can make these in bulk at home! The kids loved them!
These look so delicious and fun to make! My daughter love anything chocolate and peanut butter! Can’t wait to make these!
Wow, these are a game changer!! So fun to create and even more fun to eat!!
I really want to try this recipe, but unfortunately, I do not have a microwave at all.
Is there a way to modify this recipe to no microwave for those of us without one?
Yes, you can boil a pot of water and then put a glass or other heat-safe bowl over the top of the pot and stir it until it is melted!
Thank You!!
Cool
I loved them they were so good and tasty
How much of each ingredient is needed for Reese’s peanut butter cups
https://www.favfamilyrecipes.com/homemade-reeses-peanut-butter-cups/
Ingredient amounts are listed on the recipe. Not sure if that is what you are asking?
Double boiler or a bowl on top of a boiler melt until smooth.
Can the powered sugar be left out of the peanut butter mixture.
It won’t be quite the right texture if you leave it out!
you can make your own powdered sugar from granulated, in a food processer or blender.
Substitute swerve powdered sugar or another alternative powdered sugar.
This is a dangerous recipe to have!! These are so addicting! So creamy & delicious!
Yum. Everything I love about Reeses PB cups – without all the fakey additives that come from the real thing. These are delish!
I love the idea of making PB Cups from scratch! Can’t wait to give these a try!
I made these and I got 60 minis. With a heaping teaspoon in each. Took alot longer than expected. They turned out good tho. But the butter made the chocolate hard. So I used oil.
Thank you for sharing! What kind of oil do you prefer?
Is there anything I could use to replace the powdered sugar that still allows for the same consistency? I’m trying to make the homemade ones just a bit healthier… I was wondering if coconut flour (or just any flour) would work for this.
That’s a good question– you could definitely try coconut flour but we have never tried that before so I can’t tell you for sure. If you try it, please come back and let us know how it turns out!