We may earn a commission when you click on the affiliate links in this post.
Making ice cream has never been so easy (and fun)! Learn how to make ice cream in a bag with just a few simple ingredients. It’s the perfect kitchen science experiment and delicious dessert all in one.

Ice Cream With (Virtually) No Mess
I am not even kidding, this is my kids’ favorite summertime treat. It’s literally the best because I can prep it all outside and then have them do the “hard” part and shake it up until it turns into ice cream. It’s like a game, a science experiment, and a tasty afternoon snack all rolled up into one. It’s the best for summer birthday parties because it turns the ice cream portion into a fun activity. There’s really no downside here. It’s always a hit with kids (and even the adults)! For a dairy-free version, try our homemade Magic Slushie recipe. Still all the fun, just without the dairy. Try them both and let me know which one you like best!
🩷 Erica
Ingredients and Supplies
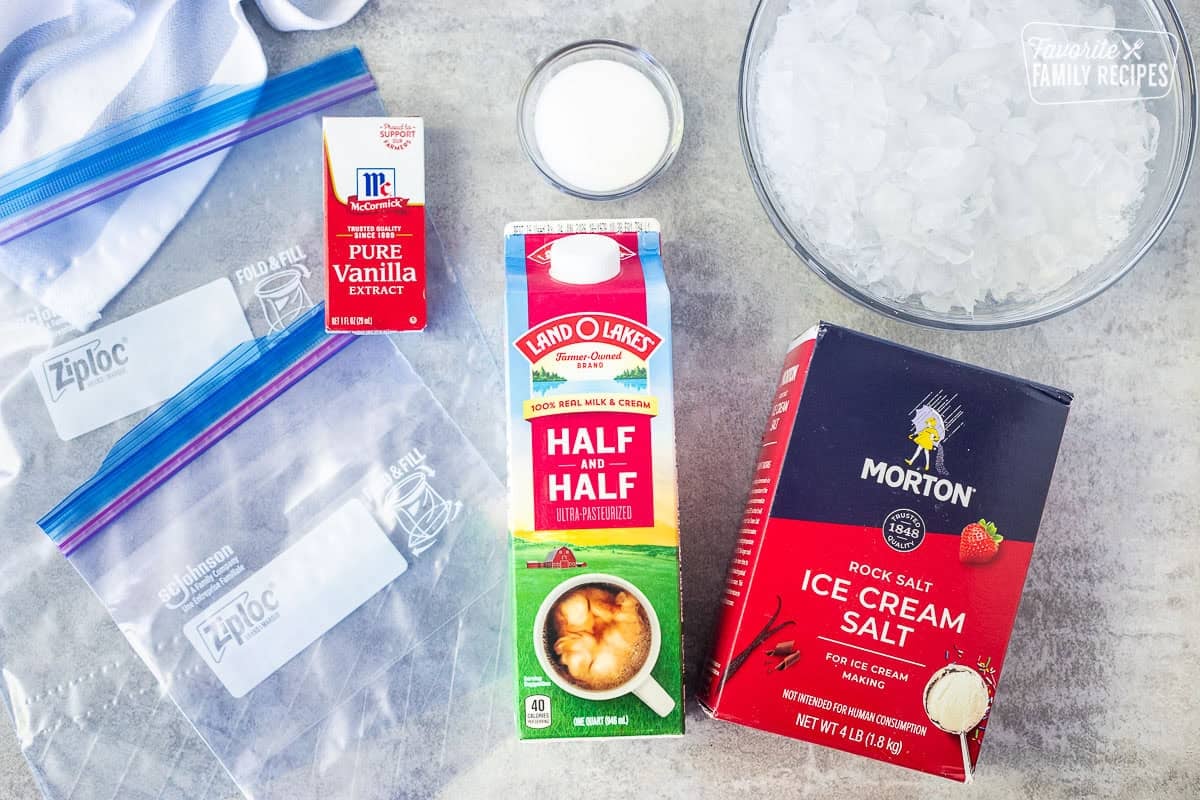
- Ziplock bags – You will need both gallon-size and a quart-size freezer bags. Make sure you use high quality bags with several seals of you are going to have leaks. Trust me, don’t scrimp on the quality of the bags.
- Ice – I have found that small cubed ice or crushed ice works best. Large cubes don’t work quite as well, but they will still work fine if that’s what you have.
- Rock salt (or ice cream salt) – You can find this at most grocery stores. It’s not too hard to fine. You want to use nice, coarse salt when making ice cream, not fine sea salt or table salt.
- Half and half – I usually just do half and half but the ice cream does come out a little icy. My kids have never complained about it so we have just stuck with it. If you really want it extra smooth and rich, use heavy cream or a combination of cream and half and half.
- Sugar & vanilla – Just plain granulated sugar and vanilla are enough to flavor the ice cream and give it the classic vanilla flavor. See below for some fun variation ideas!
How to Make Ice Cream in a Bag

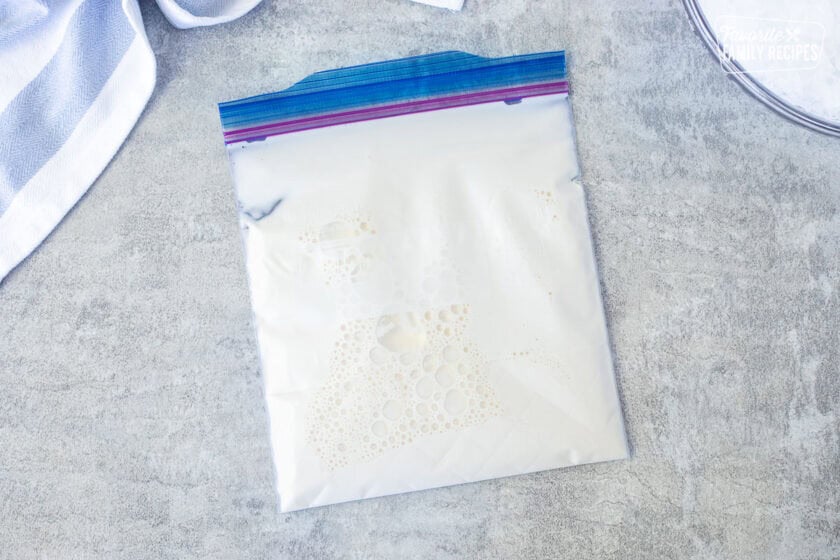
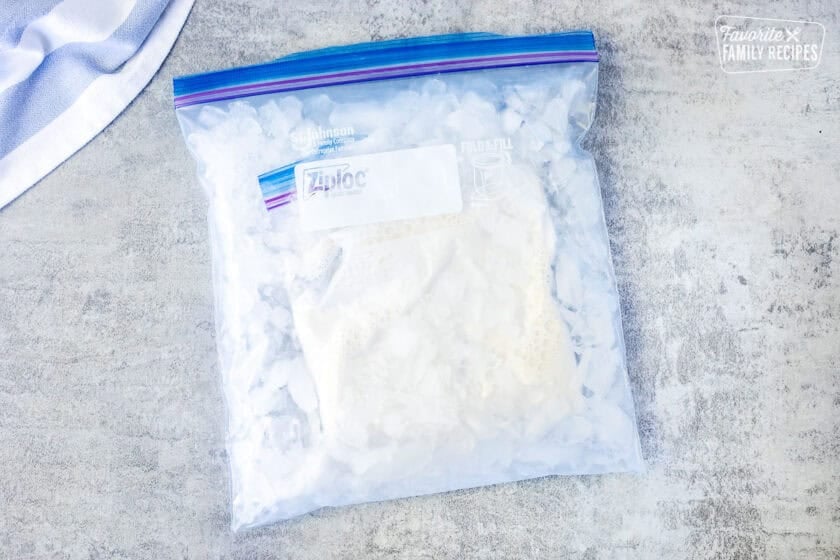
- Place half and half, sugar, and cream in a zip-top bag and seal very tightly (for exact amounts see recipe card below). Make sure there are absolutely no leaks in the bag.

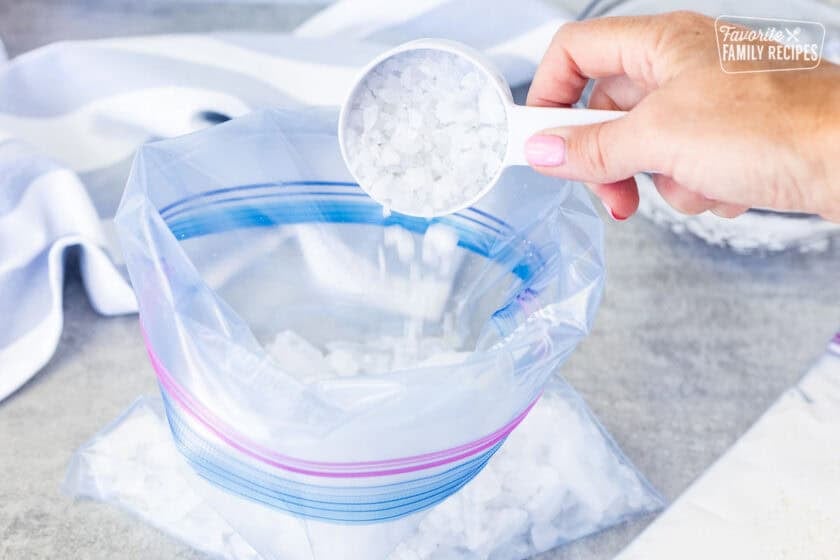
- Place ice and rock salt in a larger zip-top bag.
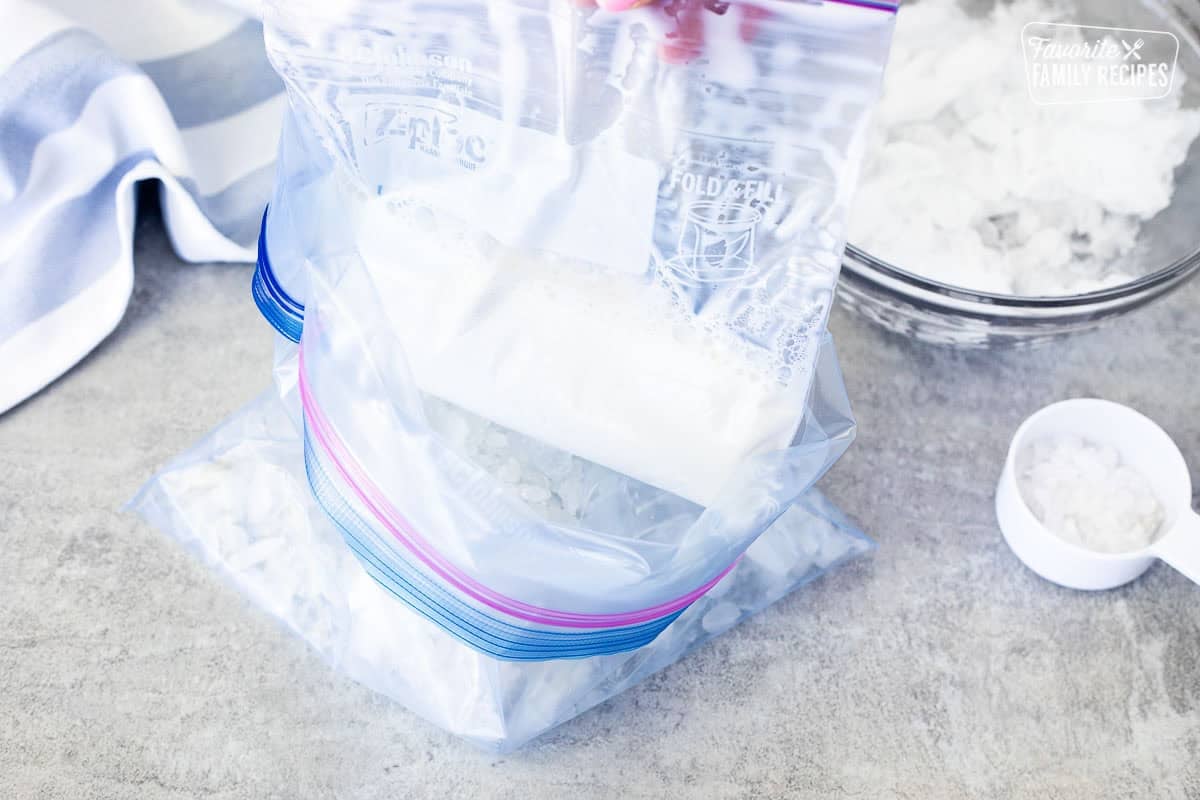
- Place the ice cream bag in with the ice and salt.
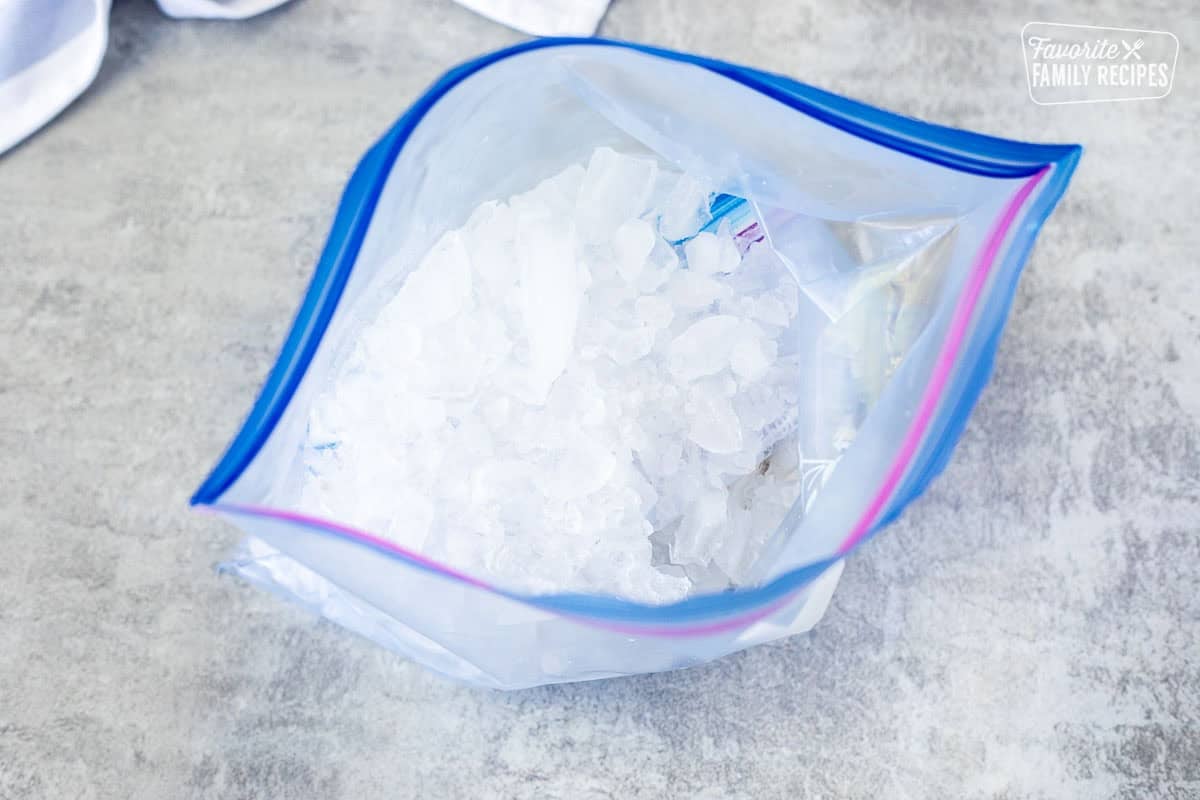
- Add remaining ice over the ice cream bag.

- Seal the outer bag tightly.

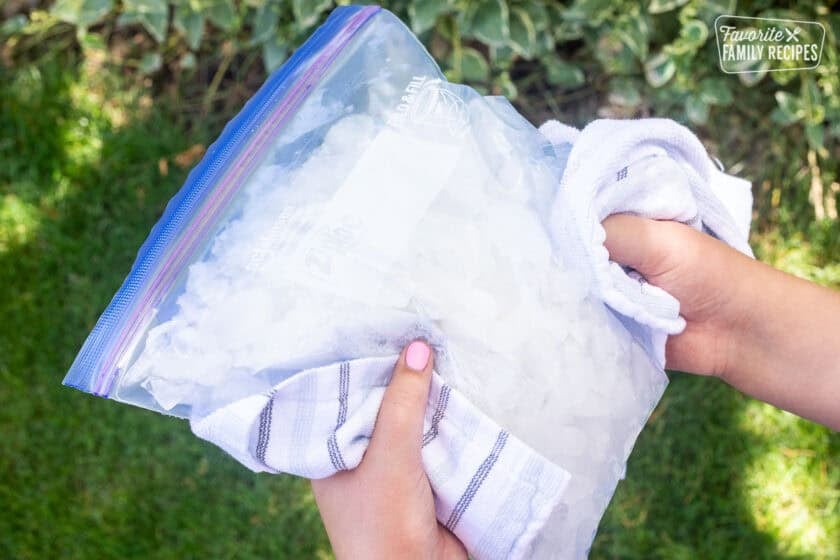
- Now it’s time to shake that thang! Shake it all up for 10 minutes. Get creative in how you shake it. Play hot potato (well, cold potato) or bounce it on a trampoline. Be sure to use a towel or gloves when handling because I am telling you, it gets *cold*!
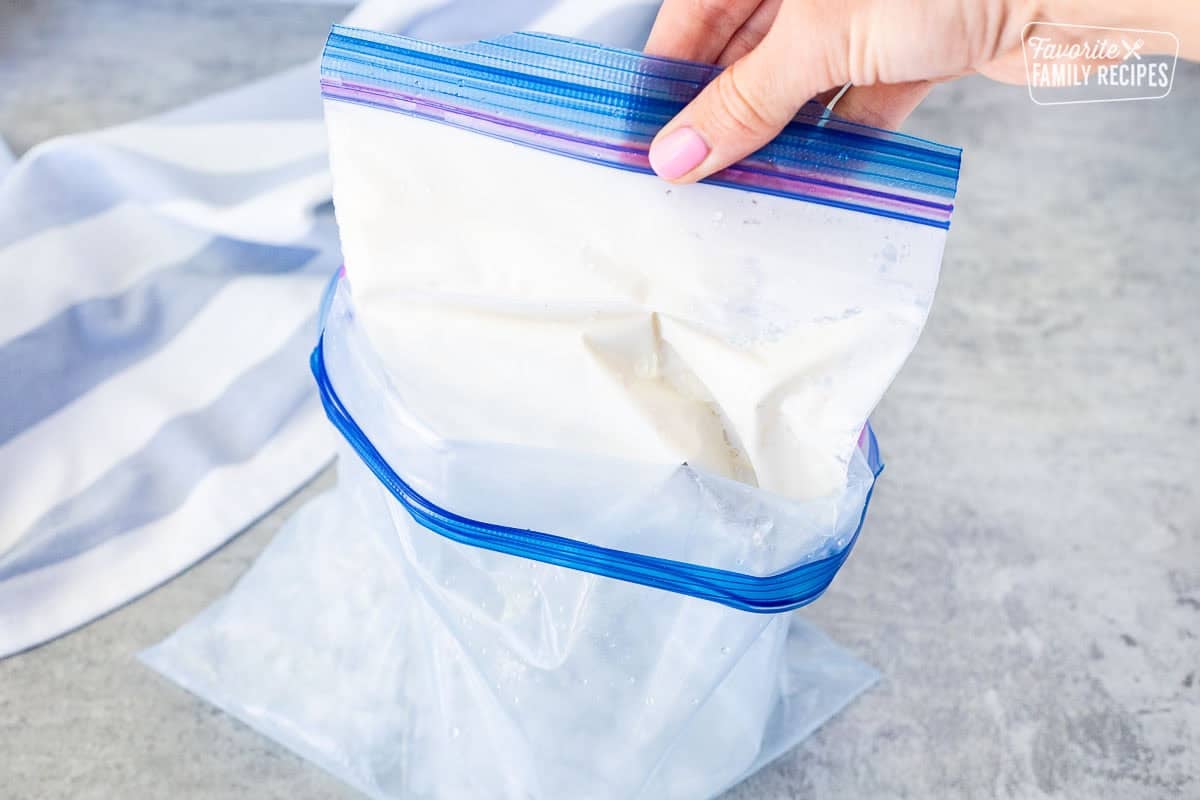
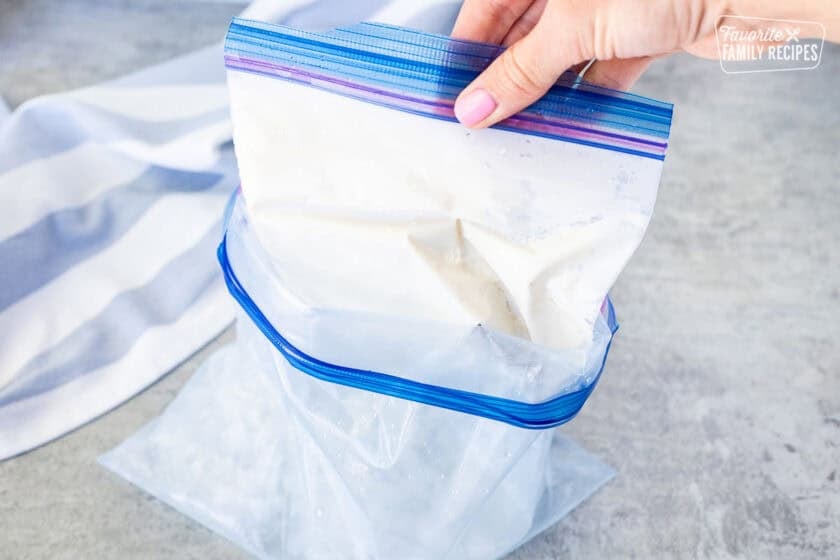
- Remove the inner ice cream bag from the ice bag. You may want to give it a little rinse in very cold water before opening just to get all the salt off the bag.
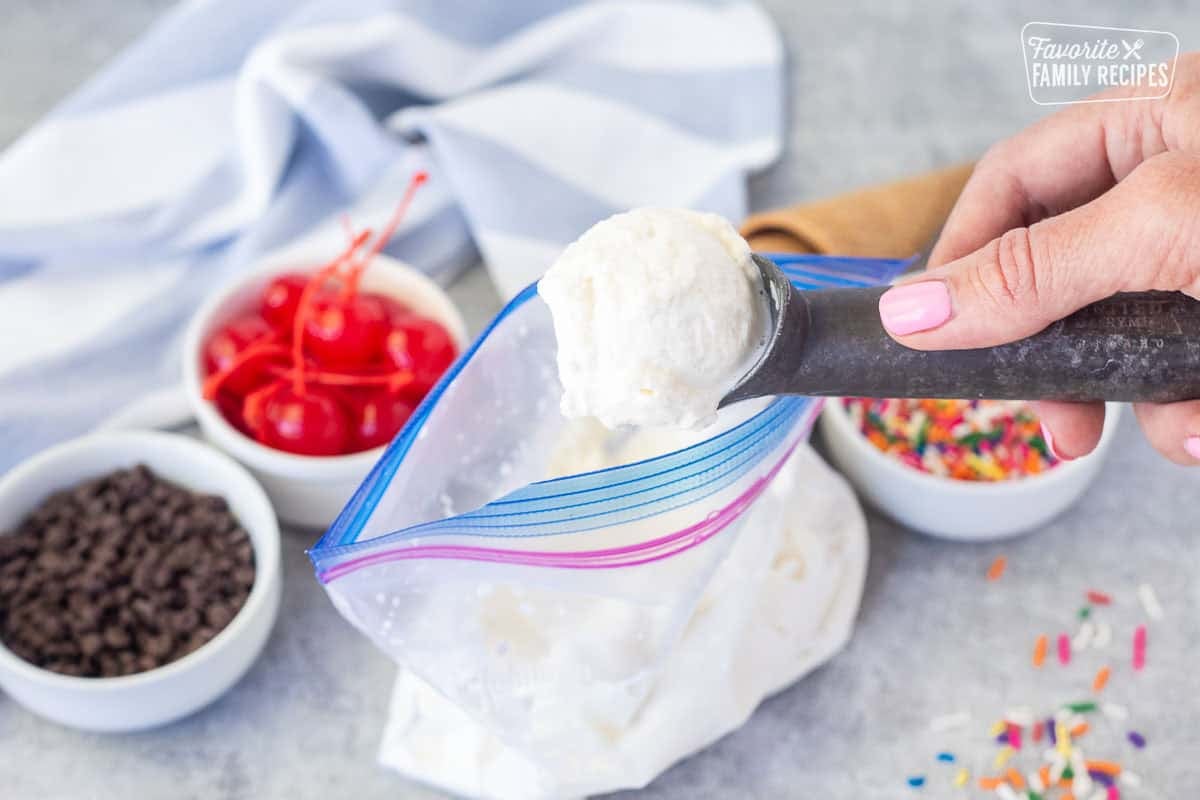
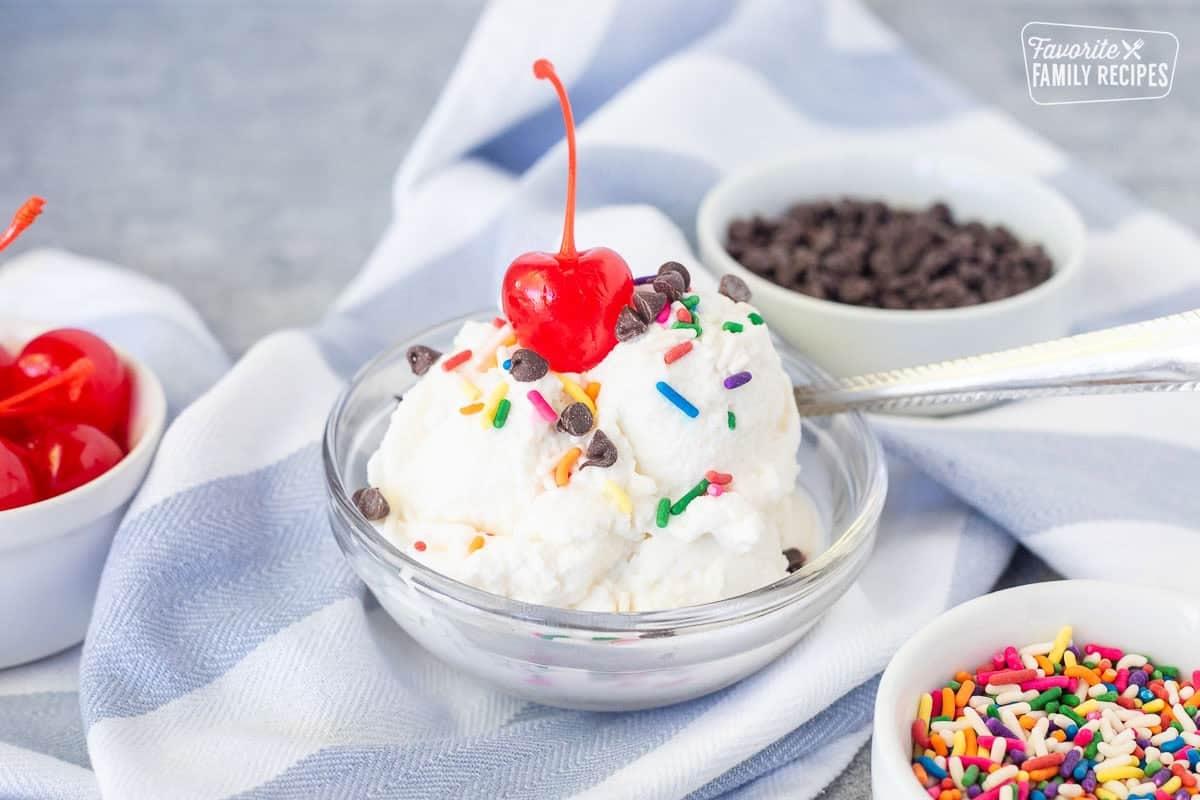
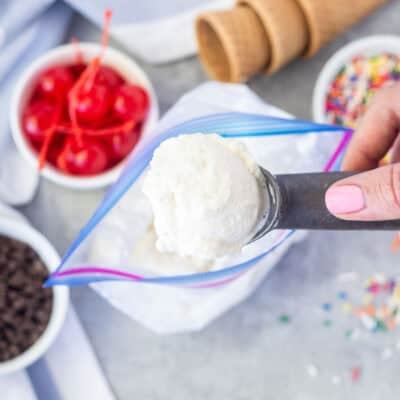
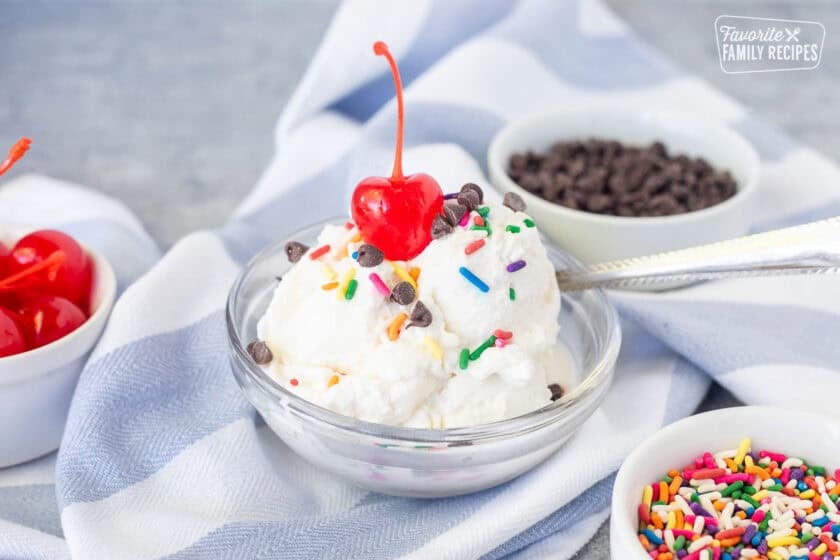
- Open the ice cream bag, scoop out your ice cream, and serve with your favorite toppings. If you want the ice cream to be more solid you can always put it in the freezer for 30+ minutes or until it becomes firm to your liking.
Mix-In Ideas
This is where it gets really fun! I love adding different mix ins to the ice cream either before or after it gets all shaken up. If you want to add ingredients before shaking, use ingredients that can dissolve, flavor the ice cream, or stay soft enough that they won’t puncture the bag, for example, cocoa powder (chocolate ice cream), jam, mini chocolate chips, peanut butter, cookie butter, or flavor extracts (like mint). Mix-ins that work best *after* shaking include M&Ms, crushed cookies (Oreos work amazing), crumbled brownies, chopped candy bars, chopped nuts, dried (or fresh) fruit, coconut flakes, etc… these tend to get crushed, become soggy, or make shaking difficult when added before so adding them afterward is definitely better.
Expert Tips for Making Ice Cream in a Bag
When in doubt, double-bag: It’s never a bad idea to double-bag the smaller bag with the ice cream. The tiniest leak can ruin the ice cream so if you aren’t 100% confident in that inner bag, double bag it.
Shake continuously for the best texture: The more movement, the creamier the ice cream. If you stop and start too often, ice crystals can form and the texture won’t be as smooth.
If the ice cream isn’t freezing, add more salt: The most common reason ice cream stays liquid is not enough salt. Add an extra tablespoon or two of rock salt and keep shaking.
Frequently Asked Questions
No. The rock salt is what makes this experiment work. It lowers the freezing point of the ice, allowing the mixture to get cold enough to freeze into ice cream. If you skip the salt, you’ll end up with very cold milk instead of ice cream.
You can, but the ice cream won’t be nearly as creamy. Half-and-half gives the ice cream a richer texture. For an even creamier ice cream, you can use heavy cream.
The salt lowers the freezing point of the ice, creating a super-cold layer around the ice cream mixture. This allows the cream to freeze much faster than it would with ice alone.
Grainy ice cream is usually caused by ice crystals forming during the freezing process. Make sure you’re shaking continuously and using enough salt. Using heavy cream instead can also help create a smoother texture.
Yes! You’re using the same basic ingredients found in many homemade ice cream recipes. The only difference is that you’re freezing it in a bag instead of an ice cream maker.
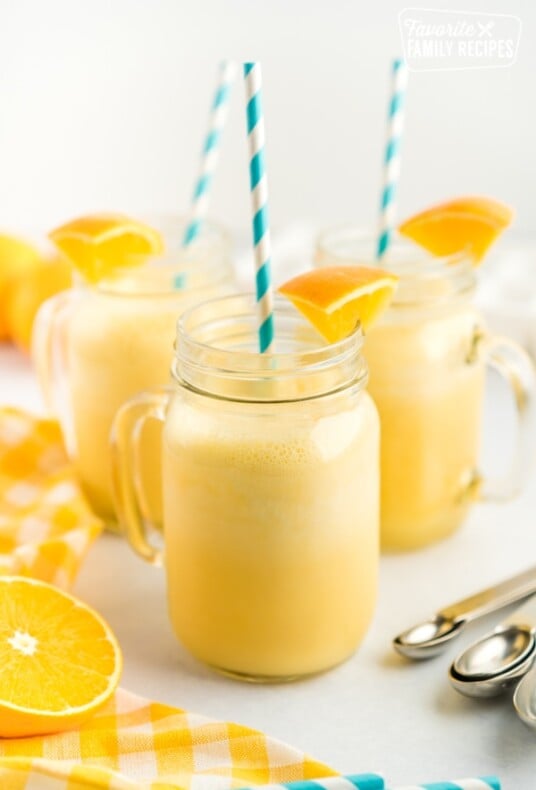
More Fun, Kid Friendly Frozen Treats

Have you tried this Ice Cream in a Bag? I’d love to hear what you think! Drop a comment below and let me know how you liked it. And don’t forget to take a pic and tag us on Instagram @favoritefamilyrecipes! 📸🍨
Ice Cream In A Bag
Ingredients
- 1 cup half and half
- 2 tablespoons sugar
- 1 teaspoon vanilla
- 6 cups ice, (smaller cubes work better than larger)
- 1/3 cup ice cream salt (or rock salt)
Instructions
- Place half and half, sugar, and vanilla in a small zip-top bag (sandwich size or quart work great). Press out as much air as you can and seal VERY tightly. The tiniest little leak will ruin the ice cream.

- Place half of the ice and all of the rock salt in the larger bag (I usually do the one gallon size).
- Then place the ice cream bag in the larger bag and cover with the rest of the ice.
- Press out as much air as possible and seal tightly.
- Wrap the bag in a towel or wear gloves or mittens and start shaking the bag vigorously. Shake for 10 minutes. Toss the bag between friends or find creative ways to shake it up (my kids love bouncing it on the trampoline).
- Carefully remove the smaller bag from the larger bag. Open the ice cream bag carefully. Try not to get any of the salty water inside the bag when opening. The ice cream should be soft-serve consistency at this point. If you want to make it more like a scoop-able ice cream, place the ice cream in a freezer-safe Tupperware container, seal tightly, and freeze for at least 2 hours.
- Serve immediately and top with your favorite ice cream toppings.

Equipment
- 1 gallon size ziplock bag
- 1 sandwich or quart size ziplock bag
Nutrition
Nutrition information is automatically calculated, so should only be used as an approximation.
Love this recipe?
We want to hear from you! Please leave a review.