We may earn a commission when you click on the affiliate links in this post.
Craving a refreshing slushie? You don’t need a blender or any special equipment, just a few simple ingredients, a couple Ziplock bags, and some ice and you will have a delicious slushie in 5 minutes!
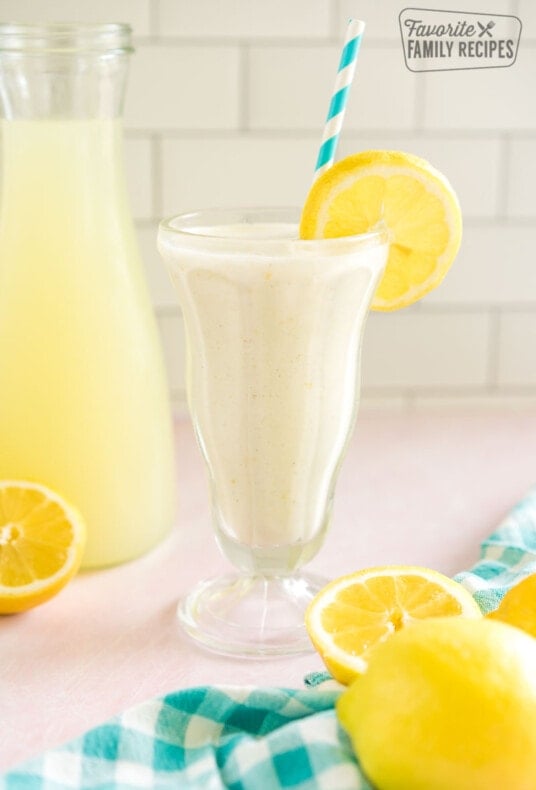
The Best Slushie Recipe Ever
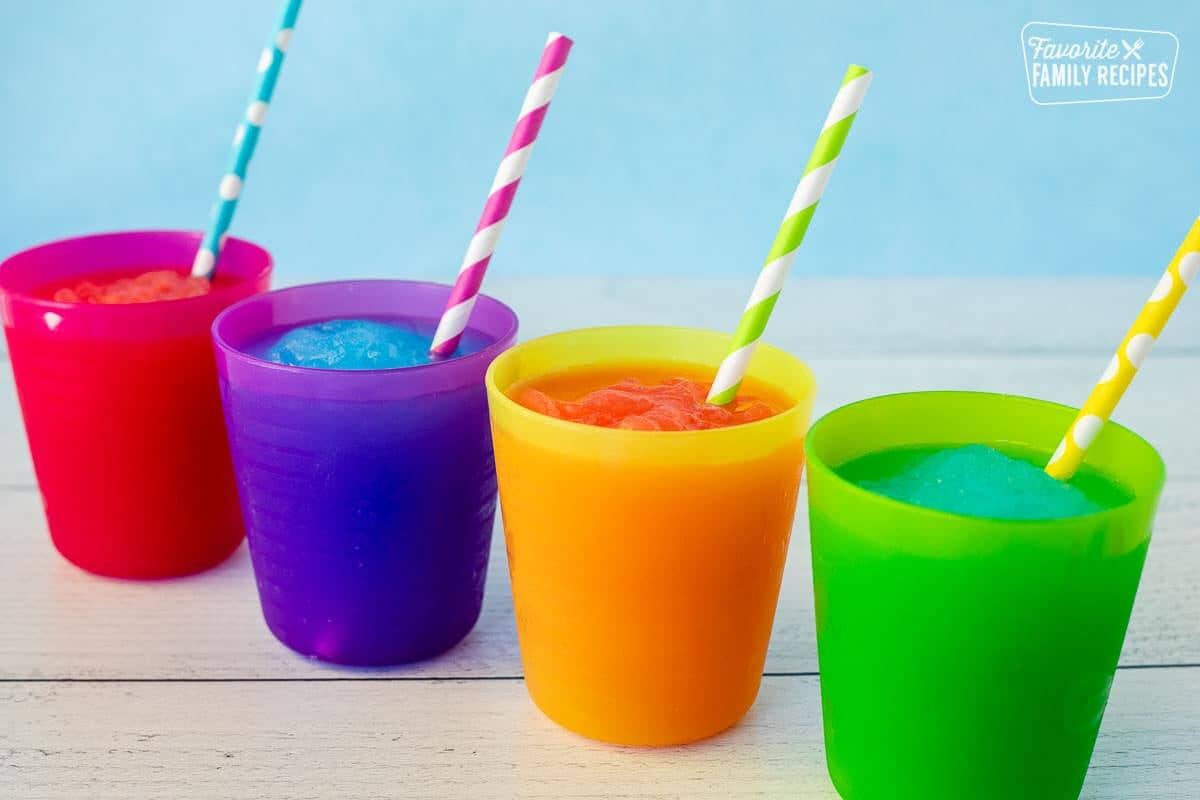
Ready to be the favorite mom on the block? These slushies (or “flushies” as my 3-year old would say) are the coolest thing ever. You throw them together, shake, and BAM – instant slushie. They are a HUGE hit with my kiddos and they taste just like the slushies that you get at the gas station. No high powered blender, no big mess, no freezer, no big chunks of ice, just smooth slushie goodness. This is the perfect drink for hot summer days when plain juice or soda doesn’t seem cold enough to quench your thirst and you don’t want to deal with melty popsicles.
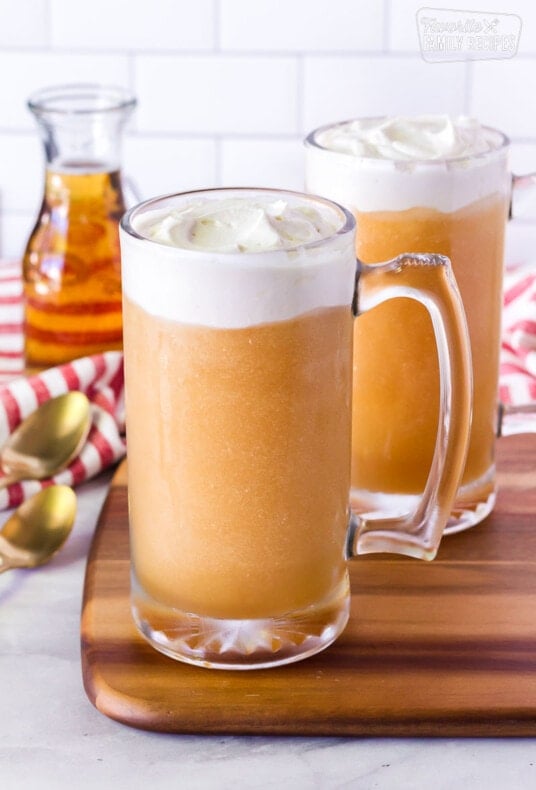
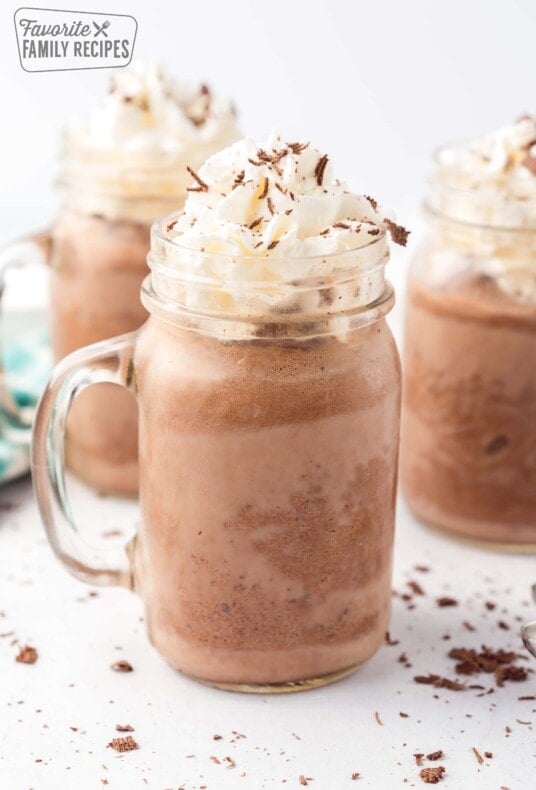
You can make these with fruit juice or with soda. My personal favorite is making it with vanilla Dr. Pepper. You can buy a Slushy Magic Kit online for upwards of $10 or you can make your own homemade slushie at home for a few cents.
This is so easy to do, even a 3 year old can do it… really! You literally can be drinking a slushie in 5 minutes from now. I bet you have everything you need right at this moment. All you need is ice, salt, juice, and a couple Ziploc bags. That’s it! 🩷Erica
Ingredients and Supplies
To make a 5-minute slushie, you’ll need the following ingredients and equipment:
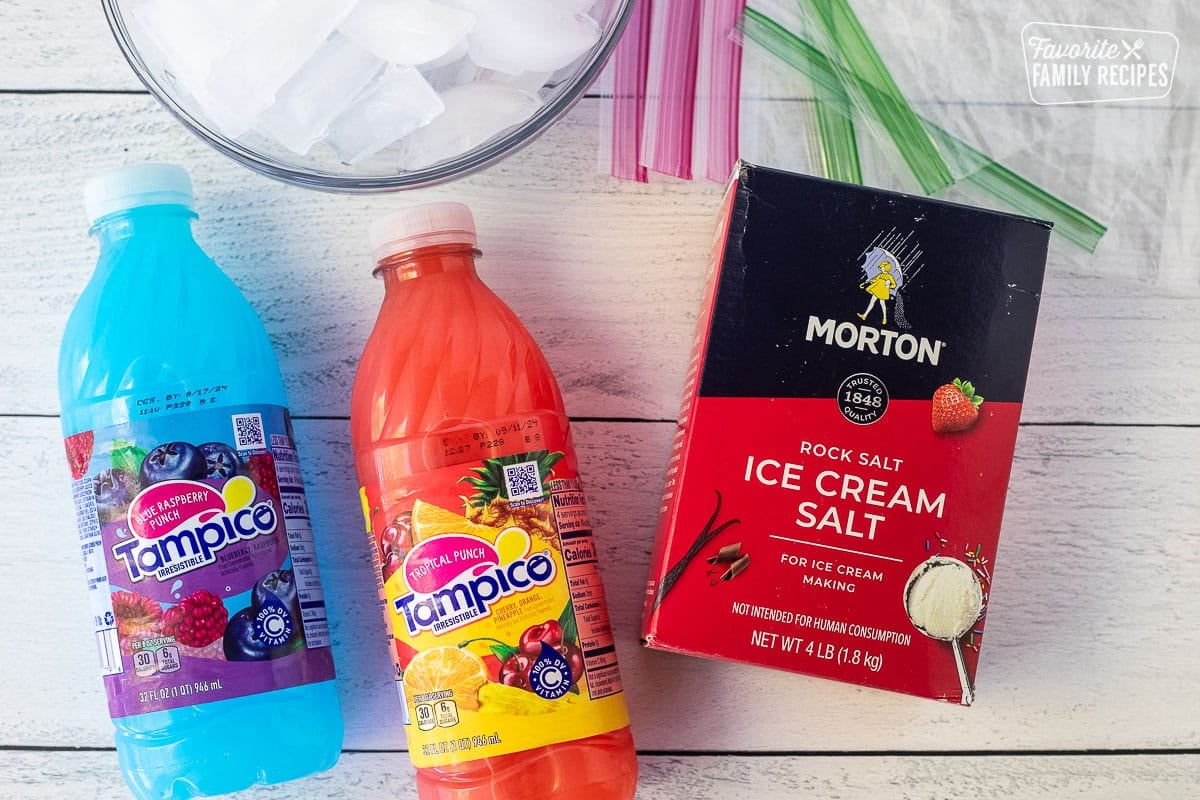
- Juice or soda – Your choice of any sugary juice, soda, or flavored beverage will all work great (prepared Kool-aid or drink mixes work great). Diet or zero sugar drinks don’t work as well.
- Zipper Bags – Two sturdy, resealable Ziplock-style plastic bags (one smaller and one larger). You can use a quart-sized bag and a sandwich bag or a gallon and a quart. Just so one fits inside the other. The keyword here is sturdy. You don’t want thin bags that will tear easily or ones with weak seals. Freezer bags work great.
- Ice cubes – I have actually found that smaller ice cubes work better than larger ones. Even crushed ice is great! It cools the juice faster. However, ice cubes from the refrigerator will also work fine, you may just need to add more.
- Salt – Ice cream salt works best but coarse Kosher salt or coarse salt also work great. Table salt will work fine in a pinch but doesn’t work quite as well.
- Gloves or a towel – Optional, to protect hands.
How to Make a Slushie

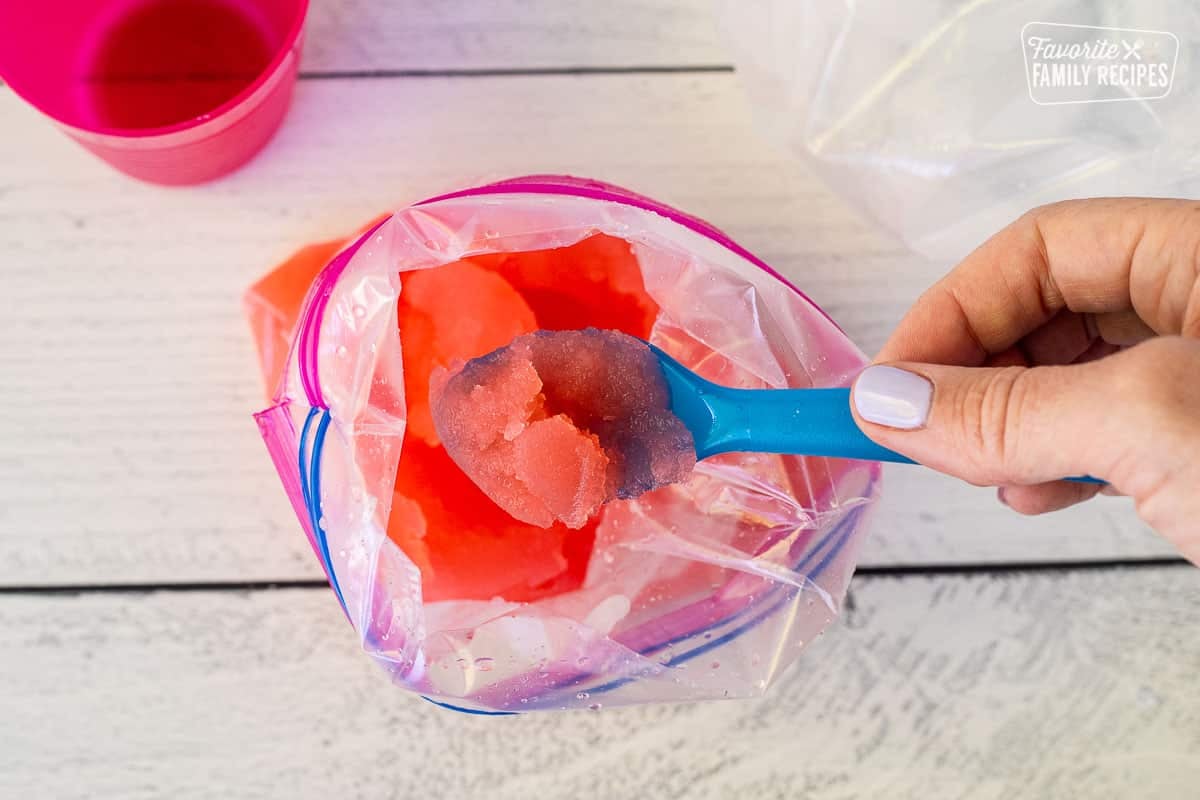
- Take the larger resealable plastic bag and fill it halfway with ice cubes. Add salt over the ice cubes.

- Fill a smaller (quart sized) bag and fill it with juice. Seal it tightly, making sure there are no gaps. Any little leaks will allow salt to get in and no one wants salt in their slush!

- Place the sealed small bag containing the flavored drink mixture into the larger bag of ice. Ensure both bags are sealed tightly.

- Shake and knead the bags for about 5 minutes or until the liquid mixture inside the small bag has transformed into a slushy consistency. The bag gets VERY cold so we recommend using winter gloves or wrapping it in a towel. The ice will help rapidly chill and freeze the mixture.

- After 5 minutes, carefully remove the small bag from the larger bag of ice. Open the small bag and check if the mixture has achieved the desired slushy texture. If needed, continue shaking the bag for a little longer until you reach the desired consistency.
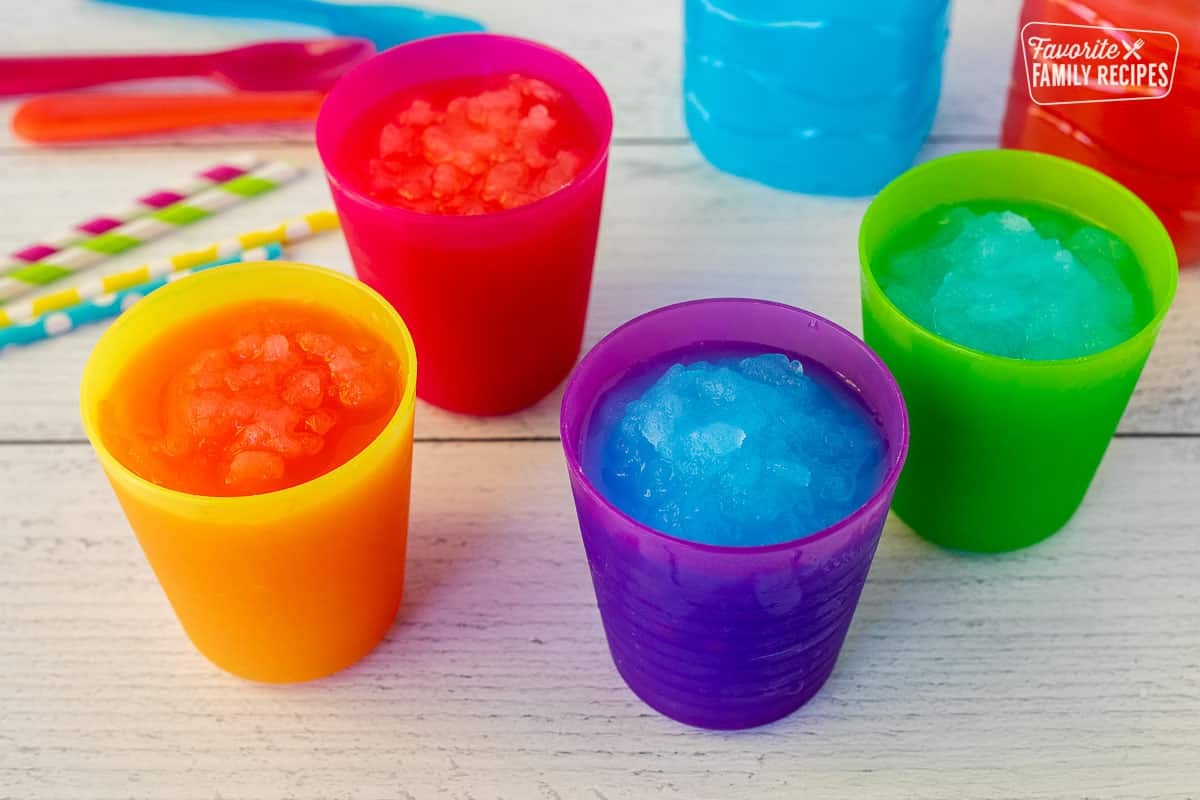
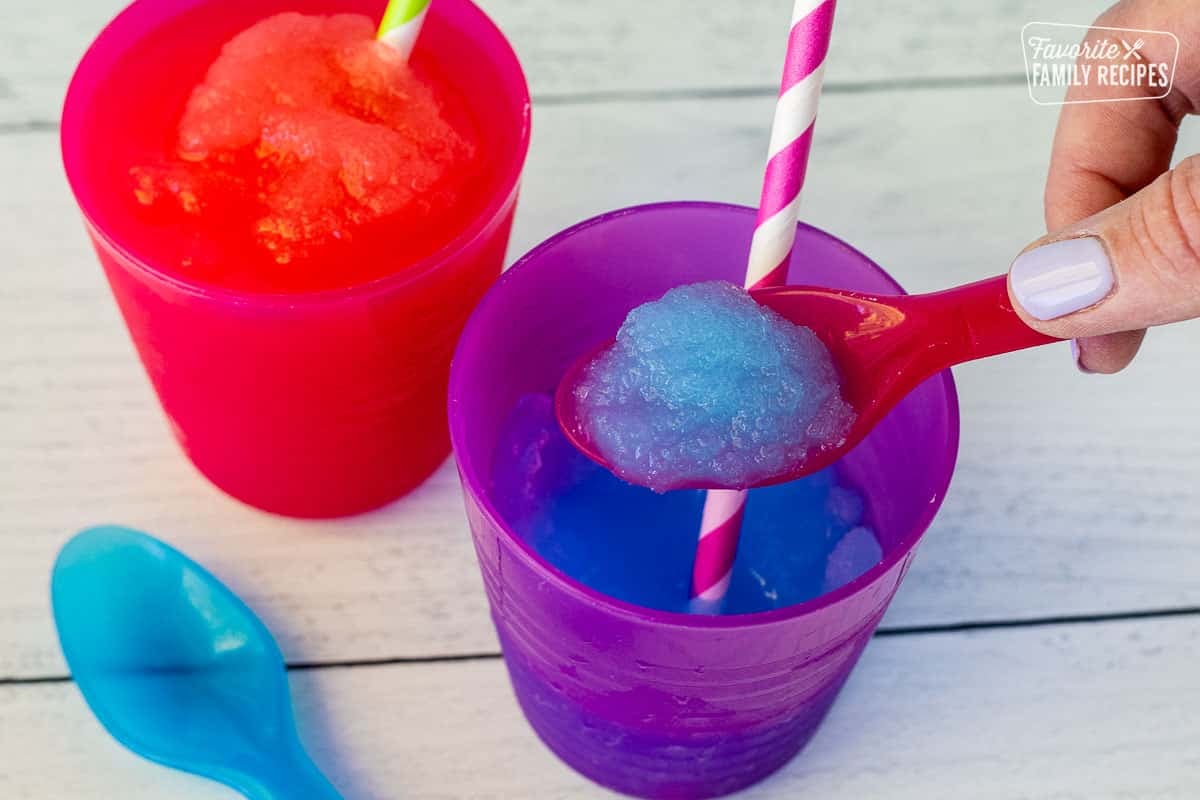
- Transfer the slushie to a glass or slushie cup, grab a straw or spoon, and enjoy!
How Does It Work?
A slushie’s science involves lowering the freezing point of a liquid. The salt in the outer bag lowers the temperature at which the mixture freezes. When the liquid is supercooled below its freezing point, agitating it creates tiny ice crystals throughout the liquid, giving it a slushie texture. It’s a cool and refreshing treat that’s always a hit and perfect for a hot day!
Pro Slushie Tips and Troubleshooting
- Keep in mind that when you are shaking the bags, they get SUPPPERRRR cold. Especially when my kids are shaking them, I like to wrap them in a hand towel or dish towel so their little hands don’t freeze. This also helps the ice to not melt so quickly because your hands are warm and can melt the ice faster.
- Crushed ice or smaller cubes work faster than large ice cubes. If your cubes are big, the drink may take longer to freeze.
- If yours doesn’t seem to be getting cold enough, add another teaspoon or so of salt and maybe a couple more ice cubes.
- If it tastes salty, the inner bag probably leaked. Double check that the sandwich bag is sealed really tightly before shaking. You can even double-bag it if needed. The salt and juice should definitely not mix!
- Overfilling the juice bag can also cause leaks. Leave a little room in the bag so the liquid can move around while freezing.
- The amounts I put below seemed just about right for us, but if you are in a place where it is really hot, you may want to add a little more ice and salt and you may need to shake it longer.
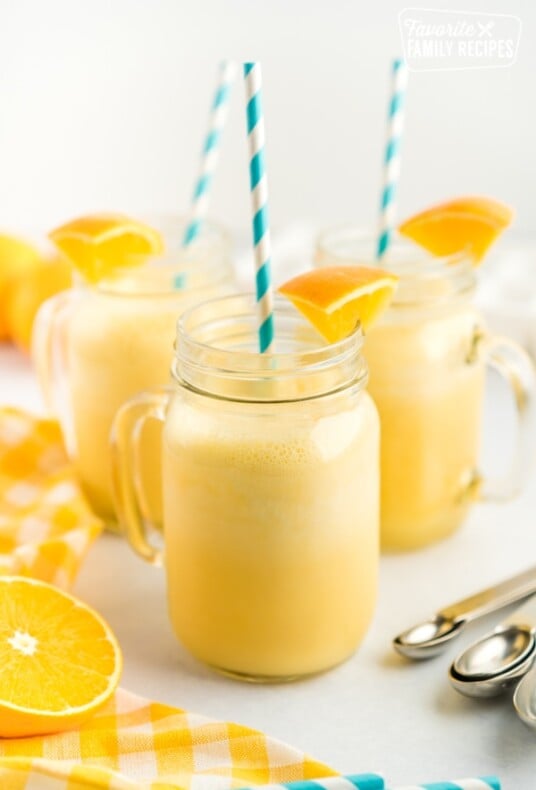
- Some favorite recipes include grape juice and Sprite, apple juice, strawberry lemonade, cherry lime juice, mango juice, coconut and pineapple juice, or Gatorade. The possibilities are endless. They really are like MAGIC!
Frequently Asked Questions
Fruit juice, lemonade, sports drinks, and regular soda all work really well. Drinks with a sugar tend to freeze into the best slushy consistency.
That usually means some of the salt water leaked into the drink bag. Make sure the inner bag is sealed really tightly before shaking. I like to press out the extra air and double-check the seal before putting it into the ice bag.
Usually it just needs more ice, more salt, or more shaking. Make sure the outer bag has plenty of ice surrounding the drink bag and keep shaking constantly. Using drinks with sugar also helps it slush up faster.
More Frozen Summer Drinks
Have you tried these Easy Magic Slushies? I’m excited to hear what you think! Leave a comment or tag us on Instagram @favoritefamilyrecipes and show us your creations! 📸🍧
5-Minute Slushie Recipe

Video
Ingredients
- 4-6 cups ice, small cubes or crushed works best
- 1-2 tablespoons Ice cream salt, Kosher salt or coarse salt work great too
- 1 cup juice , or soda (not diet)
Instructions
- Place ice cubes and salt in a quart-sized Ziploc bag.

- Place juice in a sandwich-sized Ziploc bag, press out all the air and seal tightly. If it isn't sealed tightly enough, salt will get in and it won't taste good.
- Place the small bag of juice IN the larger bag of ice and seal. The larger bag will be holding the ice, salt, and the baggie of juice. *PLEASE NOTE: You will have two separate bags – a quart bag with ice and salt, and a sandwich bag with juice.
- Shake for about 3-5 minutes or until juice gets slushy. Using gloves, mittens, or a towel will protect your hands and also keep the ice from melting too fast.
- If your slushy isn't getting slushified. Add more ice and salt to the outer bag and keep shaking.
- Pour slush into a cup and serve immediately.


Equipment
- 2 Zip-top bags (one larger and one smaller, I usually do a quart-size and a sandwich size)
Notes
- Make sure the inner bag is sealed very tightly before shaking. If salt water leaks in, the slushy will taste salty.
- If the slushy isn’t freezing after a few minutes, add more ice and a little more salt to the outer bag and keep shaking.
- Wrap the bag in a towel or wear gloves while shaking. Keeping the bag cold the entire time helps the slushy freeze faster and will also protect your hands.
Nutrition
Nutrition information is automatically calculated, so should only be used as an approximation.
Love this recipe?
We want to hear from you! Please leave a review.
My child has been asking for slushies. We finally went to get one only to find the slushy machine was down. I impulsively promised we could make our own at home. Cue my frantic search for a recipe. I’ve made ice cream this way so we dove in. With a minute left on the clock the inner bag was still liquidy and I imagined my child’s face, now so full of curiosity and hope, crumpled with disappointment. The timer sounded and -lo and behold!- the bag was suddenly full of slushy! Said child drank the whole thing and immediately asked for more. Thank you from slushy loving children everywhere for this recipe!
Yay! I am so glad these slushies saved the day! This is one of my kids’ favorite summer treats because they can totally make them on their own. So glad it was a hit for you guys!
This is so easy! I did it at a sleepover and it tasted like I was at the movies!!! I love it so much! A three year old can really do it!!!
So glad it was a hit!
This is so easy!!! I did it at a sleepover with my friend and it tastes like I am at the movies! A 3 year old can really do it…she was not lying!!!
That’s awesome, sounds like a fun sleepover!
5 out of 5
Thank you!
Hi I love the recipe but I was just wondering if it would work with milk?
We haven’t tried it with milk! Let us know how it turns out if you try it!
Place the juice bag in the gallon bag and then add ice and salt. It’s easier to surround the juice and it freezes quicker and evenly.
I love it but the salt went in the slushy.
Oh no! Maybe the bag of juice wasn’t fully sealed? Sometimes cheaper brands of zip top bags don’t seal as well.
it did not work we did is for ten mins
Well, I rated it this because it really helped my problem! I am IN LOVE with slushies, and I’ve been trying FOR AGES to make my own slushies. This morning, I even tried to crush the ice! I’ve even tried to blend it! (but it didn’t work🤣) So I looked on my computer and saw this! it has been sooooo useful! I am BEGGING for more useful LIFE HACKS like this ( if you even count this as a life hack! ) anyways THANK YOU!!!!!!!!! 🥰🥰😍😍🤗🤗🤑🤑🤑 ( my mind is blown)🤯🤯🤯🤯
This was good, but the slushie is a little bit runny but otherwise it is a good recipe. AND it was really refreshing. just what i needed! ; )
Love this. Love it so much, I need to make WAY MORE than just one cup at a time. Can we?
We’ve only made it with these ratios so I can’t say for sure. I think a bigger batch would take a lot longer to freeze. Let us know how it goes if you try it!
I love that it requires ingredients that you probably have on hand and is simple enough that children can do their own.
I followed the instructions just with two small bags and it came out nice. Next time I’m going to shake it for longer. I had some doubts about this but it worked thanks : D
I think this is a good recipe, although mine did not become slushie-y. It was just cold orange juice. Also do you have to use a quart size bag or can you use gallon?
Which bag are you wanting to replace with a gallon size?
I did exactly what your directions called for and it came out perfect! Thanks 😊
What happened to the plastic bag with juice…how does the juice mix with the ice…how do the two connect, theyre in seperate bags
You don’t mix the juice with the ice. The ice and salt make the juice cold enough that it freezes! I hope this helps!
I have been trying so many recipes and this one finally is slushee-e it’s perfect!!!