We may earn a commission when you click on the affiliate links in this post.
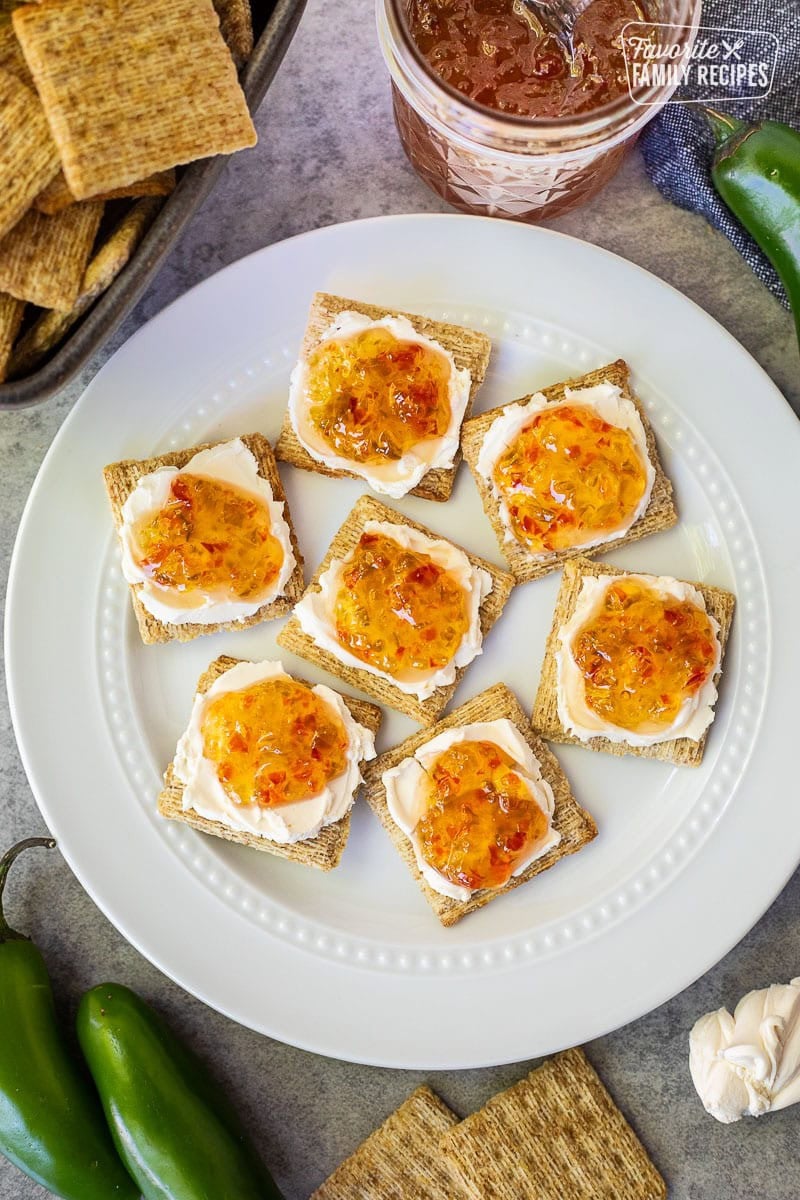
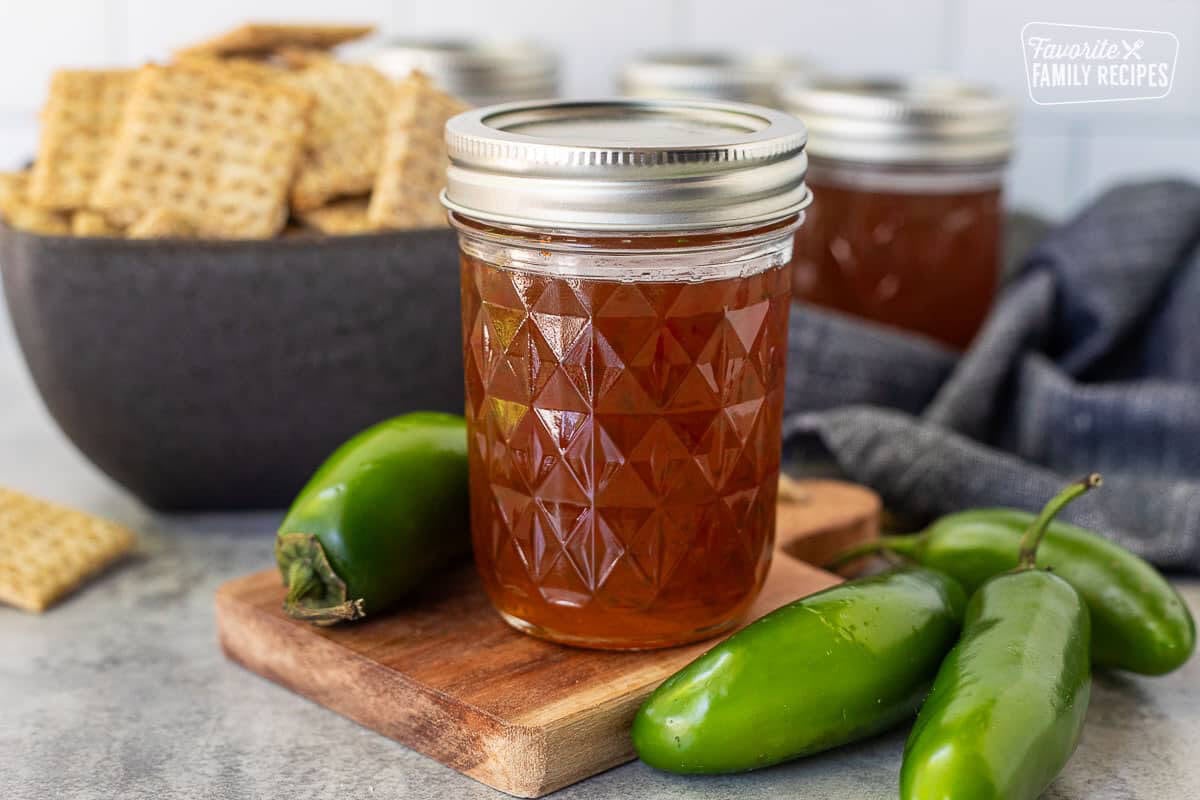
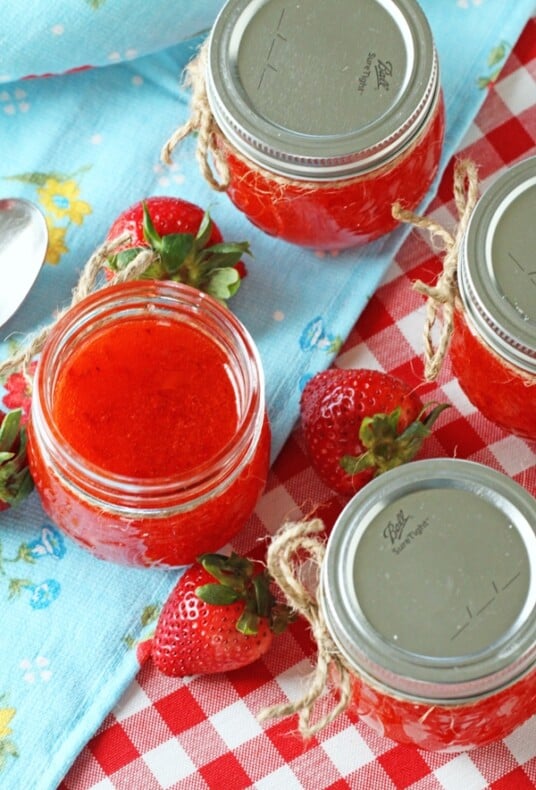
This homemade Jalapeño Jelly is sweet, a little spicy, and one of my favorite things to keep in the pantry. It is so good poured over cream cheese with crackers, but it also makes a great glaze for grilled meats, a fun spread for sandwiches, and an easy gift for friends and neighbors.

5 Star Reviews ⭐️⭐️⭐️⭐️⭐️
“Each and every time I take these to gatherings, they disappear, I am always asked for the recipe. Thank you so much for this delicious jalapeño jelly.” – Debbie
“Absolutely love this jalapeño pepper jelly and it has been a huge hit anywhere I’ve taken it! Couldn’t wait for my garden to produce the peppers so I could make another double batch as we were down to our last jar!.” – Andria
“I make canned goods for my shop. THIS is my go-to for Jalapeno jelly. I always sell out of this one first. Thanks for the recipe and all the information to help make the best jelly.” – Michele
Why I Love This Jalapeño Pepper Jelly
If you have never had jalapeño jelly before, I know it might sound a little strange. Jalapeños in jelly? I get it. But trust me, once you try it with cream cheese and crackers, it makes total sense. It is sweet, tangy, and has just a little kick. My mom loves this recipe, and she does not tolerate much heat beyond ketchup, so as written it is not overly spicy.
I love that this pepper jelly works for so many things. It is a quick appetizer when people stop by, it is a pretty addition to a charcuterie board, and it makes the cutest little homemade gift when poured into jars with a ribbon tied around the top. I also love that I can adjust the heat depending on who I am making it for. Remove the jalapeño seeds for a milder jelly, or leave some in if you want more spice.
🩷Erica
Table of Contents
- 5 Star Reviews ⭐️⭐️⭐️⭐️⭐️
- Why I Love This Jalapeño Pepper Jelly
- Ingredients You’ll Need
- Ingredient Additions and Substitutions
- How to Make Jalapeño Jelly
- Do The Consistency Test Before Canning
- Powdered Pectin vs Liquid Pectin
- Recipe Tips
- Frequently Asked Questions
- Troubleshooting
- Make Ahead and Storage
- Ways To Serve and Pairing Ideas
- More Jam and Jelly Recipes
- Jalapeño Jelly (Pepper Jelly) Recipe
Ingredients You’ll Need
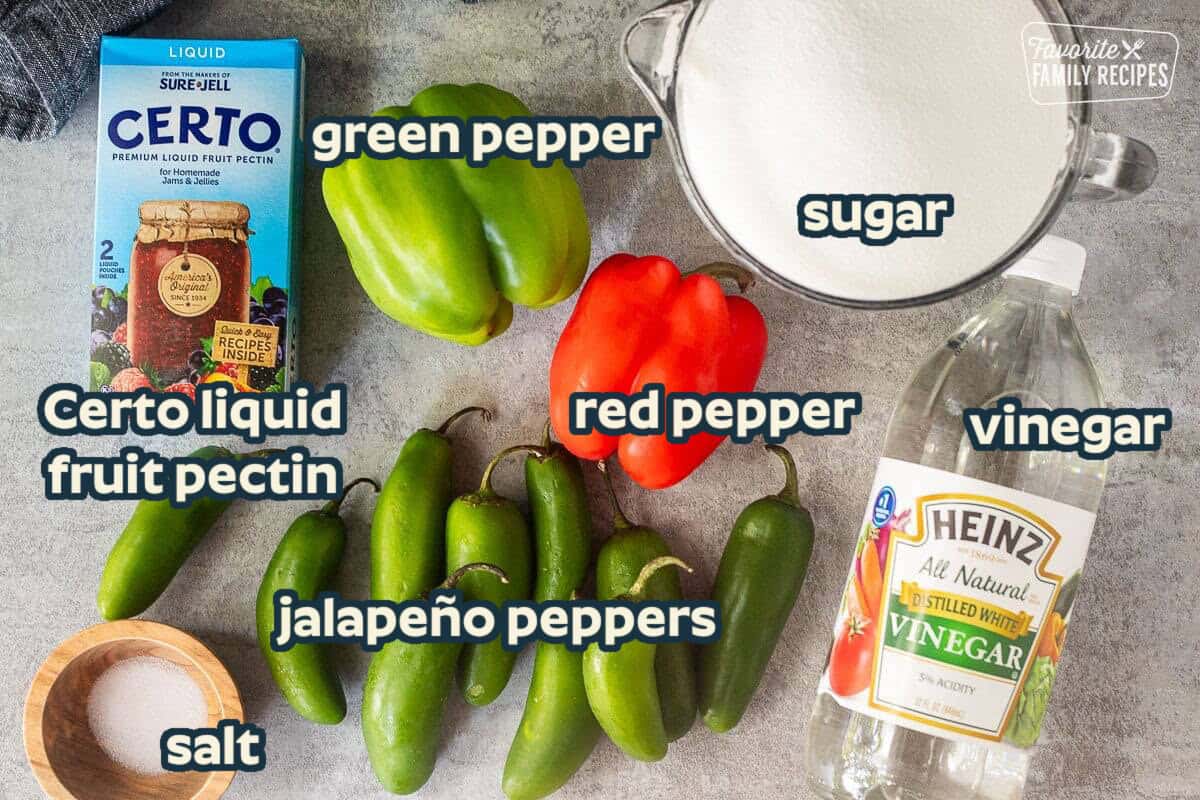
- Jalapeños: These give the jelly its signature flavor and heat. Remove the seeds and membranes for a milder jelly.
- Bell peppers: I like using both red and green bell peppers for color, sweetness, and a softer pepper flavor.
- White vinegar: Vinegar adds tang and helps balance all the sweetness. Apple cider vinegar can also be used.
- Sugar: Regular granulated sugar works best here and helps the jelly set correctly.
- Salt: Just a little salt brings out the flavor of the peppers.
- Liquid pectin: I use Certo liquid pectin for this recipe because it is easy to add gradually and adjust as needed.
Ingredient Additions and Substitutions
- For a hotter jelly: Leave in some of the jalapeño seeds or use a few hotter peppers like serranos, Fresno peppers, or a small amount of habanero.
- For a milder jelly: Remove all jalapeño seeds and membranes, and replace a few jalapeños with extra bell pepper.
- For a red pepper jelly look: Use red bell peppers and ripe red jalapeños. You can also add a drop or two of red food coloring if you want a brighter color.
- For a green pepper jelly look: Use green bell peppers and green jalapeños. The finished color may still be more golden than store-bought green pepper jelly, and that is normal.
- White vinegar or apple cider vinegar: White vinegar gives a cleaner, brighter flavor. Apple cider vinegar adds a little more fruitiness.
- Do not swap in sugar substitutes for regular sugar: Regular sugar is part of the way this jelly sets. If you want a low-sugar version, use a pectin made for low-sugar recipes and follow the package directions.
- Do not reduce the vinegar if you are canning: The vinegar is important for flavor and safe preserving.
How to Make Jalapeño Jelly

- Prepare the jars and peppers. Wash your jars, lids, and bands. Rinse the peppers, remove the stems, and remove the jalapeño seeds if you want a milder jelly. Finely chop the peppers in a food processor or blender.
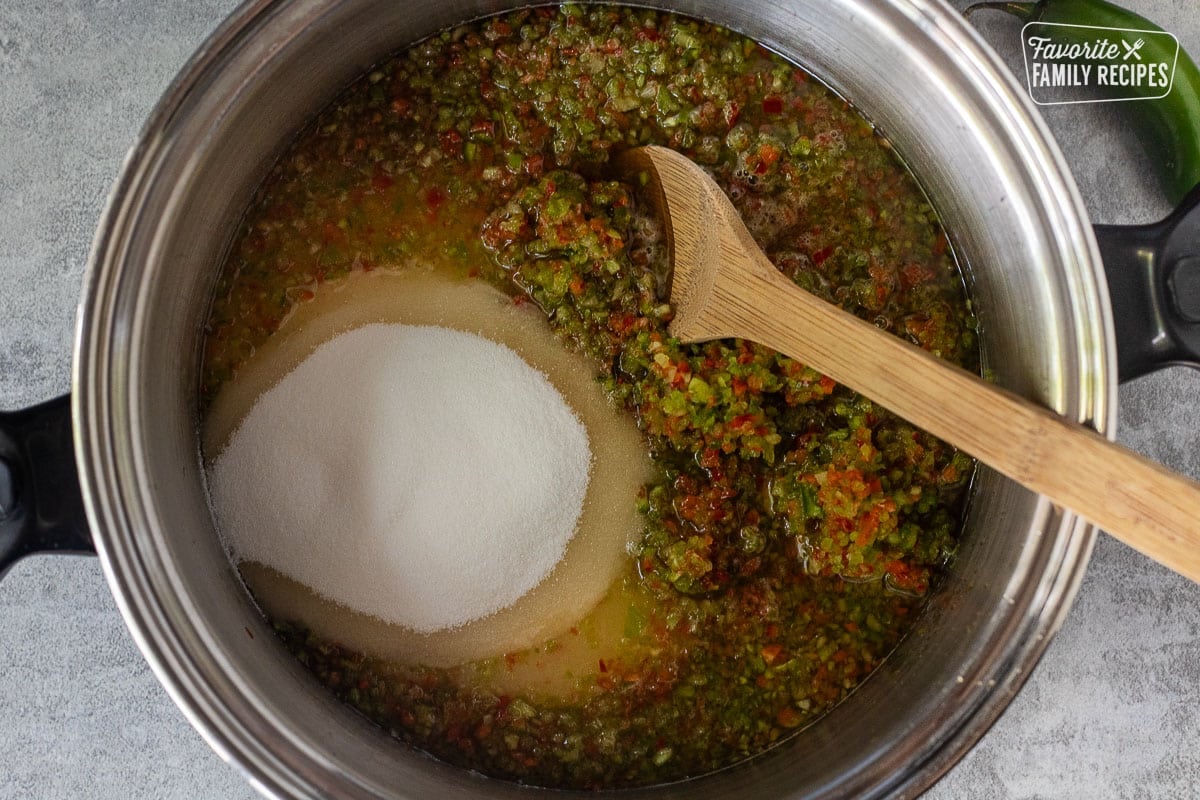
- Cook the pepper mixture. Add the chopped peppers, vinegar, salt, and sugar to a large heavy pot. Bring to a full rolling boil over medium-high heat, then boil for 5 minutes, stirring often.
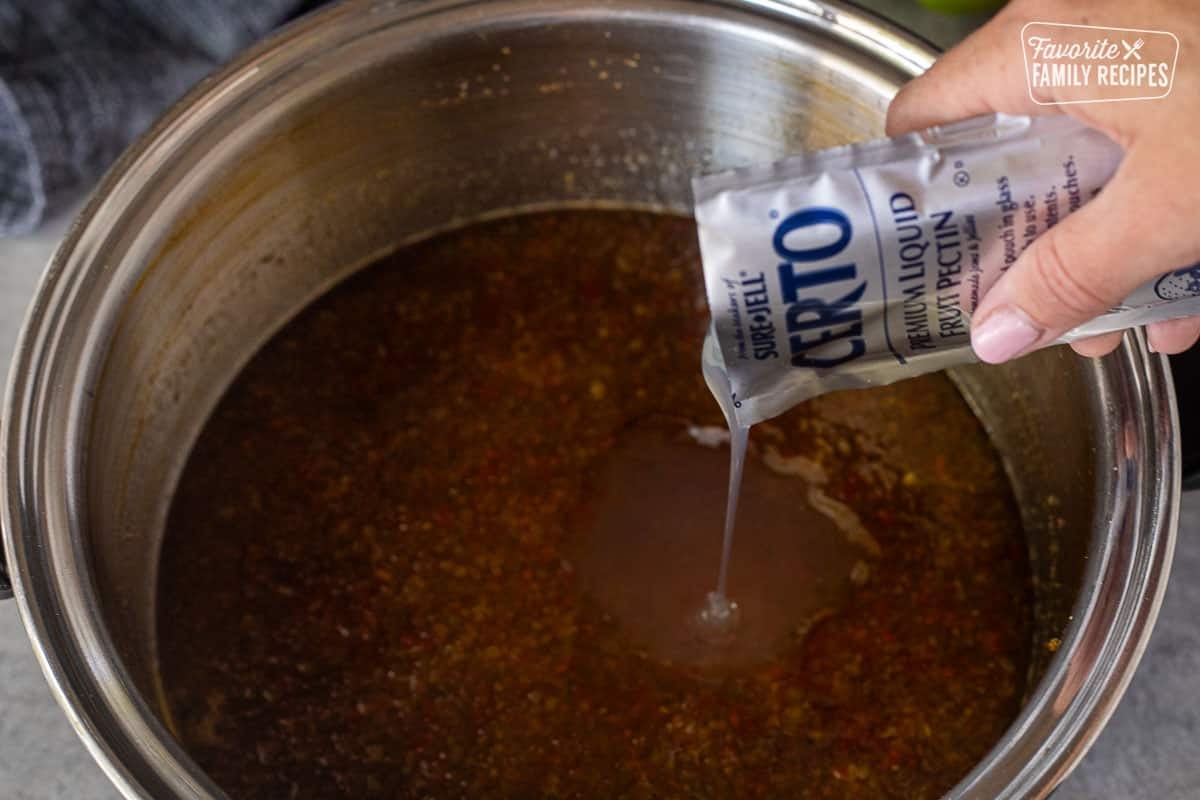
- Add the pectin. Start by adding half of the liquid pectin. Stir well and boil for 1 minute. Skim off any foam from the top so the jelly is smooth.

- Test Consistency and Fill the Jars. Do a quick consistency test before canning, then ladle the hot jelly into clean jars, leaving ¼ inch headspace. Wipe the rims with a damp paper towel, add the lids, and screw on the bands until fingertip tight.
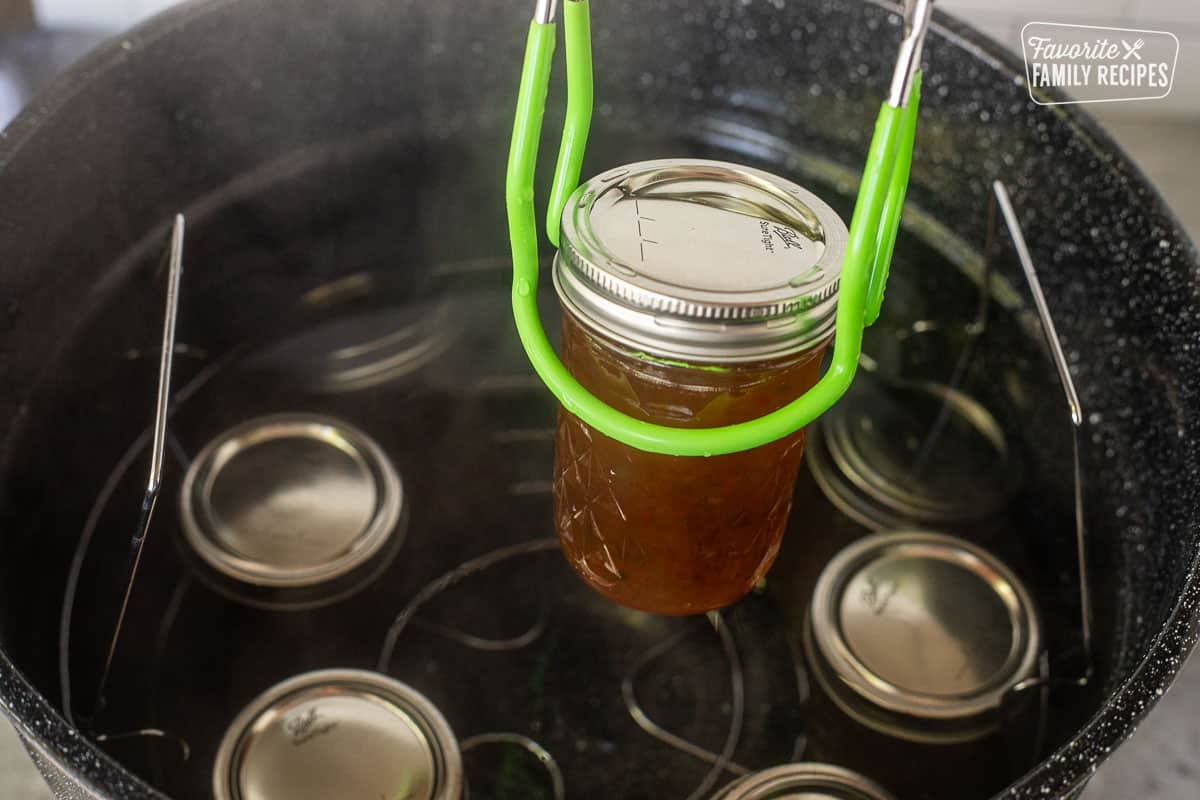
- Process and Cool. Process the jars in a boiling water bath for 10 minutes, adjusting the time for altitude if needed. Remove the jars and let them cool undisturbed. Check the seals after they have cooled.
- Serve. Let the jelly set for 24 hours before serving. Spoon it over cream cheese with crackers, add it to a charcuterie board, or use it as a sweet and spicy glaze for meat.
Do The Consistency Test Before Canning
The pectin is what can make or break the texture of this Jalapeño Jelly. If you add too much, the jelly can set too firm. If you do not add enough, it can be runny. That is why I like starting with part of the liquid pectin and adding more only if needed.
Here is how to do the quick plate test:
- Place a small plate in the freezer before you start cooking.
- Spoon a little hot jelly onto the cold plate.
- Let it sit for 1 to 2 minutes.
- Tilt the plate and watch how it moves.
If the jelly runs like water, it needs more time or a little more pectin. When it moves slowly like thick syrup, it is ready. If it sits in one firm blob, it may be a little too thick. Before jarring, you can stir in a tablespoon or two of hot water or vinegar to loosen it slightly.
The jelly will continue to set as it cools, so do not judge the final texture while it is still hot in the pot.
Powdered Pectin vs Liquid Pectin
I prefer liquid pectin for this Jalapeño Jelly because I can add it gradually and test the texture as I go. That makes it easier to get a soft, spreadable jelly instead of one that is too loose or too firm.
You can use powdered pectin, but the order of the steps changes. Powdered pectin usually needs to be added earlier in the cooking process, before the sugar. If you want to use powdered pectin for this recipe, use one standard 1.75-ounce box in place of the liquid pectin. Whisk it in with the chopped peppers, vinegar, and salt before bringing the mixture to a boil. Then add the sugar all at once and boil according to the pectin package directions.
I do not recommend mixing different types of pectin unless you are comfortable adjusting jelly recipes. Liquid pectin, powdered pectin, low-sugar pectin, and no-sugar pectin do not all work the same way.
Recipe Tips
- Wear gloves when cutting jalapeños. The oils can burn your hands, especially when you are chopping a lot of peppers.
- Use a large pot. Jelly bubbles up as it boils, so give it plenty of room.
- Chop the peppers very fine. A food processor makes this quick, but do not puree them into mush.
- Measure the chopped peppers. Too many peppers can add extra moisture and affect how the jelly sets.
- Use fresh pectin. Old pectin can lead to a weak set.
- Do not double the batch unless you are experienced with jelly. Large batches can set differently and are harder to troubleshoot.
- Skim off the foam. This gives the finished pepper jelly a cleaner look.
- Let it set before serving. The jelly needs time to cool and gel, so wait at least 24 hours before opening a jar.
- Adjust for altitude. If you live above 1,000 feet, add extra processing time for safe water bath canning. Process half-pint jars for 10 minutes at 0 to 1,000 feet, 15 minutes at 1,001 to 6,000 feet, and 20 minutes above 6,000 feet.
- Use new lids for canning. Bands can be reused if they are in good shape, but flat lids should be new.
Frequently Asked Questions
As written, this Jalapeño Jelly is more sweet than spicy. It has a little kick, but it is not overwhelmingly hot. For a mild jelly, remove all the jalapeño seeds and membranes. For more heat, leave some seeds in or add a hotter pepper.
Be sure to use milder jalapeños if you don’t like it hot.
Yes, frozen jalapeños can work, but thaw them first and drain off any extra liquid. Frozen peppers release more moisture than fresh peppers, and that extra liquid can make the jelly softer.
You did not do anything wrong. Homemade jalapeño jelly often turns out golden or amber because of the peppers, sugar, and cooking process. Store-bought green pepper jelly usually has food coloring added.
Yes. You can make the jelly and store it in the refrigerator instead of water bath canning it. Let it cool, cover it, and refrigerate it. Use refrigerated jelly within a few weeks.
It usually starts setting as it cools, but I like to give it a full 24 hours before serving. Some batches can take a little longer, so do not panic if it looks soft right away.
I do not recommend reducing the sugar in this recipe because it helps the jelly set. If you want a lower-sugar pepper jelly, use a low-sugar pectin and follow the instructions that come with that pectin.
No, I do not strain this recipe. I like the little flecks of pepper throughout the jelly. If you want a clearer jelly, you can strain it, but the texture and yield will be different.
No, this recipe uses vinegar for acidity, so you do not need to add lemon juice.
Yes. Apple cider vinegar works well and gives the jelly a slightly fruitier flavor. White vinegar gives it a cleaner, brighter taste.
Peppers can float as the jelly cools and sets. Finely chopping the peppers helps, and I also like to let the jelly sit for a few minutes after cooking, then stir it well before ladling it into jars.
Troubleshooting
My jelly is runny. What happened?
Runny pepper jelly is usually caused by old pectin, not enough pectin, reducing the sugar, too much liquid from the peppers, not boiling the mixture hard enough, or doubling the batch. Before you worry, let the jars sit for a full 24 hours because the jelly continues to set as it cools. If it still does not set, use it as a glaze or sauce, or reheat it with more pectin, test it again, and reprocess in clean jars with new lids.
My jelly is too firm.
This usually means too much pectin was added or the jelly cooked down too much. If you notice it before jarring, stir in a tablespoon or two of hot water or vinegar to loosen it. If it has already set, warm it slightly before serving and use it as a spread or glaze.
My jelly is too spicy or not spicy enough.
Jalapeños can vary a lot in heat. For milder jelly, remove all seeds and membranes or replace some jalapeños with bell pepper. For hotter jelly, leave in some seeds or add a serrano or other hot pepper while keeping the total amount of peppers close to the recipe.
My jars did not seal.
If a jar does not seal, refrigerate it and use it first. You can also reprocess it within 24 hours using a clean jar and a new lid.
There is foam on top of my jelly.
Foam is normal. Skim it off before ladling the jelly into jars so the finished jelly looks smoother and clearer.
Make Ahead and Storage
- Make ahead: Jalapeño Jelly is a great make-ahead recipe because it needs time to set. I like making it at least a day before serving.
- Pantry storage: Properly sealed jars can be stored in a cool, dark, dry place. For best quality, use within 1 year.
- After opening: Refrigerate after opening. I like to use opened jars within 2 to 3 months for best flavor and texture.
- Unsealed jars: If a jar does not seal, refrigerate it and use it first.
- Refrigerator jelly: If you do not water bath can the jelly, store it in the refrigerator and use it within a few weeks.
- Freezing: Freeze in freezer-safe containers with extra headspace for expansion. Use within 4 months for best quality.
- Check before serving: Do not use jelly if the lid is loose, the seal is broken, the jar smells off, or you see mold.
Ways To Serve and Pairing Ideas
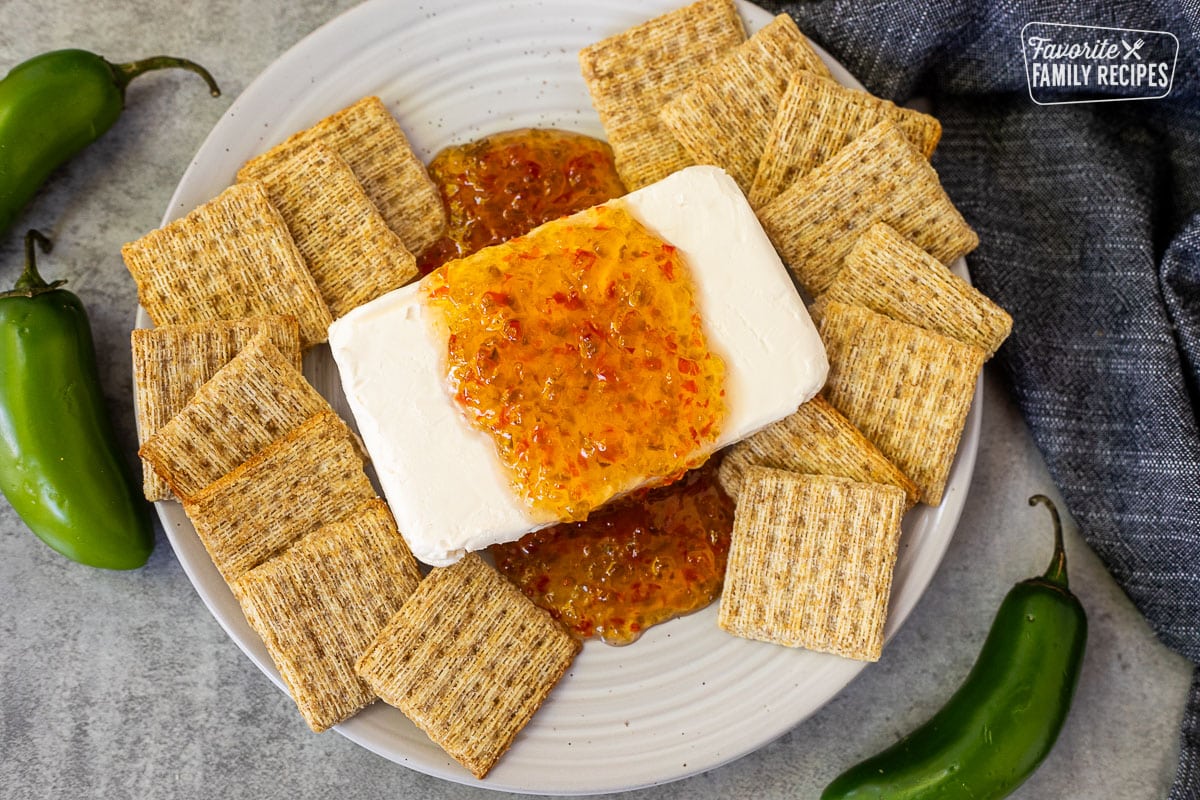
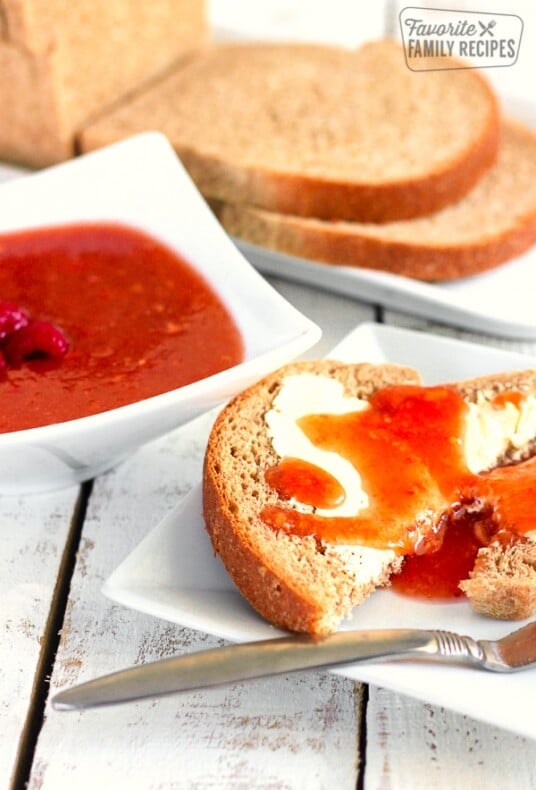
This Pepper Jelly is perfect with appetizers and grilled recipes. My favorite way to serve this pepper jelly is poured over a block of cream cheese with crackers. It takes almost no time, looks pretty on an appetizer table, and people always ask what it is. The sweet heat with the creamy cheese and salty crackers is so good.
Here are more ways to serve and pair it:
- Cream cheese and crackers: The classic, and still my favorite.
- Charcuterie board: Add it next to cheeses, crackers, cured meats, nuts, and fruit.
- Baked brie: Spoon it over warm brie and serve with crackers or toasted baguette slices.
- Goat cheese: Pair it with goat cheese for a tangy, creamy appetizer.
- Coconut shrimp: Use it as a sweet and spicy dipping sauce.
- Chicken tenders or nuggets: A delicious dip with our chicken tenders, Air Fryer chicken nuggets, and Mafa chicken.
- Grilled meats: Brush it over grilled chicken, grilled Malibu chicken, grilled pork chops, salmon, or shrimp.
- Burgers and sandwiches: Use it as a condiment on homemade burgers, turkey sandwiches, ham sandwiches, or grilled chicken wraps.
- Tacos: Add a little to chicken, pork, or fish tacos.
- BBQ sauce mix-in: Stir a spoonful into barbecue sauce for a sweet and spicy glaze.
- Roasted vegetables: Toss warm pepper jelly with roasted carrots, Brussels sprouts, or sweet potatoes.
- Meatballs: Use it as a quick sauce for appetizer meatballs.
More Jam and Jelly Recipes
This Jalapeño Jelly is sweet, tangy, and just spicy enough to keep you coming back for another bite. Serve it over cream cheese, add it to a charcuterie board, brush it over grilled meat, or wrap up a few jars for gifts. If you try this recipe, leave a comment and rating below. I would love to hear how you served it!! 🌶️💛
Jalapeño Jelly (Pepper Jelly)

Video
Ingredients
- 1 red bell pepper, (medium sized)
- 1 green bell pepper, (medium sized)
- 10 mild jalapeños, (medium sized)
- 1 cup white vinegar, (or apple cider vinegar)
- 1/2 teaspoon salt
- 6 cups sugar
- 1 (6-ounce) pouch Certo liquid fruit pectin, (usually by the Jell-O in grocery stores, if you can't find a 6-ounce pouch you can use 2 3-ounce pouches)
Instructions
- Rinse the jalapeños and remove the stems and seeds. Leave some seeds in if you want the jelly spicier. Finely chop the jalapeños, red bell pepper, and green bell pepper in a food processor or blender. You should have about 3 cups chopped peppers.

- Add the chopped peppers, vinegar, salt, and sugar to a large heavy pot. Bring to a full rolling boil over medium-high heat. Boil for 5 minutes, stirring often.
- Start by adding only 3 ounces of the liquid pectin. Stir well and boil for 1 minute. Skim off any foam that forms on top. Do a consistency test by spooning a little hot jelly onto a cold plate. Let it sit for 1 to 2 minutes, then tilt the plate. If it slowly thickens and moves like thick syrup, it is ready. If it is too runny, add more pectin 1 ounce at a time, boil for 1 minute, and test again.
- Ladle the hot jelly into clean half-pint canning jars, leaving ¼ inch headspace. I like to use a canning funnel to prevent spills. Wipe the rims with a damp paper towel. It should fill about 6-8 half pint jars or 3-4 pints. Add lids and screw bands on until fingertip tight.
- Process jars in a boiling water bath for 10 minutes, adjusting for altitude if needed. Remove jars using a canning jar lifter and let them cool undisturbed for 12 to 24 hours.
- Once the jars have cooled, remove the bands, check the seals, label the jars with the date to track freshness, and store in a cool, dark, dry place. Let the jelly set for at least 24 hours before serving.
- Serve over cream cheese with crackers, or use as a glaze, dip, or spread.


Equipment
- half-pint canning jars
- lids and bands
- Water Bath Canner
- jar lifter
- magnetic lid wand
- funnel (optional)
Notes
- Wear gloves when handling jalapeños.
- Remove seeds and membranes for a milder jelly.
- Leave some seeds in for a spicier jelly.
- Use fresh pectin for the best set.
- Start with half the liquid pectin and add more only if needed.
- Do the plate test before filling jars.
- Do not reduce the sugar unless using a pectin made for low-sugar recipes.
- Do not reduce the vinegar if you are canning.
- Jelly may look loose while hot but will thicken as it cools.
- Let jars sit for 24 hours before serving so the jelly has time to set.
- If a jar does not seal, refrigerate it and use it first.
- Properly sealed jars are best used within 1 year for best quality.
- Refrigerate after opening.
Nutrition
Nutrition information is automatically calculated, so should only be used as an approximation.
Love this recipe?
We want to hear from you! Please leave a review.
It was easy and taste great!!
So glad it turned out so well for you!
Thank you for sharing this recipe! Each and every time I take these to gatherings, they disappear, I am always asked for the recipe. Thank you so much for this delicious jalapeno jelly 🤙🏽🤙🏽
So glad it has been a hit for you! I always get the same reactions too, everyone loves it!
I’m not sure why this recipe calls for so much liquid pectin. It’s SOOOO thick. The flavor is incredible, but it’s a little thicker than what I normally like. Can I cut back to one pouch of pectin without compromising the shelf life?
Yes you can definitely cut back to one pack of pectin! Some people have success with 3 oz, others 6 oz is just right. I noted this on the recipe to be more clear and also provided some clarity on how to test it BEFORE canning so you know how it will turn out. Hopefully that will help for your next batch!
Can I use the powder pectin in my pepper jelly?
We have not made it with powder pectin, so I can’t say yes confidently. It should work fine though if you follow the instructions for using powder pectin.
Can you use powder pectin like sure jell in the pepper jelly
From what I have read they are similar in the way they work but might not be directly interchangeable due to different gelling strengths.
I made this yesterday, followed instructions as stated, the only 2 things I changed was after chopping veggies in food processor I did squeeze the excess fluid in a strainer and I didn’t include jalapeño seeds due to jelly coming out too hot on some of the reviews. My jelly came out beautiful, mild and the taste is amazing. Thank you for sharing this recipe ❤️
So glad this tuned out so well! Great idea to strain out the excess fluid. It’s so hard to tell how watery the peppers will be!
I don’t care for bell pepper is there any other pepper I can use or just use more jalapeno s?
You can definitely use more jalapeños, it will probably be a bit hotter though. Could you do a milder bell pepper like a yellow or orange? I typically don’t like green bell peppers but don’t mind other ones, plus this jelly does not taste like bell pepper at all, the flavor of the bells aren’t strong in this. Let me know what you decide to do and how it turns out!
The only thing that is consistently with almost every jelly recipe. No one mentions how much it makes. If I’m trying to make 60 8 Oz jars for example I need to know what to buy.
This recipe should make between 5-6 8-ounce jars. It can vary depending on the size of your peppers. Hope this helps!
I have made this twice and both times it has tiny pieces of pectin in it. I am culinary trained and followed the recipe exactly. None of my other jelly’s and jams do this. I can’t figure it out. I got all the foam off and it was at the right temperature. BTW, it only makes 5 half pints. Am I squeezing too much juice out? I had three cups of peppers. Driving me crazy!
Next time you make your pepper jelly, treat the pectin like it’s temperamental. Instead of adding it to the mixture hot, try whisking it really well into cool or just-warm pepper juice (or into the juice before adding sugar, if using powdered pectin), and give it time to fully dissolve before you bring everything to a hard boil. Make sure all the sugar is completely dissolved and you’re stirring constantly once it gets hot so there are no “hot spots” or tiny clumps hiding on the bottom. If you’re pressing the pepper mixture through a jelly bag, go a bit gentler so you’re mostly getting clear juice, not extra fine pulp. A brief rest off the heat (2-3 minutes) with a gentle stir before you ladle into jars also helps keep the texture smooth and speck-free.
Hope this helps!
I have a question. How do you keep the bell peppers and jalapenos from floating to the top when you pour the jelly into the hot jars? I’ve tried stirring them before I put the lids on, but it didn’t help much.
The peppers float because the mixture hasn’t thickened enough before it goes into the jars. The best fix is to let the jelly cook just a little longer so it thickens and suspends the peppers better. You can also let the jelly rest for 3–5 minutes after cooking, then give it a good stir before filling the jars. If they still float a bit, wait until the jelly starts to set, then gently flip the jars over and back upright a few times to help redistribute the peppers. Once the jelly finishes setting, everything should stay evenly mixed. Hope this helps!
LOVE this pepper jelly and EVERYONE that I have given it to loves it too!
So glad it has been such a hit with you and your friends! Thanks for sharing!
Saw on another recipe that shouldn’t double the recipe because it will not set up right??? Is this true? Can I double? Or triple or…. I have 5 lbs of jalapenos 😬 also have liquid pectin. Will that work? If yes. How much? Sorry for questions. Have never made this before.
Great questions! For this jalapeño jelly recipe, it is best not to double or triple the batch. Larger batches take too long to reach a full rolling boil, which can prevent the jelly from setting properly. You will get the most reliable results by making multiple single batches.
Liquid Certo works well for this recipe. Use one 6-ounce pouch per batch, or two 3-ounce pouches. Since you have plenty of jalapeños, it is better to repeat the recipe as written rather than scaling it up. Hope this helps!
Loved the recipe. I doubled it and it made 15 jars. Since I’ve already given 5 jars away to friends and family, I plan to make another batch. The next batch will be a little more spicy. I didn’t use the green pepper in the first batch and still won’t do that, but on the first batch I removed all seeds and membranes from the jalapeños. On the second batch I’ll leave some in. Here is Texas we like food a little spicy! Both versions will be awesome! Thanks for the recipe!
I agree! I like it a little more on the spicy side as well! So glad this was a hit for you!
Can tri color bell peppers be used instead of the green bell pepper?
Yes, you can use any color bell pepper in this recipe. Thanks for asking!