We may earn a commission when you click on the affiliate links in this post.
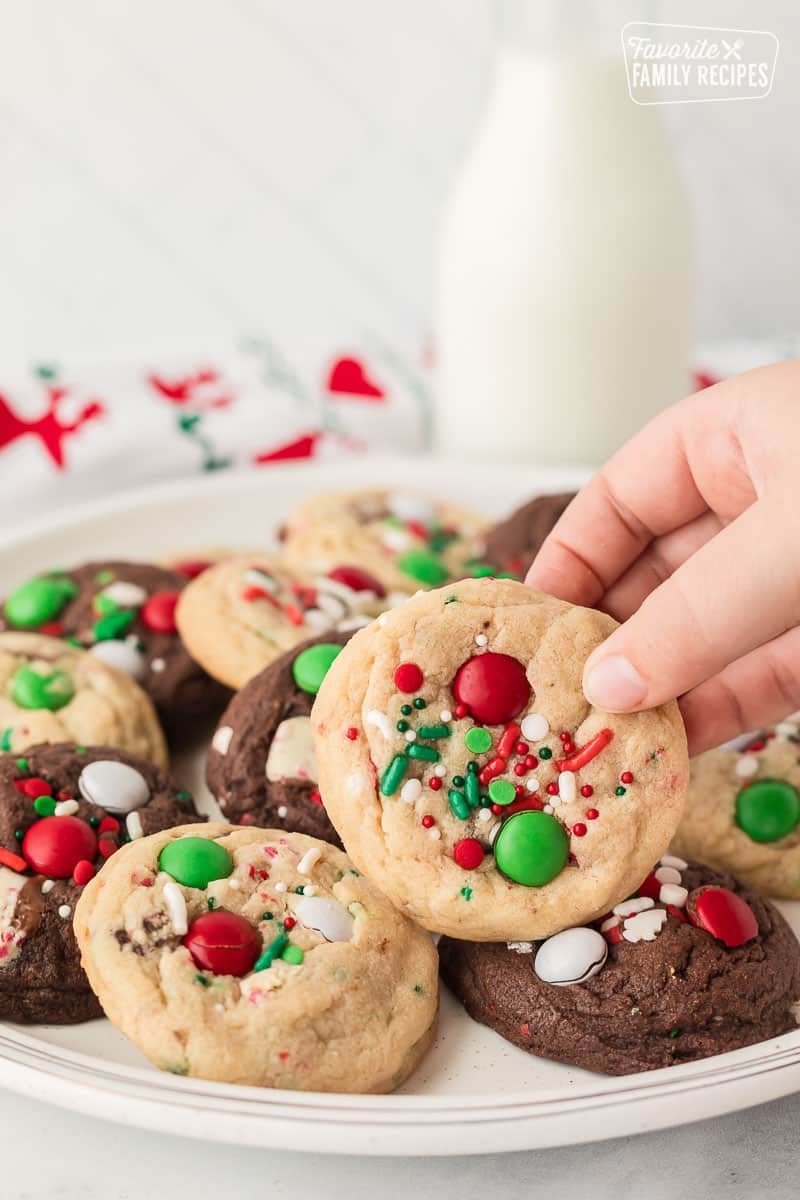
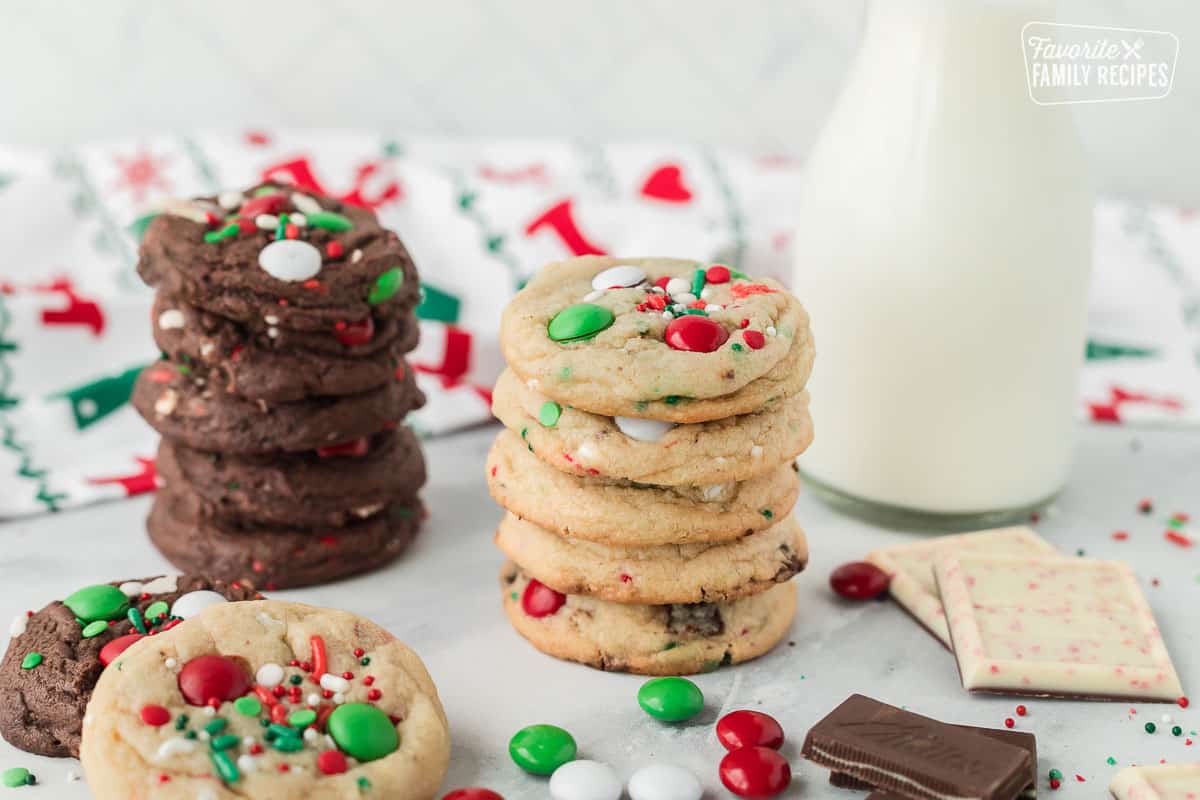
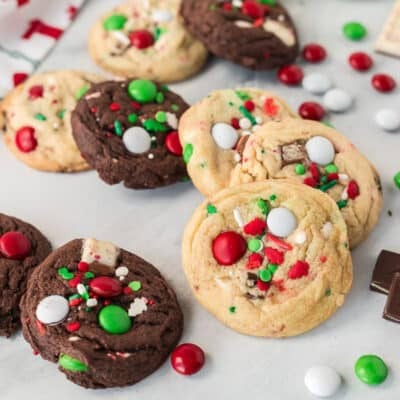
These Elf Cookies are much like the ever-popular “Monster Cookies” but we decided to kick them up a notch by making them “Christmas Style”. What elf wouldn’t want a cookie filled with tons Christmas candy?
The Cookie Dough
Everyone needs a good base cookie dough recipe. You know, one of those easy cookie recipes that you have memorized but make different each time depending on the mix-ins. We have tried this cookie dough recipe with several different mix-in ideas, but we think we found the best mix-in…. Christmas candy! And LOTS of it!
Ingredients in Elf Cookies
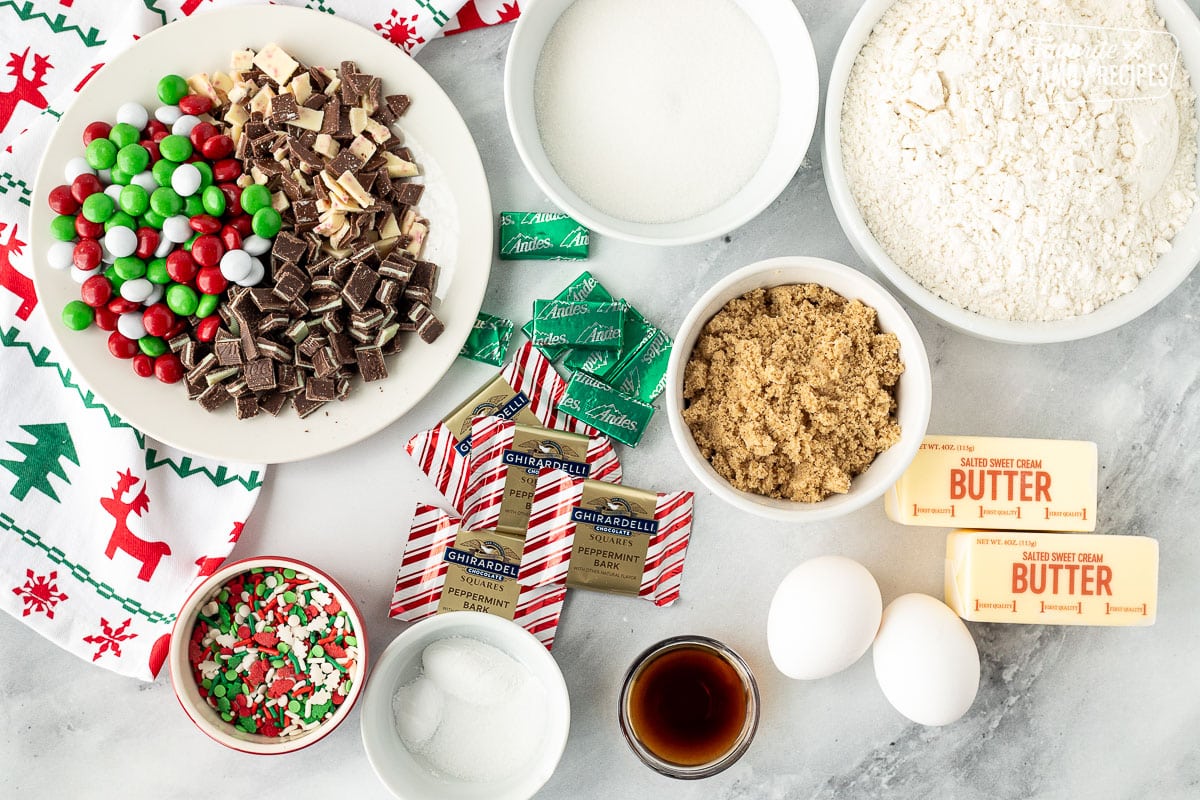
- Butter
- Granulated sugar
- Packed brown sugar
- Egg
- Egg yolk
- Vanilla extract
- All-purpose flour
- Baking powder
- Salt
- Baking soda
Mix-Ins Not To Miss
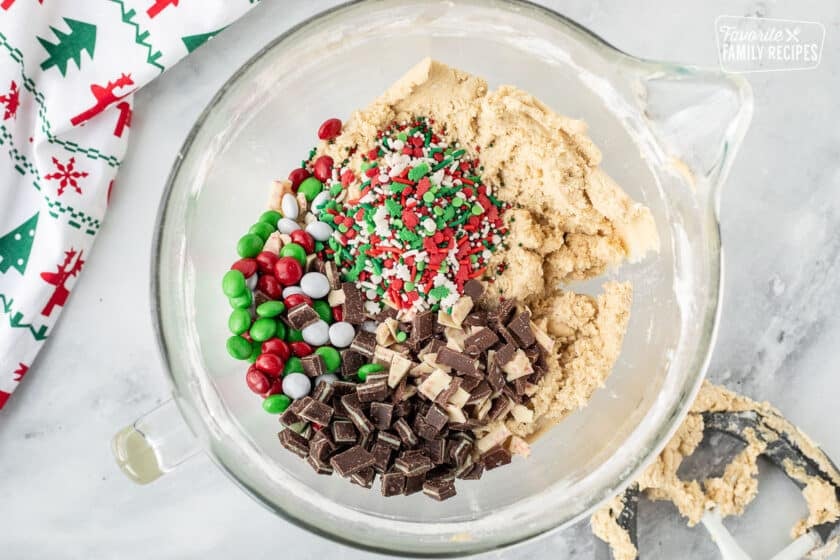
These would be great with any kind of Christmas candy, but the mix-ins we chose, specifically, include: Candy-coated chocolate candies (M&M’s), chocolate dinner mints (creme de menthe mints), white chocolate peppermint bark, and Christmas SPRINKLES! Here are some other mix-in ideas that even Buddy the Elf would approve of:
- Mini Marshmallows
- Pecans, almonds, or walnuts
- Chopped up chow mein noodles or pretzels
- Drizzle some chocolate syrup, or melted chocolate over the top with a piping bag
- Frost with some chocolate frosting
- Milk Chocolate candies like Hershey Kisses
- Crushed candy canes
- Crush cinnamon sugar pop tart pastries
- White chocolate chips – you can can melt the white chocolate and use food coloring to make it different colors.
- Marshmallow bits
- Graham crackers
- Chocolate chips or peanut butter chips
- Toffee bits
Step by Step Instructions

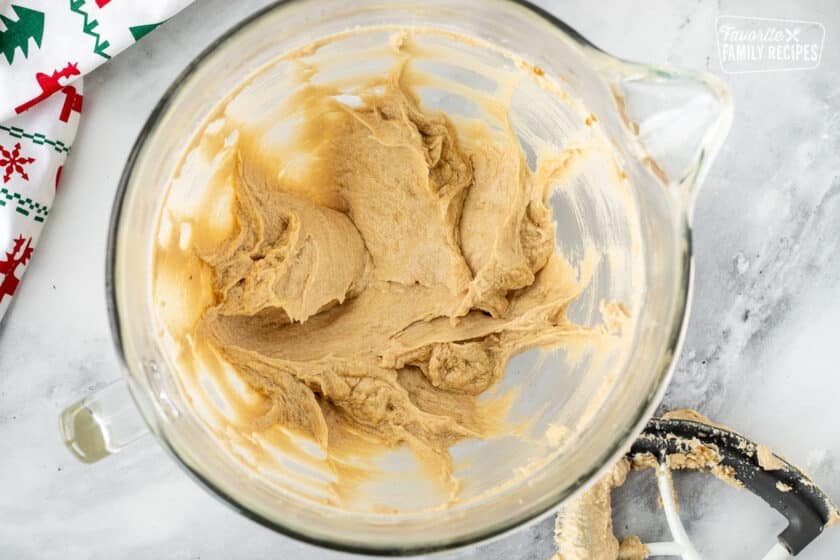
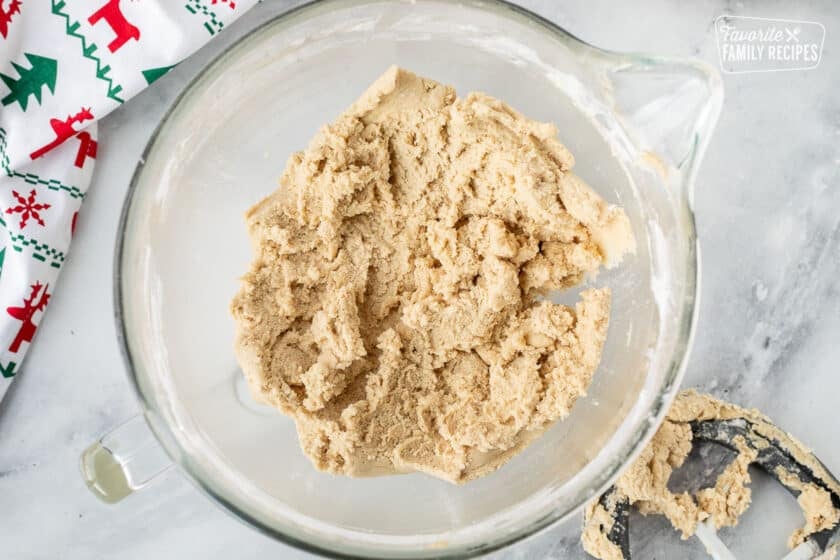
- Make the Dough – Preheat oven to 375°F. In a large bowl, beat together the brown sugar, granulated sugar, butter, egg, egg yolk, and vanilla until smooth. Add the flour, baking powder, salt, and baking soda and mix until combined. If making chocolate cookies, mix in the cocoa powder.

- Add the Mix-Ins – Fold in the peppermint bark, chocolate candies, chocolate dinner mints, and sprinkles until evenly distributed.

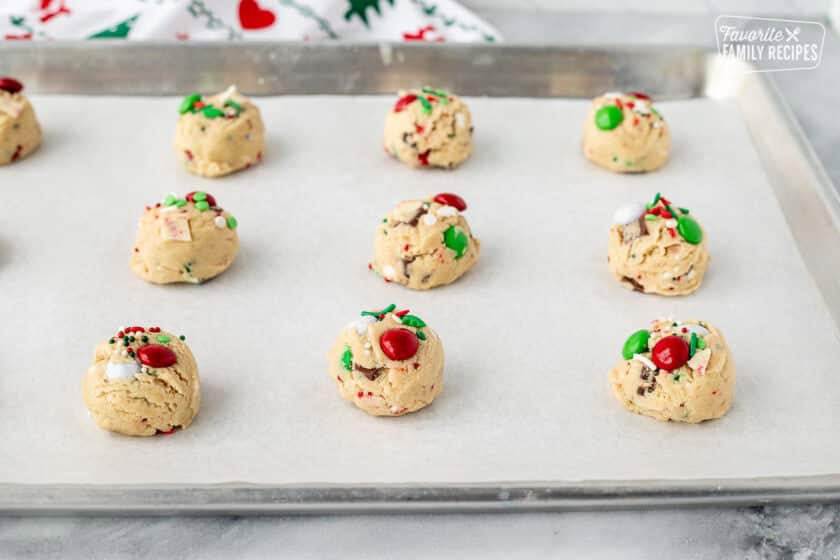
- Scoop the Cookies – Drop rounded tablespoonfuls of dough onto ungreased baking sheets about 3 inches apart. Top with extra candies, if desired.
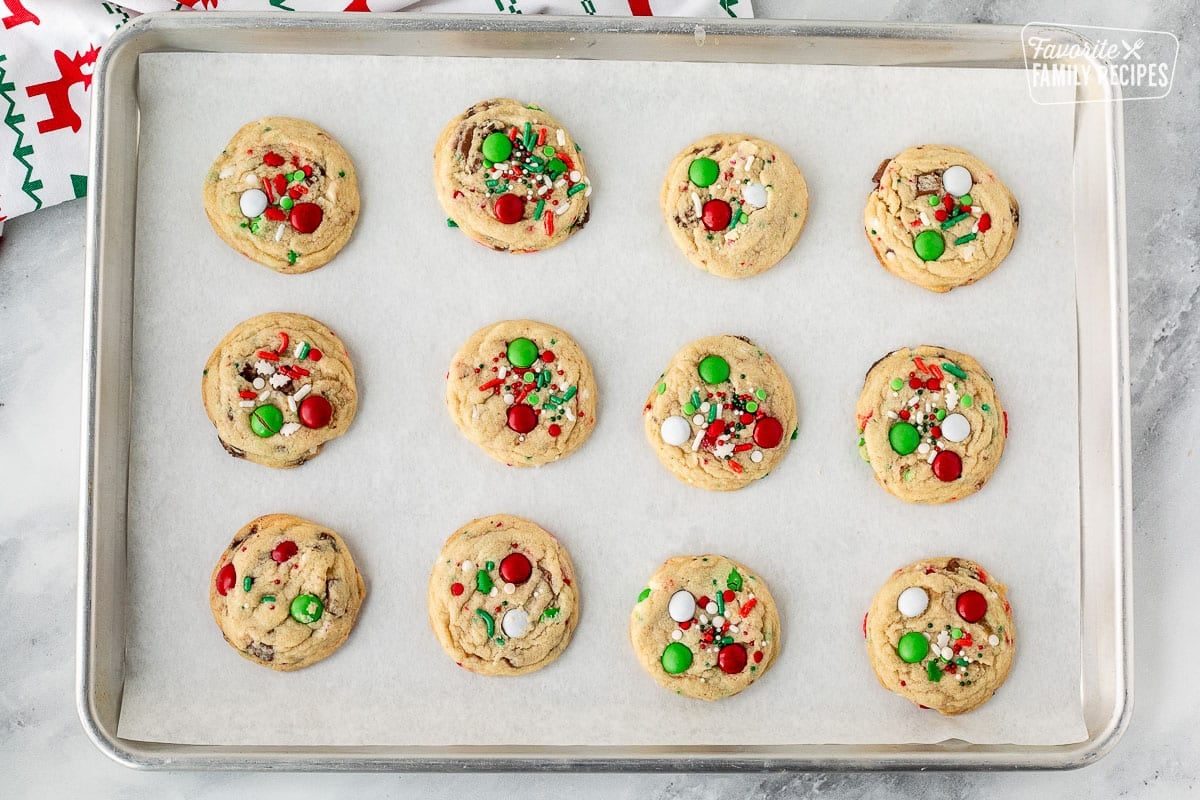
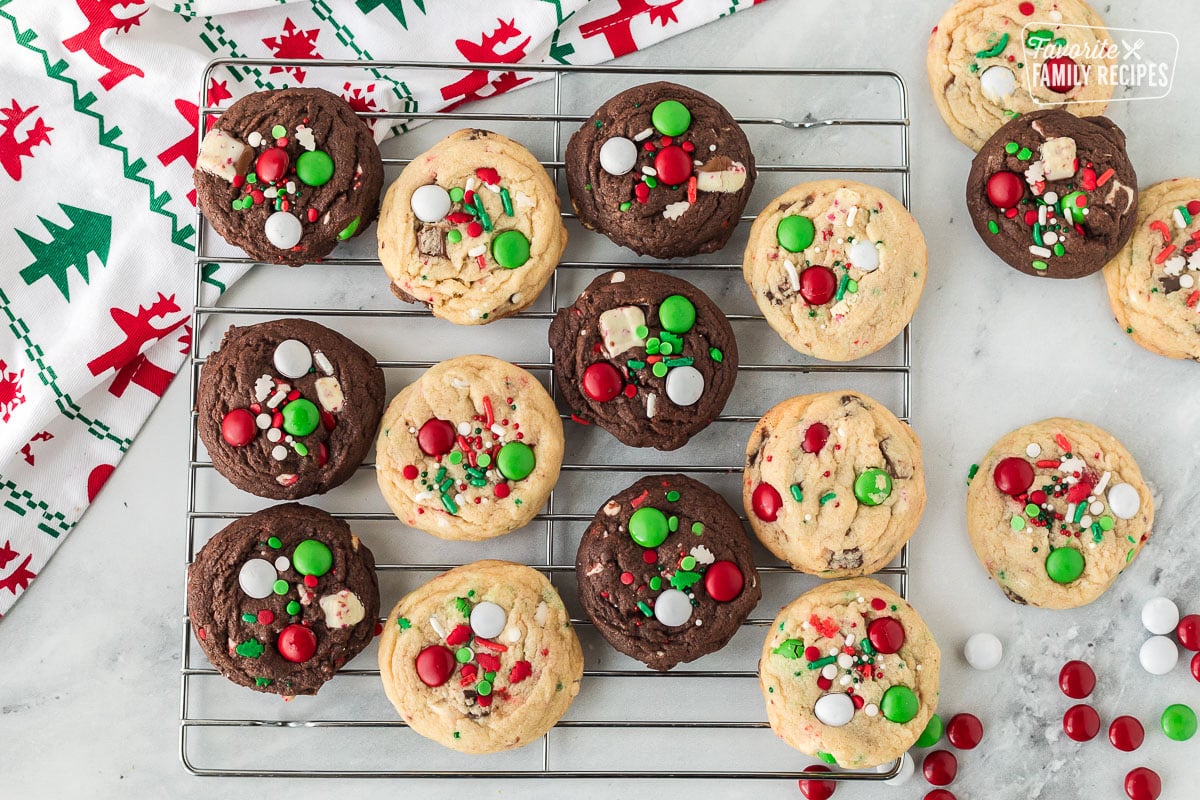
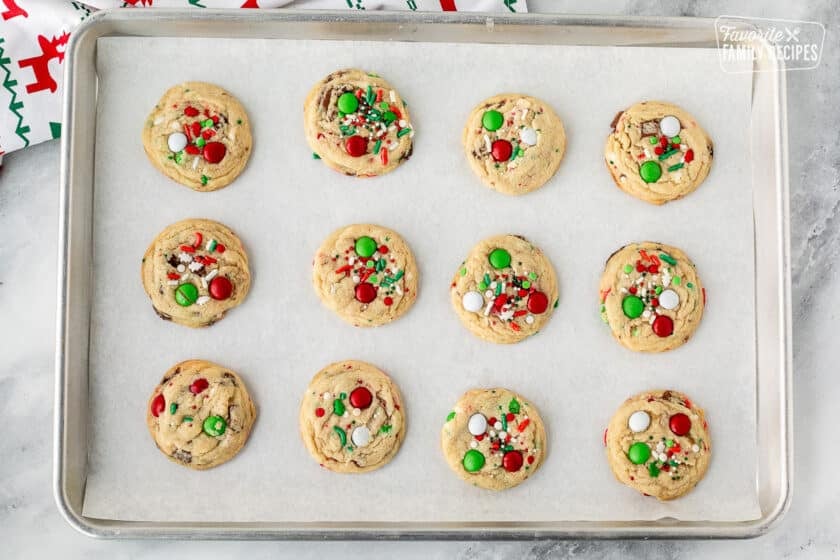
- Bake and Cool – Bake for 10-12 minutes, until the edges are lightly golden. Cool for 1 minute on the baking sheet, then transfer to a wire rack to cool completely.
Make Elf Cookies Part of the Party
This would be such a fun recipe to use for a family activity, birthday party or holiday party for kids or teenagers. Have all the kids make their own recipe creations by dividing up the dough and letting them choose which Christmas candies they want in their Elf Cookies. Have all the Christmas candy out in bowls and give them an allotted amount of “scoops.” So many possibilities! Kids love being able to come up with their own creations in the kitchen. This is the perfect opportunity to let them do just that! Everyone loves homemade cookies, especially when they are warm out of the oven. Serve them up with a tall glass of cold milk or a hot mug of cocoa. Does a party get any better than that?
Elf Cookies as Gifts
Share the magic and yummy taste of these darling Elf Cookies with friends and neighbors for the holidays! Package up a few of the cookies in a festive box or cellophane bag tied with holiday ribbon and give them to all your favorite people.
Make a Double Batch
This recipe can be made a day or two ahead or frozen for later use, which makes it even more convenient for holiday gatherings or parties. Or make a double batch of dough to save for later. Here’s all you do:
- Tightly wrap leftover dough in Saran wrap.
- Place the wrapped dough in a freezer bag.
- Freeze dough for up to two months.
- OR you can also freeze fully cooked cookies in a freezer bag.
“I loved how there was peppermint IN the cookie! Such a great idea!”
Beth
“LOVE how festive these cookies are! Beautiful yet simple! I can’t wait to try them!”
Jennifer
Frequently Asked Questions
Push the sides of the cookie very lightly with a spatula or butter knife. If the edge stays firm and doesn’t fall inwards, then your cookies are done. If you leave a noticeable indentation, then your cookies need a few more minutes to cook.
Cookies can stay good for up to two weeks, but taste best fresh. If I make them for an event, I like to make them within 24 hours of when I need to serve them. Or, if I want to make them way ahead, I will make them and freeze them.
Tightly wrap leftover dough in Saran wrap. Place the wrapped dough in a freezer bag and freeze dough for up to two months. OR you can also freeze fully-cooked cookies in a freezer bag.
Read Next: Christmas Cookie Recipes
More Holiday Treat Recipes
If you are looking for even more Holiday treats, we have desserts that make perfect gifts or simply make your home a little sweeter this time of year.
- Christmas Dessert Ideas
- Easy Fudge Recipes
- Chocolate Cherry Mice
- Muddy Buddies
- Mom’s Traditional Christmas Caramels
- Peanut Clusters
- Hot Cocoa Mix
Elf Cookies
Ingredients
- 1 cup butter, (softened)
- 3/4 cup granulated sugar
- 3/4 cup packed brown sugar
- 1 large egg
- 1 large egg yolk
- 2 teaspoons vanilla extract
- 3 cups all-purpose flour
- 1 teaspoon baking powder
- 3/4 teaspoon salt
- 1/4 teaspoon baking soda
- 1/3 cup cocoa powder, optional, for chocolate cookies
- 1/2 cup white chocolate peppermint bark
- 1/2 cup chocolate candy coated candies
- 1/2 cup chocolate dinner mints, or creme de menthe mints, chopped
- 1/3 cup sprinkles
Instructions
- Preheat oven to 375°. Using a stand mixer or hand mixer, mix brown sugar, granulated sugar, butter, egg, egg yolk and vanilla in large bowl until well combined.

- Add in flour, baking powder, salt, and baking soda and mix until blended.(Dough will be soft and creamy.) If making chocolate cookies, add cocoa powder (optional) and mix until smooth.
- Add peppermint bark, chocolate candies, chocolate dinner mints, and sprinkles into the dough and fold in with a spoon or spatula until well mixed.
- Drop dough by rounded tablespoonfuls onto ungreased baking sheets 3-inches apart. Top with more candies if desired.
- Bake 10 to 12 minutes until edges are lightly golden. Cool 1 minute on wire rack; remove from baking sheets and cool completely.
Notes
- Tightly wrap leftover dough in Saran wrap.
- Place the wrapped dough in a freezer bag.
- Freeze dough for up to two months.
- OR you can also freeze fully cooked cookies in a freezer bag.
Nutrition
Nutrition information is automatically calculated, so should only be used as an approximation.
Love this recipe?
We want to hear from you! Please leave a review.
it is really fun!
I want to make these for Christmas for the children in my family. When you say to STIR in the Flour, is that with a Spoon or with the Mixer that you were already using ? When adding the M & M’s is that before you Bake them or when removed from the oven ? Thanks ! Merry Christmas !
Sorry, that is a little confusing – use the mixer to combine the flour with the other ingredients. When you add the mix-ins, use a spoon or spatula to fold them in. And we added M&Ms to the dough and a few on top for looks! Hope this helps! Have fun making them with your family!
I loved how there was peppermint IN the cookie! Such a great idea!
Love these cookies! They have great flavor and are so fun and festive!
These cookies are so fun & colorful! They have so many yummy ingredients!!
SO excited to make these cookies for the Christmas time! I just know my kids will LOVE them!
LOVE how festive these cookies are! Beautiful yet simple! I can’t wait to try them!
how many cookies will this batch make?
It should make 4-5 dozen cookies depending on how big you make them. Hope this helps!
Silly question, I have never used Country Crock before. What difference might I notice with this recipe if I substituted unsalted butter for the Country Crock? Thanks!
The nice thing about using the Country Crock is that it is PERFECTLY softened… which sometimes it is tough to do with regular butter. You could try using butter but I can’t guarantee it will turn out the same. Do you have Country Crock available at your store?
Thanks for writing, Erica! I will check and see if my store carries Country Crock. Is there just one variety of it?
We use Country Crock on everything and I never thought about baking with it. Excited to try these!
Right? To be honest this was my first time using it to bake and it worked out awesome. You don’t have to wait for it to soften, it is already the perfect consistency for baking!