We may earn a commission when you click on the affiliate links in this post.
If you’re new to hard-boiled eggs, we can help. Learn how to make easy-to-peel hard-boiled eggs by following these simple techniques.
Why This is My Go To
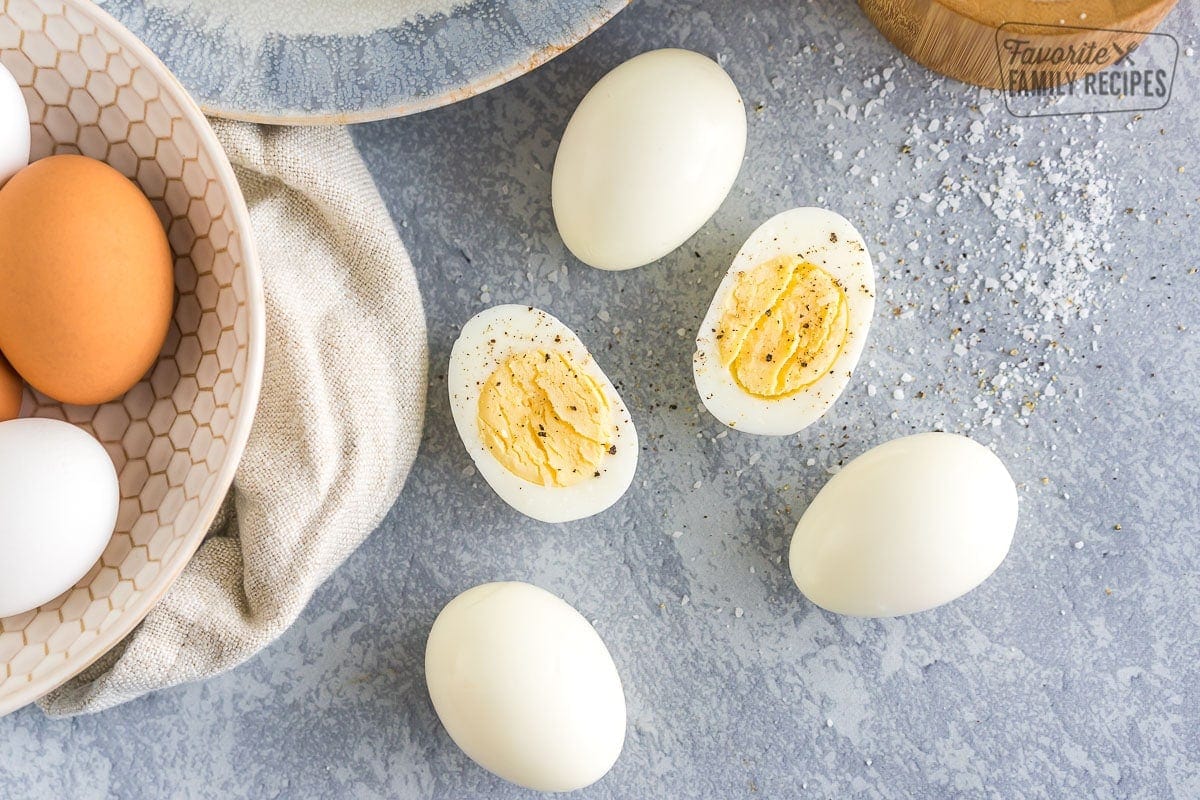
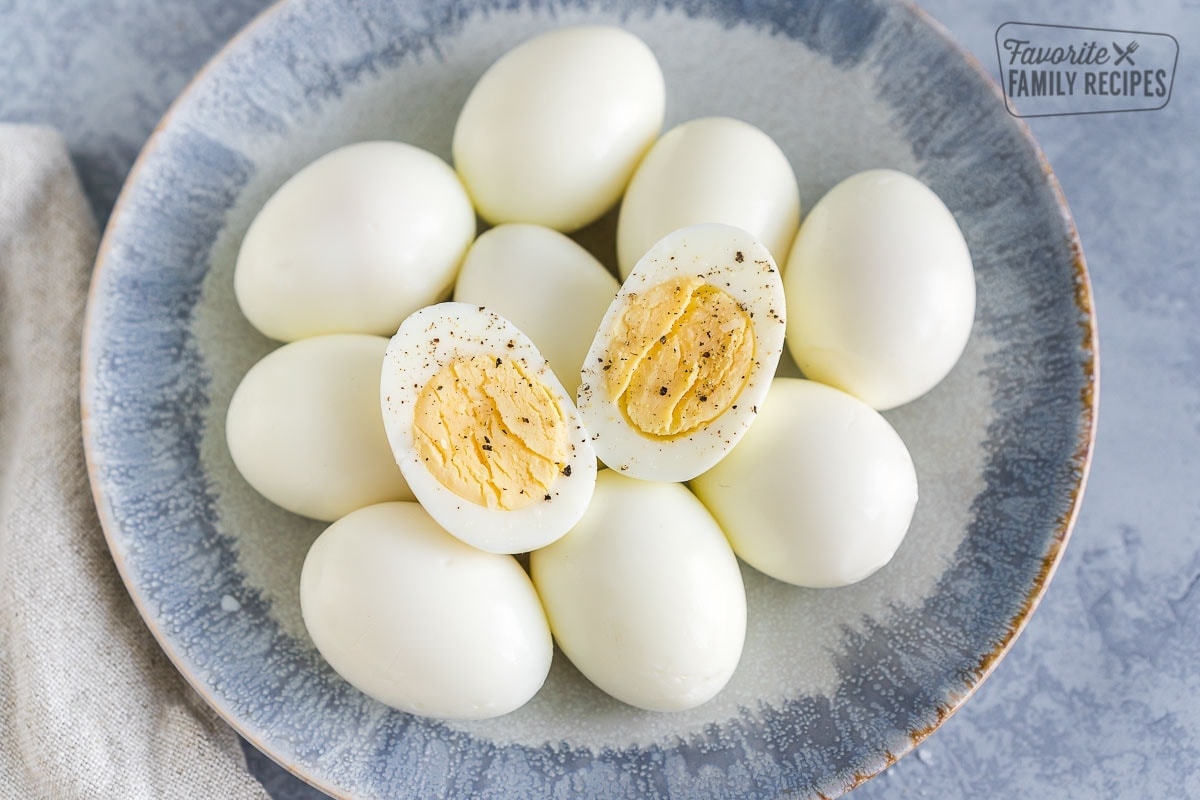
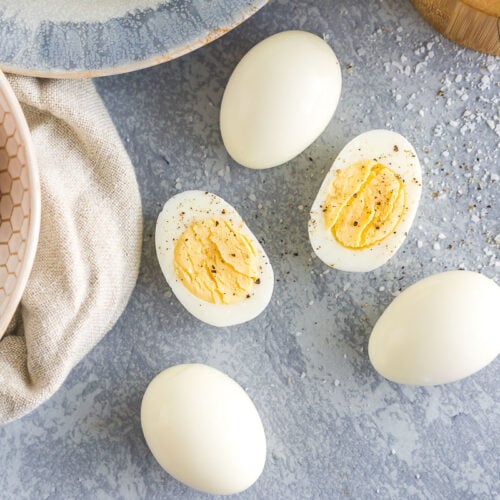
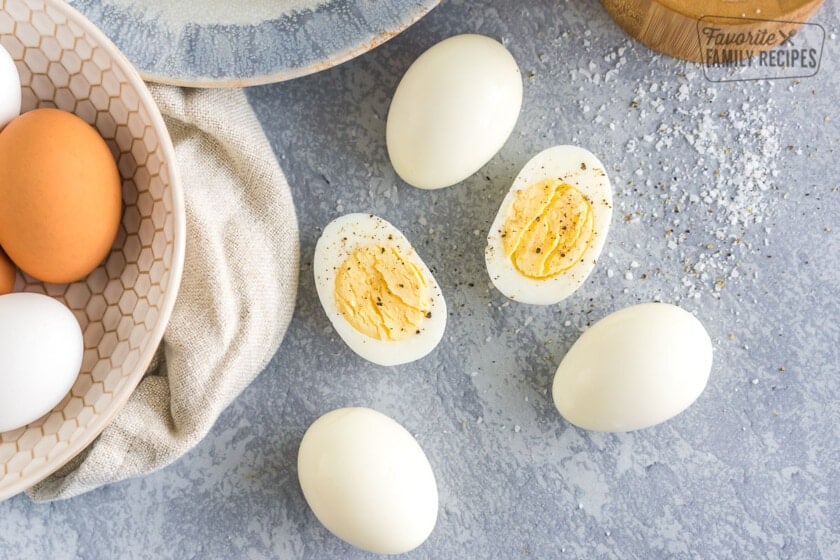
In my book, there are two characteristics to the perfect hard boiled egg: they can’t have any grey-ish rings around the yolk and they also have to be easy to peel! Before practicing this method, it was such a gamble to get it right. Not anymore! Now they’re cooked to perfection every time. In this post, you’ll see how easy it is to make beautiful hard boiled eggs for every occasion! Whether you’re dyeing Easter eggs, craving a simple Egg Salad Sandwich, or whipping up a batch of Easy Deviled Eggs to snack on, this method will give you smooth, hard, yet creamy yolks without the unappetizing green or grey ring.
Ingredients (Including our Secret Ingredient)
- Eggs – This hard boiled eggs recipe works the best with large eggs to medium eggs. If you are using small, medium, or jumbo eggs, you will need to adjust the cook time. If you are using farm fresh eggs, you will want to wait one to two weeks before hard boiling them. For store bought eggs, you can hard boil them about three days after you buy them. If the eggs are too fresh, the membrane will be too strong and it will be extremely hard to peel away the shell without ripping the egg whites.
- Salt – The reason you salt the water is actually to safe guard the egg if it cracks. The egg white will solidify in salty water faster than unsalted water. So, if the egg cracks while boiling, the salty water will help to quickly stop up the crack.
- Baking Soda – This is the secret ingredient! Baking soda helps to loosen the membrane inside the shell. It changes the pH of the egg white. This makes the egg so much easier to peel.
- Water – You’ll need water to boil the eggs and for an ice bath afterwards.
- Ice – Make sure you have ice on hand for the ice bath. The colder the water, the more the egg will contract and pull away from the shell, making it easier to peel.
Step by Step Instructions
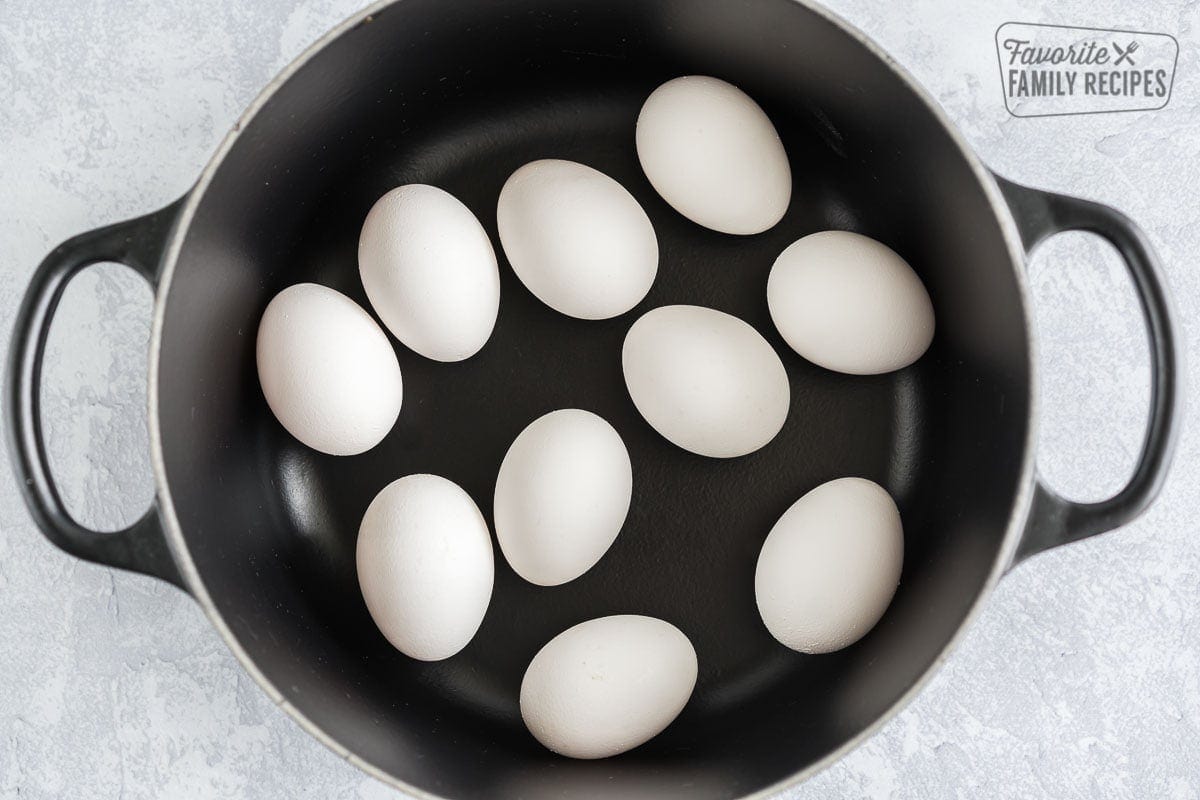
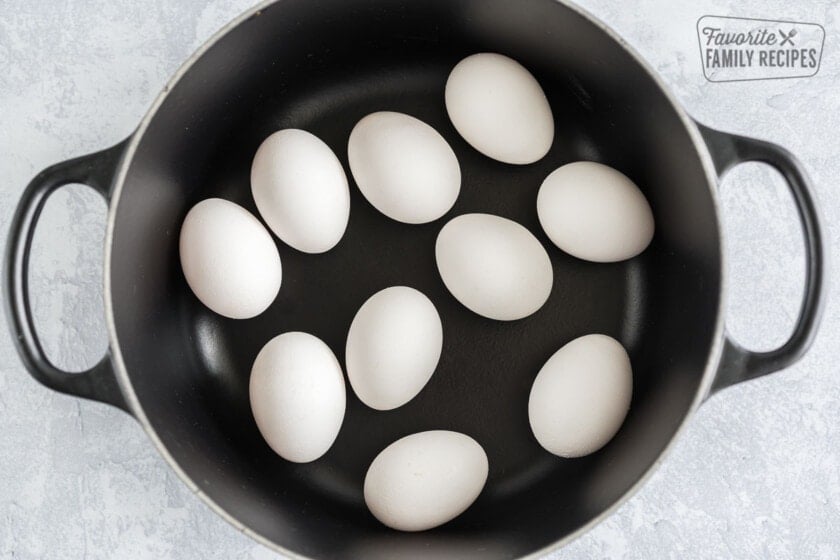
- Place eggs in pot: Arrange eggs in a single layer in the bottom of a large pot.
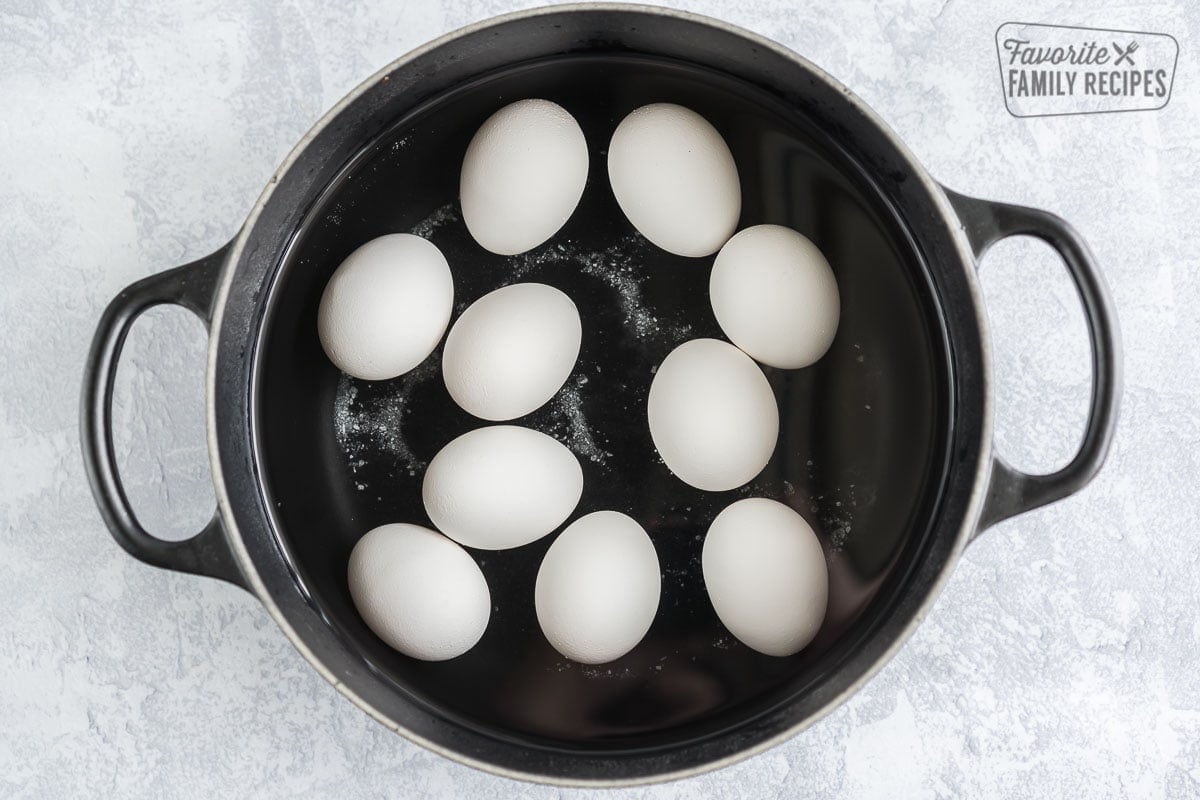
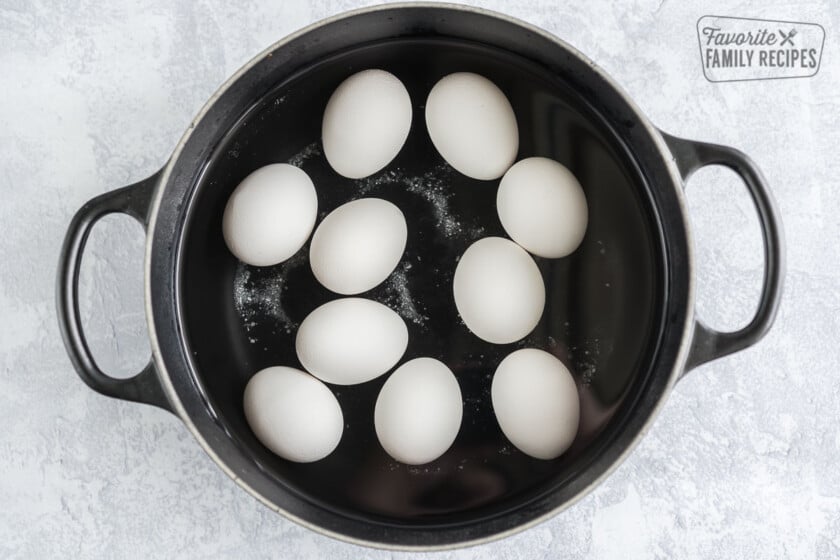
- Add water, boil, then let sit: Fill the pot with cold water until the eggs are covered by 1-2 inches. Add the salt and baking soda, then bring the water to a boil. Once boiling, reduce heat to medium and boil for 1 minute. Cover the pot, remove from heat, and let the eggs sit for 10 minutes.
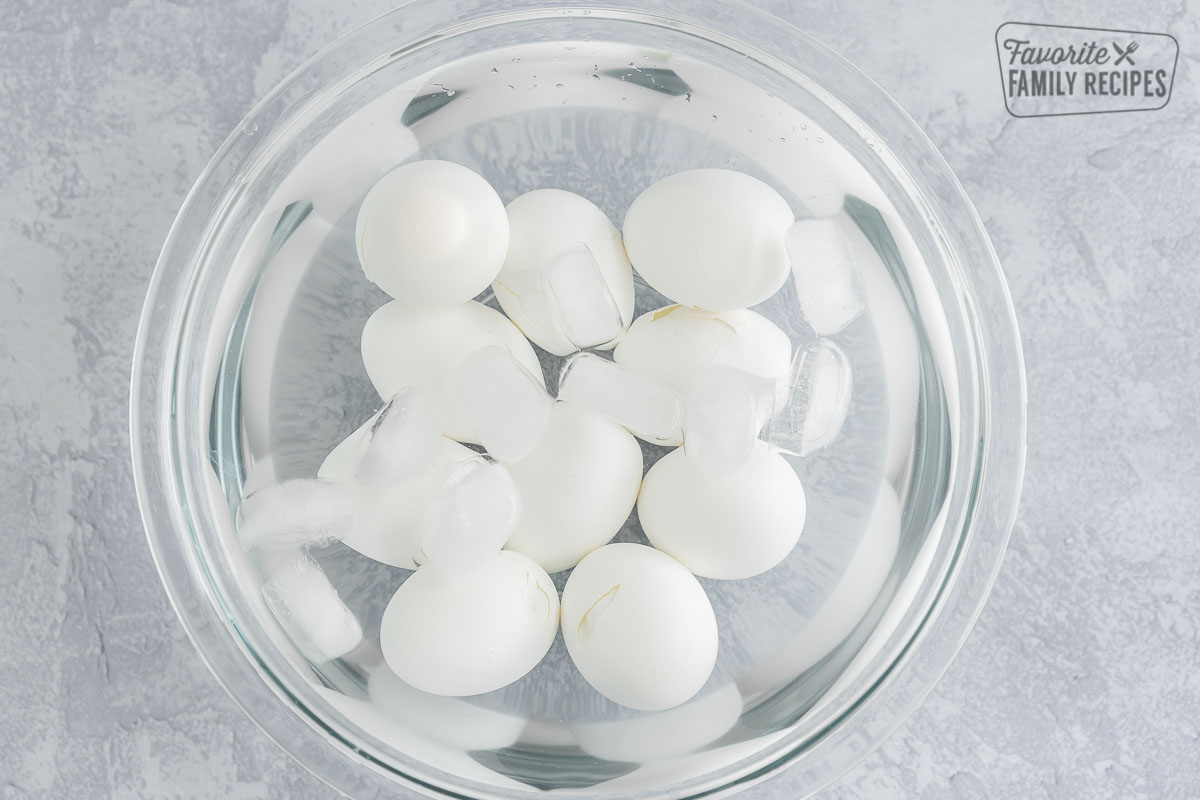
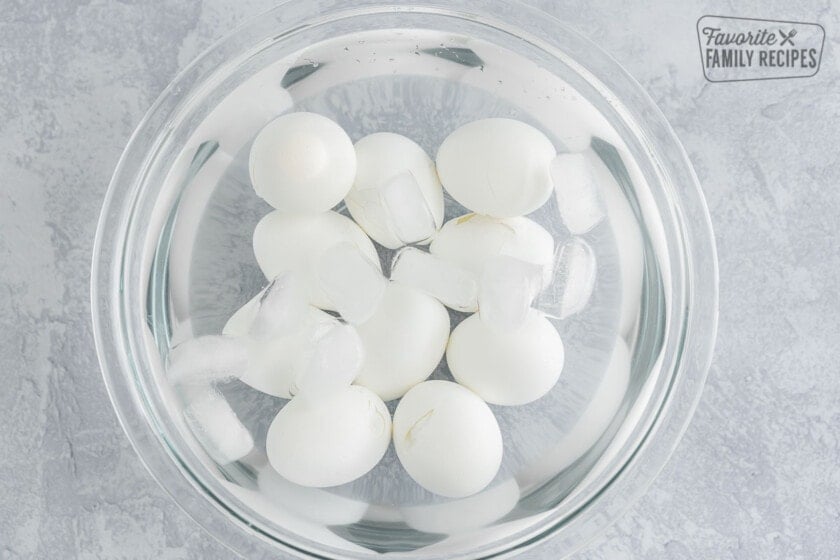
- Cool: Drain the water and transfer eggs to an ice bath for about 10 minutes, until cool.
- Crack and peel: Crack the shells gently and peel.
Pressure Cooker Method
If you have a pressure cooker or an Instant Pot, make sure to check out our Instant Pot Hard Boiled Eggs recipe!
How Long To Boil Eggs
After eggs have been removed from the heat, allow them to sit in the hot water (covered) for the amount of time specified depending on how well cooked you want the eggs to be:
- For soft-boiled eggs with a runny yolk, let them sit for about 4-6 minutes.
- For medium-boiled eggs with a slightly jammy yolk, let them sit for about 8-9 minutes.
- For perfect hard-boiled eggs with a fully cooked yolk, let them sit for about 10-12 minutes.
Common Mistakes
- The first common mistake people make is adding cold eggs straight from the refrigerator into a pan of already boiling water. This shocks the eggs and increases the chance that they will crack.
- Another mistake people make is not using a timer. The key to making perfect eggs on the inside is to not over boil, even by a minute. If they’re too hot for too long, you will get that green ring around the yolk.
- This one is a big one. If you make deviled eggs or egg salad from hard-cooked eggs, they will only be good at room temperature for two hours. If you are having a picnic or a party longer than that, then make sure you put it back in the fridge. Making this mistake can lead to food poisoning or other food borne illness.
More Ways to Prepare Eggs
Growing up, I only thought eggs could be prepared one way: scrambled. That’s the only way I liked them. But as I’ve gotten older I realized there’s a whole world of preparing eggs that give you and your family tons of yummy options! And they’re easy to do too!
- Instant Pot Boiled Eggs – if you’re pressed for time, or just love your instant pot, try this easy recipe for boiled eggs. They’ll turn out perfectly every time.
- How to Make Scrambled Eggs – Scrambled eggs are an easy, filling meal that fill in the cracks when you’re running low on ideas in the kitchen. We love making a big batch of scrambled eggs for dinner too. It’s a great way to use up older eggs.
- Fried Eggs – This recipe gives you all sorts of options for cooking fried eggs, different methods and how to cook them, from small eggs to extra-large eggs.
- How to Make Basted Eggs – Basted eggs are one of the easiest and tastiest ways to prepare an over-easy egg that is perfectly cooked every single time.
Frequently Asked Questions
Hard boiled eggs will last a week in the fridge. Make sure to use them up in that time frame.
Start to finish, the process should only take about 10-12 minutes. Read our method instructions above for cooking instructions
Tap on the large end of the egg, roll on the counter, then peel.
Dfinitely peel them when they’re cold. You can shock your recently boiled eggs by plunging them into a bowl of cold water. If you let them cool for about 15 minutes, they’ll be easy to peel.
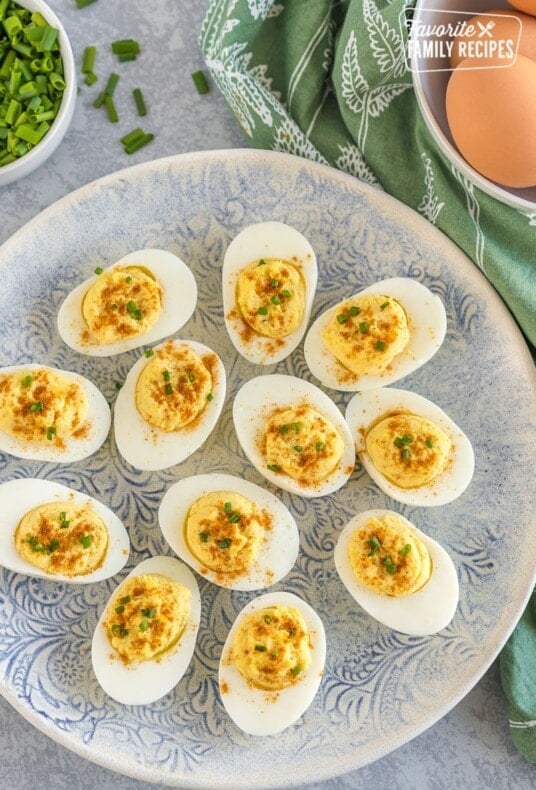
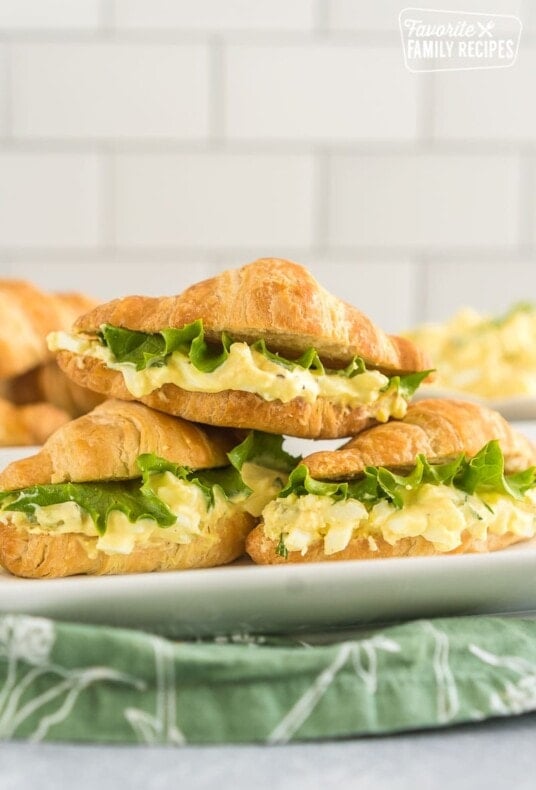
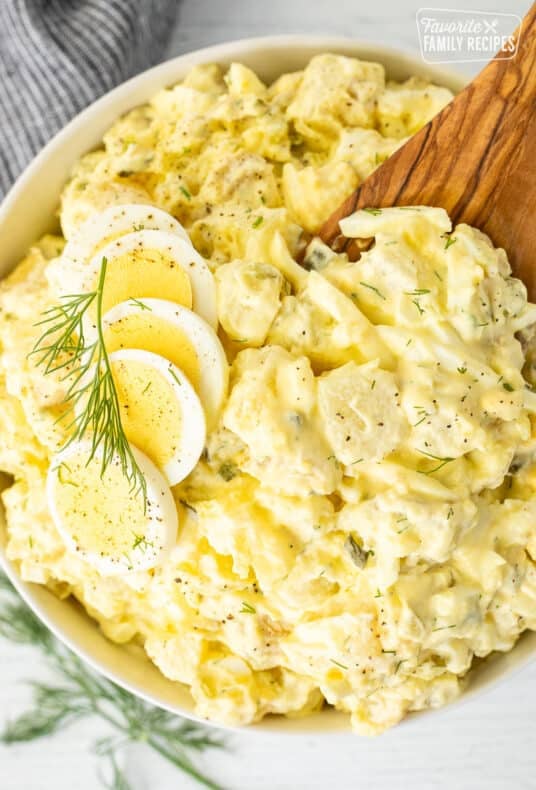
Recipes that Use Hard Boiled Eggs
These easy peel eggs are the perfect ingredient to so many recipes! They are a great addition to your breakfast or lunch. They taste great on sandwiches or salads. They are also key for Easter meals and activities. Here are a few of our favorites:

READ NEXT: 33+ Breakfast Ideas
Perfect Hard Boiled Eggs (Easy Peel)
Video
Ingredients
- 10 eggs, see notes above about what kind of eggs to use
- 1 teaspoon Kosher salt
- 1/2 teaspoon baking soda
- water
Instructions
- Add eggs in a single layer to the bottom of a large pot.

- Fill pot with COLD water until there is about 1" – 2" of water above the eggs. Add salt and baking soda. Bring water to a boil. Once water is boiling, reduce heat to medium and boil for about 1 minute. Cover pot and remove from heat. Let sit, covered, for another 10 minutes.
- Strain water from pot and put eggs in an ice-water bath until the eggs are cool to the touch, about 10 minutes.
- Lightly crack the shell of the eggs and peel.
Nutrition
Nutrition information is automatically calculated, so should only be used as an approximation.
Love this recipe?
We want to hear from you! Please leave a review.
I use a push pin and poke a small hole in the big end of the egg, making sure to pierce the membrane. Releases the pressure and water gets under the membrane, shell comes right off.
Great tip, thanks!
I knew reading this, that the eggs were store bought OLD eggs! No way it would work on butt fresh eggs! I’m a farmer and know fresh fresh fresh eggs!
Directions are so easy. Eggs were perfectly down and easy to peel.
Thank you, Robin! I’m glad your eggs were perfect! 😀
It’s been a long time, a difficult struggle throughout my 46 years of life to get these things right. This works 100%. Thank you!!!
Haha – it is so great to come across life hacks every now and then. I’m glad you found this one! 😀
Best way to boil perfect eggs
I’ve used this method twice and the eggs came out great. It was easy to peel and the yolks were not too hard.
It was my first time making boiled eggs. This recipe made it easy! Thank you! They turned out nicely!
I’m so happy it was a success for you! Thank you for your comment!
Thank you for this recipe! The eggs came out perfect. This is my go to for future.
Thanks! Glad they turned out so well for you!
The best way to hard boil eggs that peel easy.
I’ve used the same recipe for years. If boiling only about five eggs: put eggs in the bottom of a pan, add cold water just to cover the eggs, boil for 5 minutes, cover and turn off heat, let sit for 5 more minutes, drain and let sit in cold water, Crack eggs and enjoy. I imagine you will have to adjust the time if cooking more eggs.
I let the eggs sit out for an hour and use a pushpin to prick a hole in the bottom of each egg. Then I drop the eggs straight into boiling water, remove the pan from the heat and let stand for 14 minutes before the ice bath. No salt, no soda. Just water and eggs. Perfect peel every time. Learned it from my great grandmother. Don’t know why everybody seems to think we need these silly “hacks” today. It’s not like peeling eggs is a new concept.
I love that you’ve found a method that works for you!
I forgot to mention that my elevation is 650 feet and I’d to rate the recipe.
My eggs turned out very nicely using this recipe! They were very easy to peel and the yolks were cooked through without graying! I don’t make hard-boiled eggs that often because I usually end up taking most of egg whites off with the shell, but I see more H B eggs in the future using this recipe! Thank you for sharing!
just want to say that this is my go to recipe for hard boiled eggs, it works perfect every time. I think that if it didn’t work for you then you probably are using eggs that are way to fresh, I only use eggs that are at least one week old. thanx again…Sandy from Ontario…
Worked perfect – 10 perfect hard boiled eggs and they peeled perfect. Definitely my go to for hard boiled eggs when making deviled eggs. 👍👍
I have hens so will this work with fresh from the nest eggs? I have never had success yet with clean peeling?
I have never tried this with fresh eggs – you are lucky to have those available to you. I found a fellow food blogger that has had experience with this. See her step by step instructions for boiling and peeling fresh eggs here: http://www.theprairiehomestead.com/2014/04/the-easy-way-to-peel-farm-fresh-hard-boiled-eggs.html
The fellow food blogger you reference used a food colander inside a covered pot for steaming eggs and has since then been experimenting with the ‘Instant Pot’.Here’s an excerpt from her site- “Y’all know I’ve been experimenting with Instant Pot recipes lately, and I’ve fallen in love with this simple little appliance. And it just-so-happens to work like a champ for those super-fresh hard boiled eggs and peeling is a breeze. No mangled eggs at all.
Time-wise, the process is about the same. But using an Instant Pot for hard boiled eggs versus my regular steaming technique requires less fiddling around with pots, colanders, and burners. You pretty much set it and forget it– no fuss”.
All that being said; to date I’ve steamed 6 dozen eggs, all store bought, from fresh to somewhat aged, and never had one that had a green ring or was difficult to peel. As a matter of fact most peeled without the use of running water over them.
My method is a vegetable steamer basket set inside a pot with a lid with about an inch of water, eggs (right out of the fridge) placed in the basket but not over crowded (important). I use a gas cook-top set at medium high for 15 minutes (pot covered), then immersed in an ice water bath for about 6 minutes and peel. I’ve used every method mentioned in the reviews and then some. In my opinion this is the only method that works more often than not. The only thing I know about the ‘Instant Pot’ is that, for me, it would be just another gadget & add more counter clutter & I could save about a hundred bucks.
Thank you for taking the time to share this, Drew. I’ve never tried the steaming method, but now I’m curious. I’m going to give it at try. Thanks again!
I followed directions exactly to boil and peel 18 eggs. The worst info I’ve ever used! The hardest to peel eggs in my 53 years of life! ONLY 1 egg was whole. The other 17 were ripped to shreds, and half gone. Thank God I was making egg salad! DO NOT USE THIS THIS METHOD!!
I’m sorry this method didn’t work for you. It could have something to do with your elevation. If you have an Instant Pot, I highly recommend this method for boiled eggs: https://www.favfamilyrecipes.com/instant-pot-hard-boiled-eggs/
It works like a charm every time. I am at an elevation of almost 5,000 ft and it works beautifully. My sisters are at 2,000 ft and it works just as well.
The ultimate trick is ( and I have used this for years ) to make a hole in the flat\broad end using a push pin. No cracking the egg, just make a pinhole. Shells all but fall off.
I’ve never tried that, but I’m going to now. Thanks for the tip!
And when do you make the pin prick. While cooling off or right out of the pot?
Before you boil them. Right at the beginning.
Before cooking or after?
I have chickens and have the perfect way to peel hard boiled eggs, even the just laid fresh ones.
I’m going to try this! The eggs look beautiful.
This was a miss for me. It took much longer to peel our hard boiled eggs then it usually does and it made a mess out of the eggs. Unpinning!
What elevation are you at? You may have needed to boil it a little longer…
These yolks look a little undercooked for my taste. Is that how they always come out?
Exactly! This was an epic fail and a waste of a dozen eggs! Didn’t peel and yolks weren’t cooked. 🙁
I am so sorry this recipe didn’t work for you. What elevation are you at? Sometimes that can affect the cooking times.