We may earn a commission when you click on the affiliate links in this post.
These homemade dinner rolls have been a favorite in our family for generations. We serve them with dinner, especially Thanksgiving and Christmas dinner.

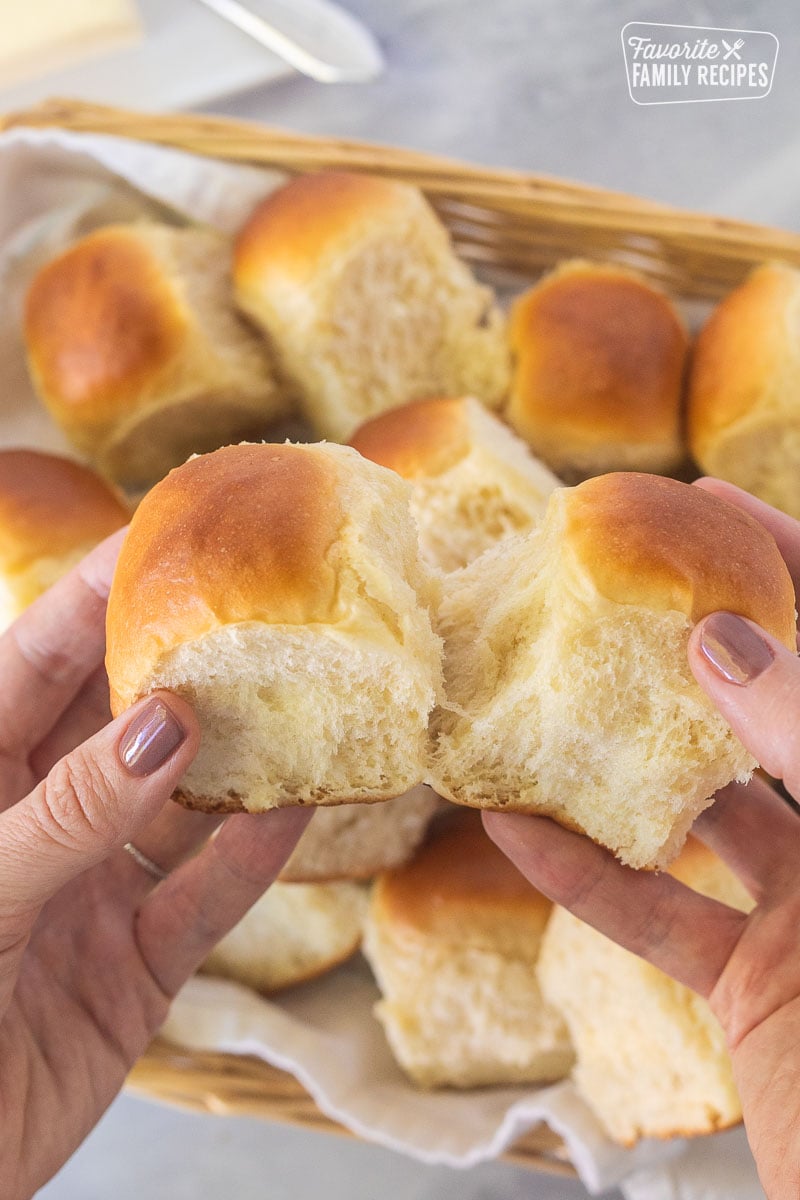
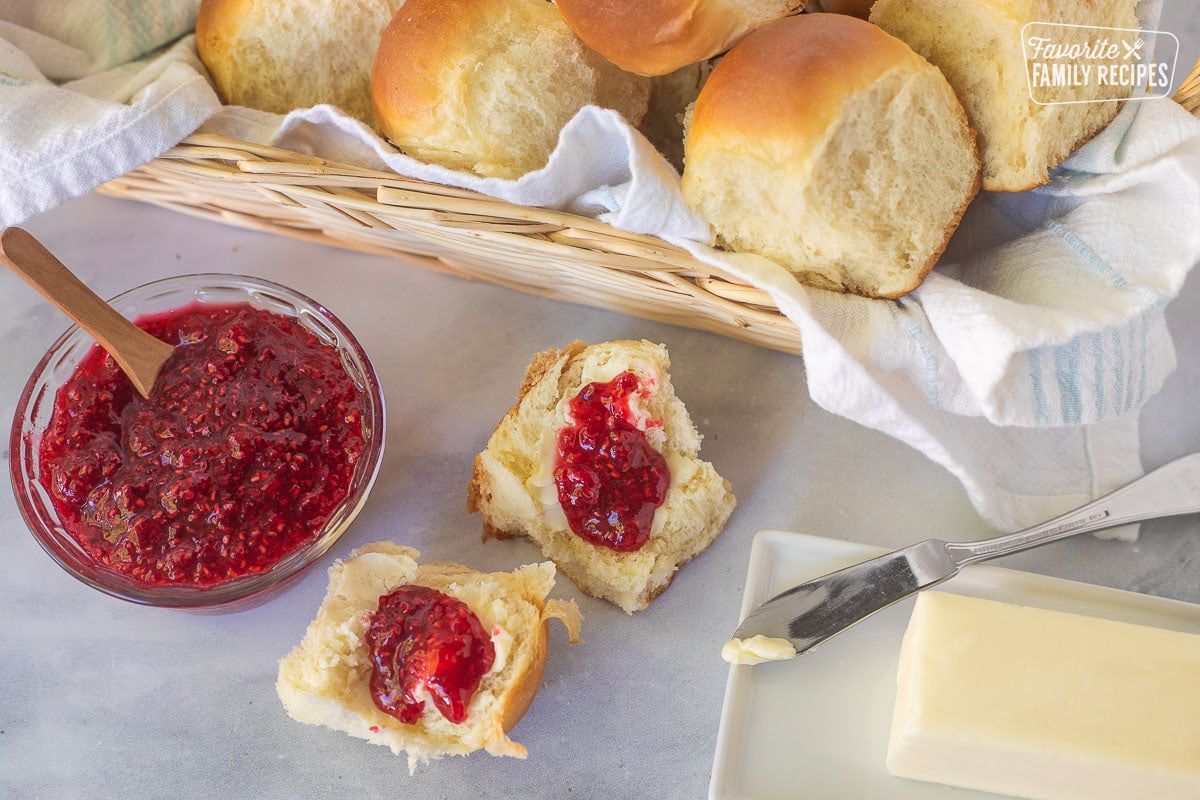
Our mom has made these homemade dinner rolls as far back as I can remember for Sunday dinners and special occasions. They disappear off the table pretty fast. The texture and flavor of these rolls are perfect. They are soft, fluffy, buttery, and complement any meal.
How to Make Dinner Rolls from Scratch
Homemade dinner rolls are SO easy to make. The hardest thing about this recipe is just having a little patience while the dough rises. Start by gathering a simple list of ingredients: Active dry yeast, sugar, water, milk, butter, sea salt, an egg, and flour. Then, follow these steps:
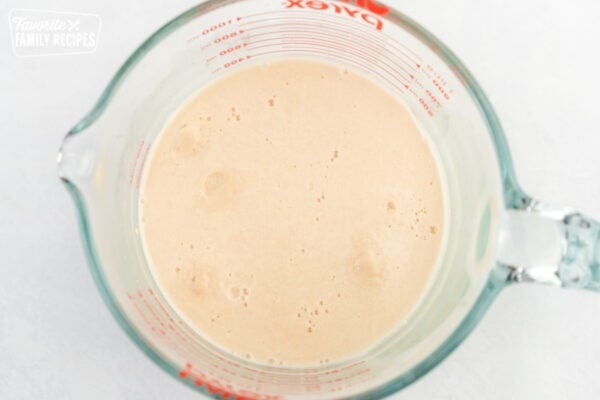
- First, combine the warm water, sugar, and active dry yeast. Set aside while the yeast activates.
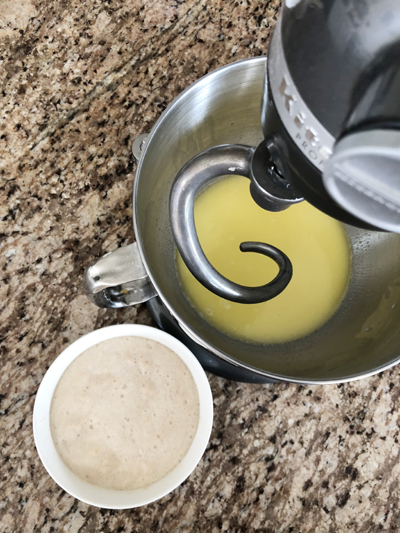
- Then in a large bowl or mixing bowl, combine scalded milk, softened butter, sugar, salt, and egg. Stir to combine and then add your yeast mixture.
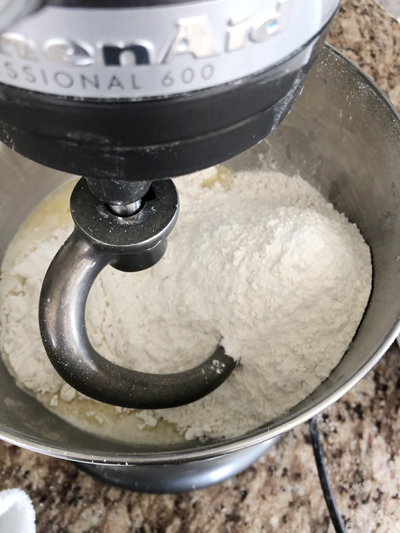
- Add all-purpose flour (bread flour will work as well) a half cup of flour at a time and mix at medium speed.
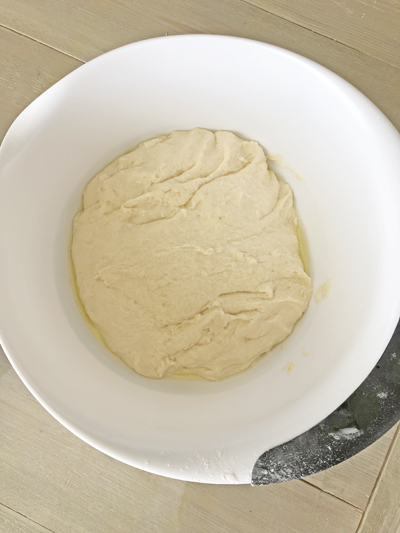
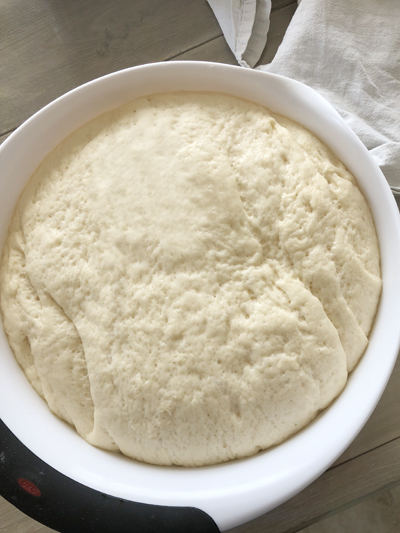
- Let dough rise.
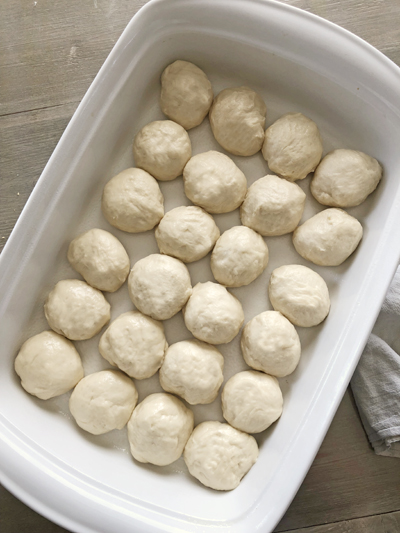
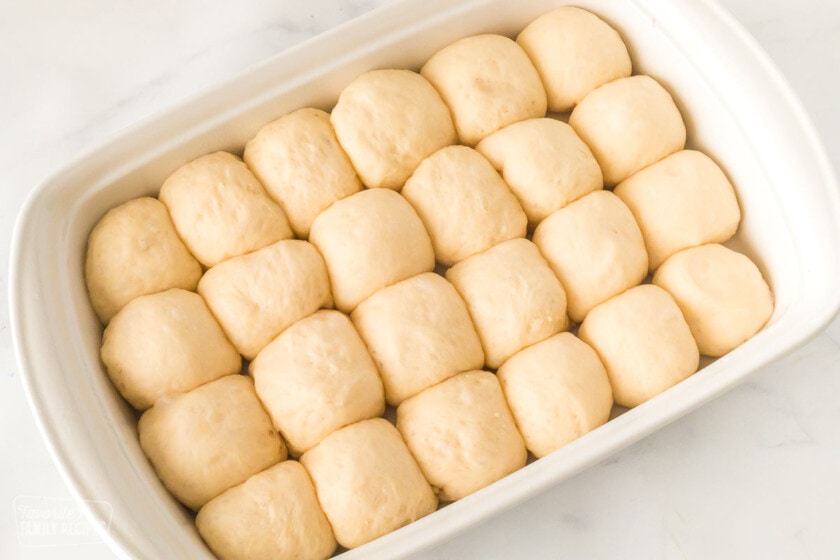
- Use a bench scraper or dough knife to cut smaller pieces and form into rolls on a lightly floured surface. Grease a 9×13 baking pan and place rolls in rows and let rise again, covered with plastic wrap sprayed with cooking spray or a clean kitchen towel.
- Bake, butter, and serve!
Making Dinner Rolls Without a Stand Mixer
No stand mixer? No problem. After you add the flour, turn the dough onto a floured work surface and knead the dough by hand until it is soft and smooth. Add a flour a little at a time as needed and continue kneading for about 10 minutes—just make sure not to add too much flour. You want the dough to be soft but not too dense or the rolls won’t be as fluffy as you would probably like.
How to Store Homemade Dinner Rolls
We have found the best way to store homemade dinner rolls is to first allow them to cool, and then place them in a Ziplock bag. Squeeze out all the air, then seal the bag tightly and store in the refrigerator for 2-3 days. If you would like to reheat them in the microwave, then you can wrap them one at a time in a paper towel and heat for 7-8 seconds.
How to Freeze Dinner Rolls
If you want to save yourself some time in the future, or just want to make it easy to bake up a few rolls at a time, try freezing the rolls before baking. It’s like making your own homemade Rhodes rolls recipe. Here’s what to do:
Prepare the Dough: Prepare the dough as directed in the recipe below, through step 6. Do not allow the dough to rise a second time.
Place on a Tray: Put the shaped rolls on a baking sheet or tray lined with parchment paper, making sure they don’t touch each other. You can put a bunch of the roll balls on to one tray, just give them a little space so they don’t accidentally stick together.
Freeze: Place the baking sheet with the rolls into the freezer and leave them there for about 3-4 hours. This will help the rolls harden.
Wrap for Storage: After the rolls have frozen for a few hours, remove them from the freezer and wrap each roll individually in plastic wrap or aluminum foil. Make sure they are tightly wrapped to prevent air from getting in.
Put in a Bag or Container: After wrapping each roll, you can place them all in a large freezer-safe plastic bag or airtight container. This will help keep them organized and protected in the freezer.
Freeze: Put the bag or container in the freezer, and make sure your freezer is set at a very cold temperature to keep the rolls fresh.
How to Thaw and Bake Frozen Dinner Rolls
You would make these much like you would frozen dinner rolls you buy in the store. Place them in a greased 9×13 baking dish at room temperature, cover, and allow them to thaw and rise for anywhere from 2-6 hours, depending on how warm it is where they are thawing. Once they have risen, bake them as you normally would per the instructions below. Don’t forget to butter them when they come out of the oven!

Why aren’t my dinner rolls fluffy?
If you follow this dinner roll recipe as outlined, you will get soft, fluffy dinner rolls every time. The best way you can tell if you are going to get soft rolls is by how the dough rises. If your dough isn’t rising well, your rolls are going to be denser.
The key is to make sure your yeast is activated in the warm water and sugar mixture before you add it to the bowl of other ingredients. Visually, it should look foamy, not like a liquid.
Always check the labels on your yeast packages or packet to make sure it isn’t expired and that you are using it within 4-6 months from the first use. Also, be sure to keep yeast refrigerated or frozen after breaking the original seal.
More Yummy Roll Recipes
- Pani Popo (Samoan Coconut Rolls)
- Homemade Crescent Rolls
- Homemade Cinnamon Rolls
- Homemade Orange Rolls
- Peach Cinnamon Rolls
- Biscoff Spread Cinnamon Rolls
- Caramel Apple Cinnamon Rolls
How to Make Dinner Rolls
Homemade Dinner Rolls

Video
Ingredients
- 2 tablespoons yeast, active, dry
- 1 tablespoon sugar
- 1/2 cup warm water
- 1 cup whole milk, scalded (microwave for 1.5 min)
- 1/2 cup butter, softened (you can use salted or unsalted butter)
- ½ cup sugar
- 1 teaspoon Kosher salt, or sea salt
- 1 large egg
- 5-6 cups flour
- 2-3 tablespoons butter, melted
Instructions
- Combine yeast, 1 tablespoon sugar, and warm water in a small bowl and set aside.

- In a large stand-mixer bowl with a dough hook attachment combine scalded milk, softened butter, ½ cup sugar, salt, and egg. Stir until well combined.Stir in yeast mixture.

- Add 4 cups flour, adding ½ cup flour at a time until the dough pulls away from the sides of the bowl, it should still be slightly sticky. You may need more flour or even a little less than the full amount- it is best to eyeball this and go by feel than exact amounts.
- Slightly oil a large mixing bowl. Place dough in bowl and turn once to lightly cover dough in oil. Cover lightly with plastic wrap or light kitchen cloth.
- Allow dough to rise for 1 hour. Punch down dough. Lightly knead on a floured surface if dough is too sticky.
- Break off sections to form into small rolls. They should be roughly the size of a ping-pong ball (or approximately 2 oz.). Pinch the bottom of the rolls (so you have a smooth, round top) and place seam-side down in a greased 9×13 glass baking dish. You should be able to get 6 rows of 4 rolls (24 rolls total) and possibly a few extra.
- Cover lightly with plastic wrap (greased so dough doesn't stick to it) or light kitchen towel and allow to rise 30-45 minutes or until rolls have at least doubled in size.

- Bake at 375 degrees for 10 to 12 minutes or until tops of the rolls become light golden brown. Tip: This recipe may vary by elevation, if the middle of the rolls seem too doughy, lightly cover with foil and bake another 3-5 minutes or until centers are light and fluffy.Remove from oven and brush the tops of the rolls with melted butter. Cool slightly and serve.

Equipment
- 9×13 inch pan
Notes
- We have found the best way to store homemade dinner rolls is to first allow them to cool, and then place them in a Ziploc bag. Squeeze out all the air, then seal the bag tightly and store in the refrigerator for 2-3 days.
- If you would like to reheat them in the microwave, then you can wrap them one at a time in a paper towel and heat for 7-8 seconds.
- No stand mixer? No problem. After you add the flour, turn the dough onto a floured work surface and knead the dough by hand until it is soft and smooth. Add a flour a little at a time as needed and continue kneading for about 10 minutes—just make sure not to add too much flour. You want the dough to be soft but not too dense or the rolls won’t be as fluffy as you would probably like.
Nutrition
Nutrition information is automatically calculated, so should only be used as an approximation.
Love this recipe?
We want to hear from you! Please leave a review.
Great, works perfectly, and tastes delicious
Thanks!
I’m in love 😍
These rolls are so good and so fluffy. We’re having them tonight with pulled chicken and coleslaw. All homemade. I just have to make sure I don’t eat all the rolls before tonight….😄
So glad you like them! Sounds delicious with the pulled chicken and coleslaw!
Have you ever made these with a gluten-free 1 to 1 flour? If so, what did you use?
I haven’t used GF flour for this recipe before so I can’t say for sure. If you try it, please let me know what kind you used and what amounts!
????
Did you have a question for us?
Looks absolutely delicious! Question? Do you think it would work to add raisins to the recipe? My family loves raisin buns.
Thanks Much
Hanna
I don’t see why not! I have never added raisins before but I am sure they can be kneaded in!
I flavored the dough with vanilla extract and orange zest and added raisins. It tastes wonderful.
Antje
Yum
Even though “the yeast” and I had a long breath today, the long wait was really worth it! The rolls turned out perfectly and I’m looking forward to Pani Popo! 🥰 Thank you so much for the great recipe … it is forever immortalized in my recipe book!
So glad you liked this recipe! Flattered that it will be immortalized in your personal recipe book 🙂 And yes, these will be amazing as Pani Popo! YUM!
Can’t wait to try.
My all time favorite but never make because of difficulty of making. Not this year!! Your explanation is something I will try!
There is nothing better than a hot buttered roll with dinner. Thank you for sharing this recipe.
Nothing like a warm buttered roll dipped in gravy. Yummy!
Thank you, thank you for sharing this recipe. I got a kitchen aid mixer for my birthday. I have been wanting to make dinner rolls and/or bread but didn’t have a recipe. I am an elder and it has become hard to make dough by hand.
Do you really add 2 tablespoons or of yeast? Normally when making any type of roll, I add 2 teaspoons. Please clarify.
2 tablespoons is correct. You can add less but we like big, puffy rolls.
Easy to make and nummy ~ do have a question about letting them cool… mine are sitting in the pan right now. Do I remove them to cool or just leave them in the pan to cool?
Thanks
I only let them sit long enough in the pan to cool until I am able to handle them easily. Usually 5-10 min. You’ll want to remove the rolls from the pan and let them cool on a wire rack. If you leave them in the pan too long, the steam gets trapped and can make the bottoms a little soggy instead of soft and fluffy.
These remind me so much of my childhood when the cafeteria ladies would make them. So delicious
These are so good and very easy to make. I did not even brush the tops with butter… it did not need it.
Good not great. But this tastes exactly like my grandmother’s recipe for her buns, so thanks for the nostalgia.
Can’t wait to make these for Easter with ham and cheese potatoes