We may earn a commission when you click on the affiliate links in this post.
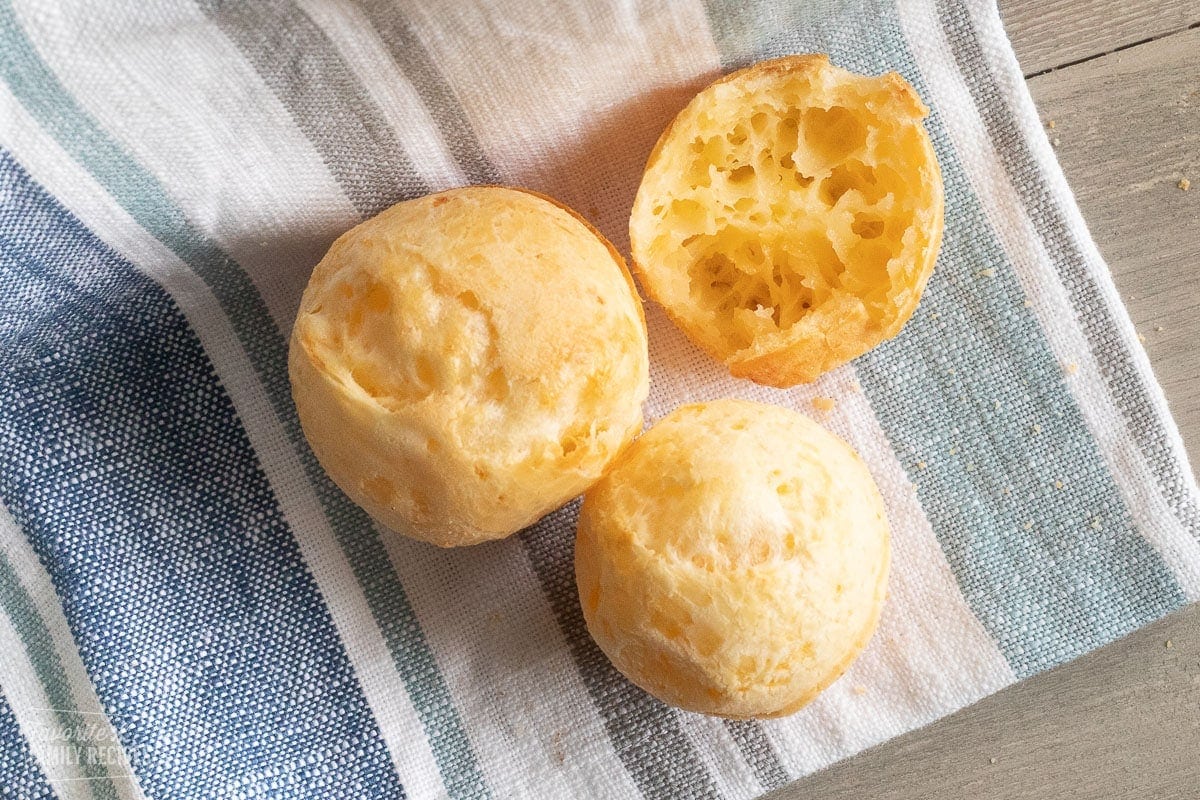
Light, airy, and irresistibly cheesy, this Brazilian Cheese Bread (Pão De Queijo) is easy to make at home with simple ingredients and always turns out delicious. These little bites are naturally gluten-free, freezer-friendly, crisp on the outside, and soft and chewy in the middle, just like the warm Brazilian cheese bread you get at a restaurant.

5 Star Reviews ⭐️⭐️⭐️⭐️⭐️
“Best recipe I’ve found. It’s delicious, crisp outside, soft inside and all-round incredible.” – TWNZMAMA2
“This is an amazing recipe! I tried to make Brazilian cheese bread for the first time and the balls turned out how I used to get them frozen from a store. The flavor, taste, and texture are exactly what I get from an expensive tiny bag at a store.” – Yana
“I’ve been making these for a long time and they are absolutely delicious! Want to add that they freeze and bake perfectly as though you just made the batter. Thanks again for sharing your recipe!” – Jenna
A Taste of Brazil at Home
I love this recipe because it brings a little taste of Brazil right into my kitchen. My husband went to Brazil back in the 90s and completely fell in love with these little Brazilian cheese bread bites. He talked about them all the time, but I had no idea what he meant until years later when we found them at Tucanos Brazilian Grill in Utah. The first time I tried one, I totally understood the hype. The smell was amazing, and that warm, cheesy, chewy bite was so good I had to stop myself from eating the whole basket.
Now I make this Brazilian Cheese Bread at home all the time, and it is always a hit with family and friends. I love that it feels special, but the ingredients are simple and the process is easy once you do it once.
I also love serving these with a full Brazilian-inspired meal. They pair so well with our Brazilian Rice and Beans and Brazilian Limeade.
I’m so excited for you to try them!
🩷 Erica
Table of Contents
- 5 Star Reviews ⭐️⭐️⭐️⭐️⭐️
- A Taste of Brazil at Home
- Why This Brazilian Cheese Bread Works
- Ingredients You’ll Need
- How to Make Brazilian Cheese Bread
- Quick Blender Method (optional):
- Recipe Tips
- Frequently Asked Questions
- Troubleshooting
- Make Ahead and Storage
- More Hot Bread Recipes
- Brazilian Cheese Bread (Pao de Queijo) Recipe
Why This Brazilian Cheese Bread Works
This recipe works because a few simple things come together the right way.
- Tapioca flour (tapioca starch) gives Brazilian cheese bread its signature chewy texture and helps the puffs rise.
- Heating the milk, oil, and salt before mixing in the tapioca flour helps create the right dough texture in the traditional method.
- Eggs and cheese give the dough structure, flavor, and that soft, stretchy interior.
- Not overbaking keeps the centers chewy instead of dry. A soft, slightly gooey center is normal for Brazilian cheese bread. That texture is part of what makes it so good.
Ingredients You’ll Need

- Milk, oil, and salt – These are heated together to create the base and help build the dough texture.
- Tapioca flour (tapioca starch) – This is the key ingredient that makes Brazilian cheese bread chewy and naturally gluten-free.
- Eggs – Eggs help bind the dough and give the puffs structure as they bake.
- Parmesan and cheddar cheese – A mix of Parmesan and sharp or medium cheddar gives a bold, salty, cheesy flavor that works really well.
Ingredient Additions and Substitutions
- Cheese options – Try gouda, mozzarella, or gruyère for a different flavor twist.
- Tapioca flour types – You can use regular tapioca flour (tapioca starch). In Brazilian recipes, you may also see sour tapioca flour (polvilho azedo) and sweet tapioca flour (polvilho doce), which give slightly different flavor and chew.
- Milk – Whole milk gives the richest texture, but 2% milk can work if that is what you have.
- Oil – Vegetable oil is my go-to, but another neutral oil works too.
- More Parmesan – If you like a stronger, saltier flavor, you can increase the Parmesan slightly and reduce the cheddar a little.
- Milder flavor – Use medium cheddar instead of sharp cheddar for a less bold taste.
How to Make Brazilian Cheese Bread

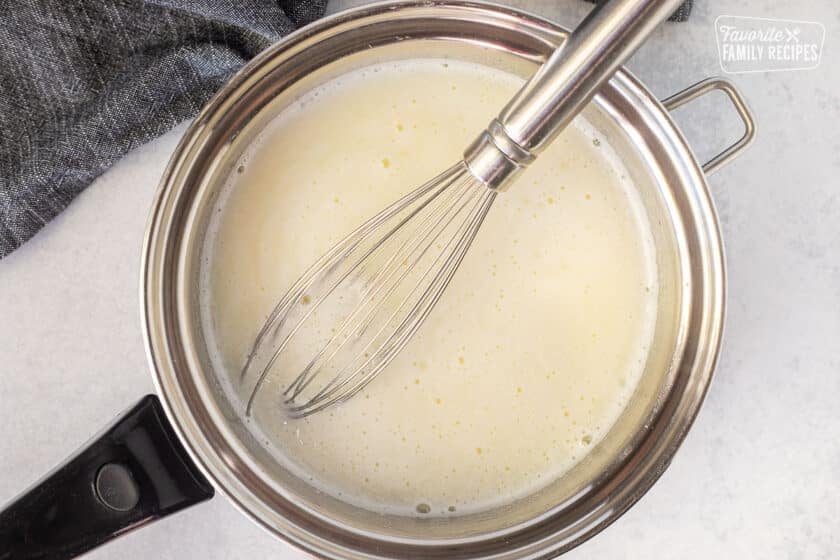
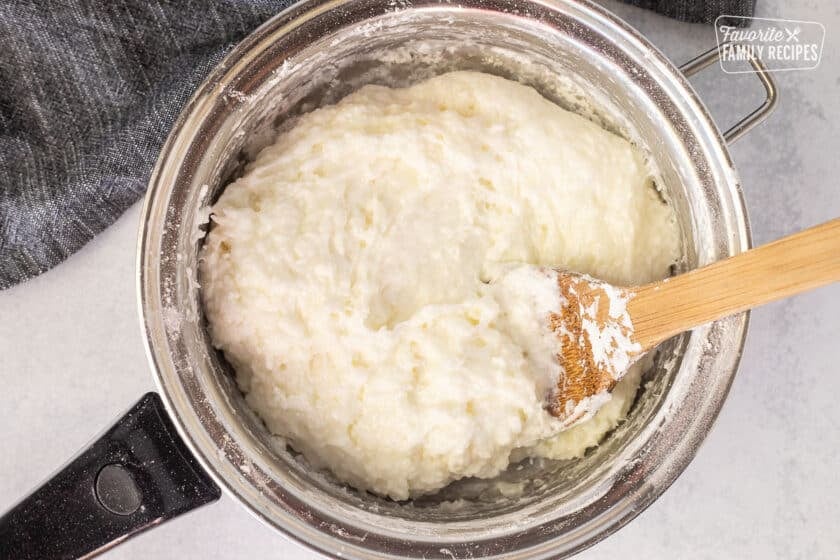
- In a saucepan, warm the milk, oil, and salt until it begins to simmer. Remove from heat.

- Gradually stir in tapioca flour until the dough becomes grainy and gelatinous.
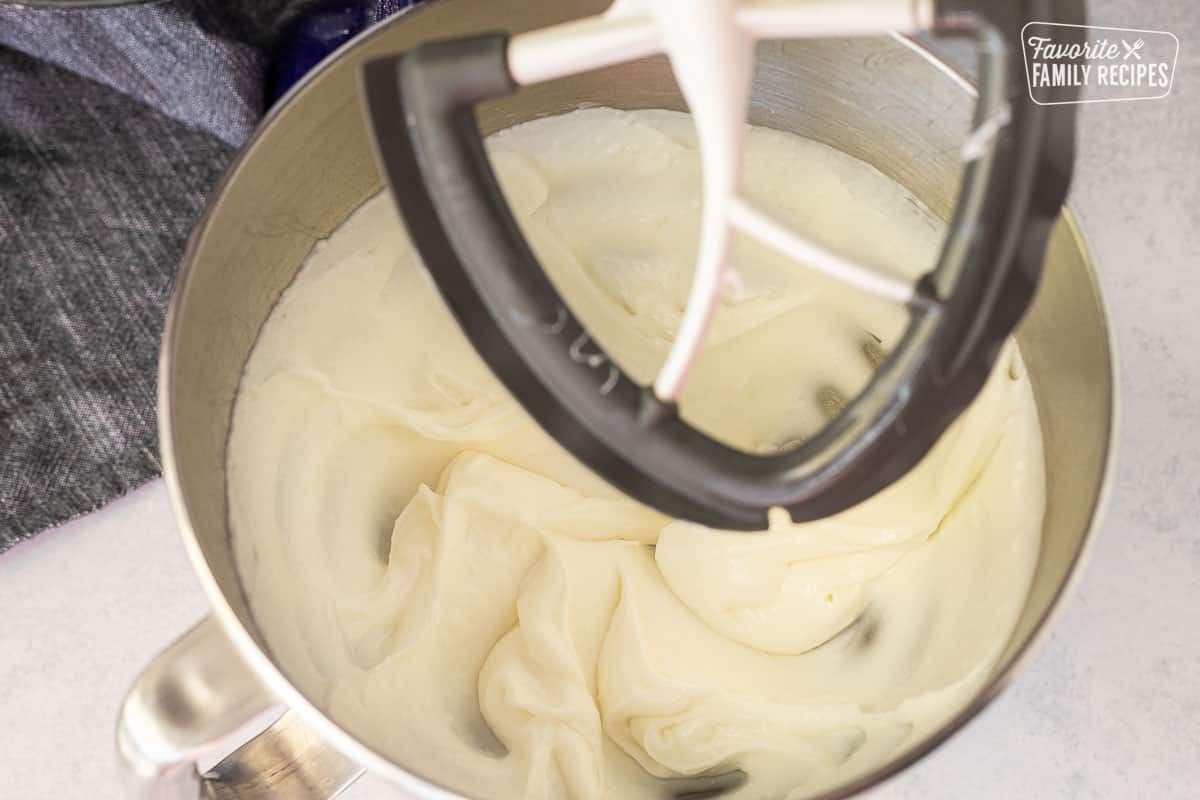
- Transfer to a stand mixer with a paddle attachment. Beat on medium speed until smooth and cooled slightly.

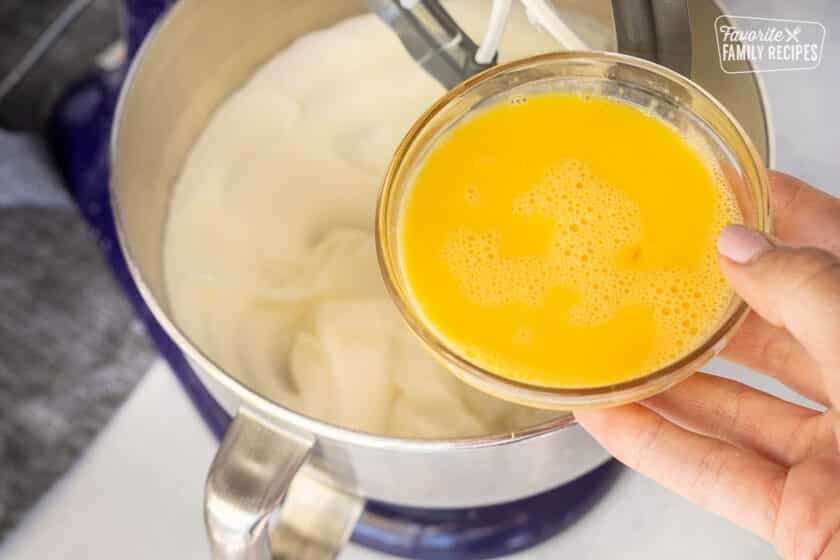
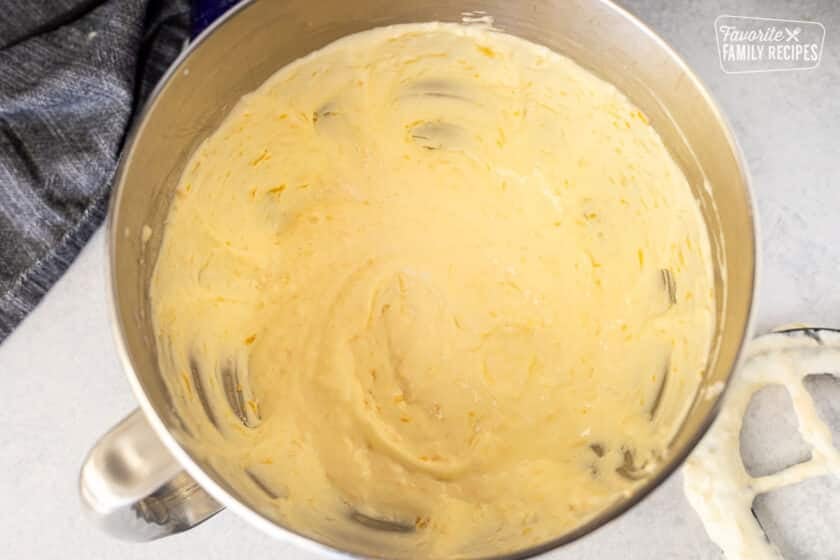
- Whisk the eggs separately. With the mixer running, add the eggs in two batches, letting each fully incorporate. Then mix in the cheese until the dough is sticky and stretchy.

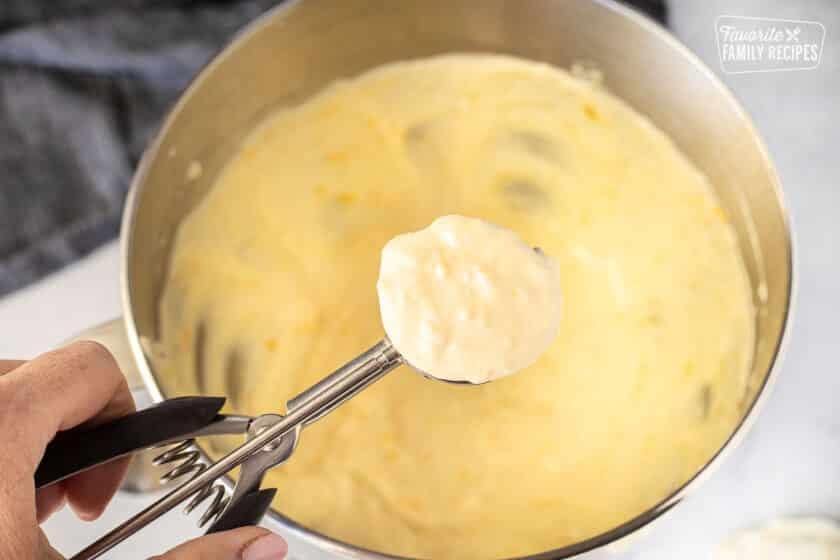
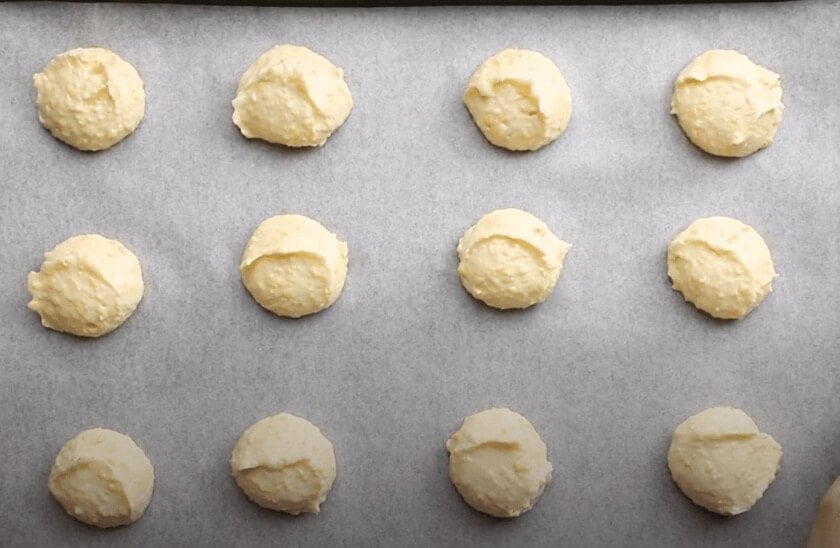
- Use a cookie scoop or spoon to form 1-2 inch balls.

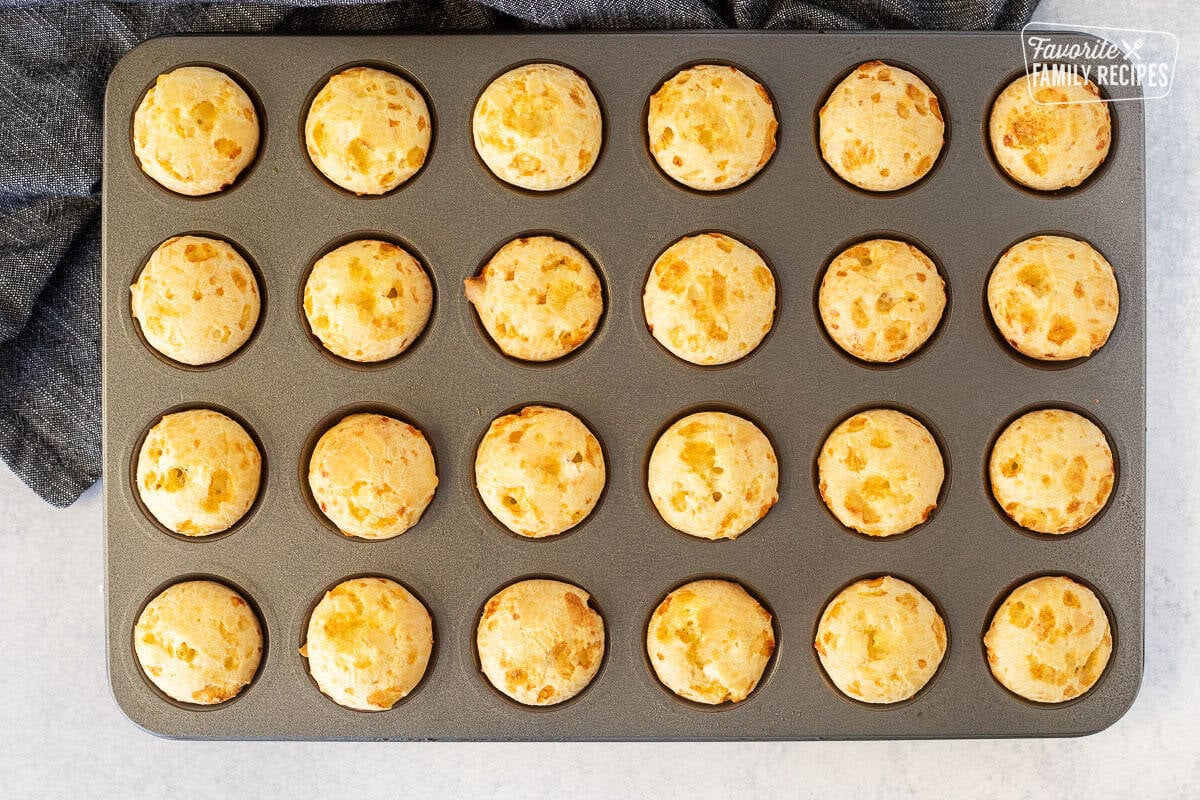
- Place on a parchment-lined baking sheet and bake for 25-28 minutes until puffed and golden.
Quick Blender Method (optional):
This is the best option when I want Brazilian cheese bread fast or I do not feel like pulling out the mixer.
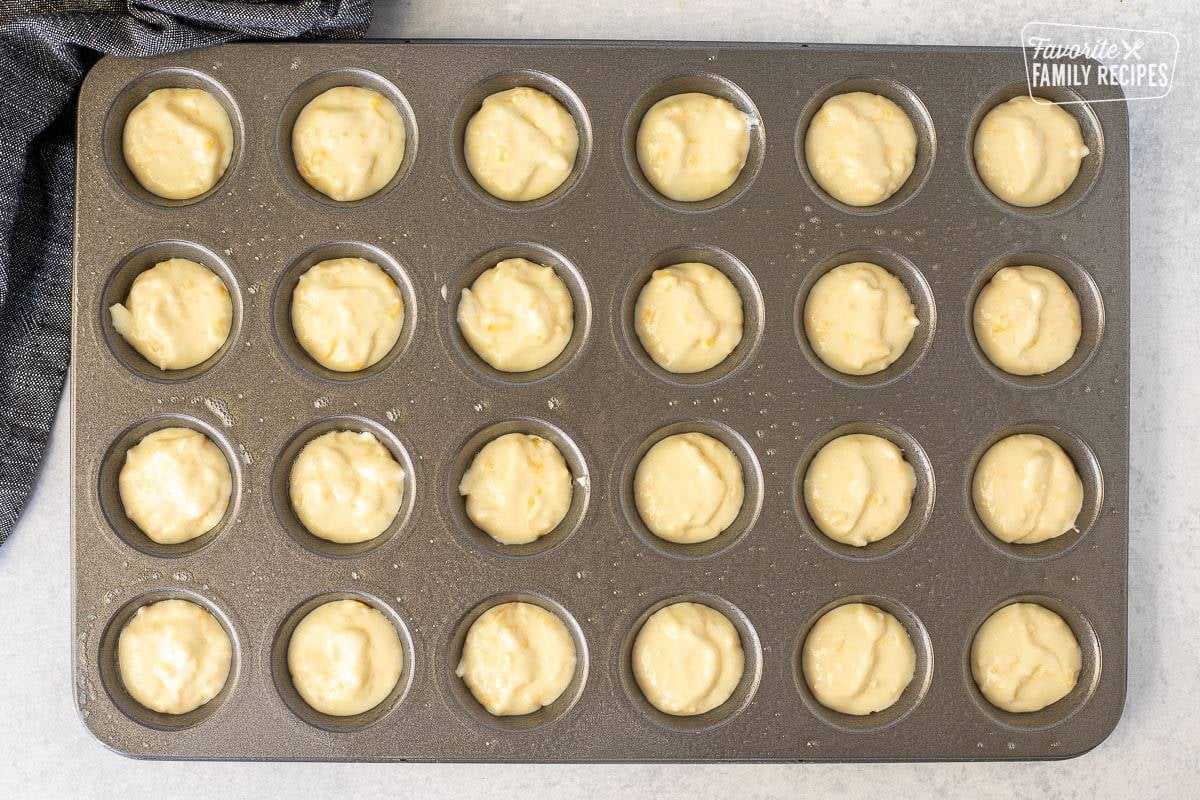
- Fill and bake – Pour or spoon the batter into the mini muffin tin. Fill each cup about ¾ full to give them room to puff. Bake for 15 to 20 minutes, until puffed and lightly golden. Do not overbake.
- Preheat and prep the pan – Preheat oven to 400°F. Grease a mini muffin tin well.
- Blend the batter base – Add all ingredients except the cheese to a blender. Blend until smooth, about 20 seconds, scraping down the sides if needed.
- Add the cheese – Pulse in the cheese 3 to 4 times until evenly incorporated. Do not overblend once the cheese is added.
Blender Method Notes
- The batter is thinner than the traditional dough, so a mini muffin tin works best.
- If you use a regular muffin tin, they may spread more and need a few extra minutes.
- The outside texture is a little more bread-like, and the inside is still soft and chewy.

Recipe Tips
- Use tapioca flour, not cassava flour – They are not exactly the same, and tapioca flour gives the best texture for this recipe.
- Shred your own cheese – Freshly shredded cheese melts better and gives better flavor.
- Expect sticky dough – The dough should be soft, stretchy, and sticky, somewhere between cookie dough and thick batter.
- Use a cookie scoop – This makes portioning easier and keeps the cheese breads more even in size.
- Wet or spray your scoop – This helps prevent the dough from sticking.
- Do not overbake – Bake just until puffed and lightly golden so the center stays chewy.
- A slightly gooey center is normal – That chewy, soft middle is part of what makes Brazilian cheese bread so good.
Frequently Asked Questions
Brazilian Cheese Bread, also called pão de queijo, is a traditional Brazilian cheese bread made with tapioca flour instead of wheat flour. That is what gives it its chewy texture. It is naturally gluten-free and does not require yeast.
It is commonly pronounced “pow duh kay-zhu” (you may also hear slightly different pronunciations depending on accent).
Yes! That gooey center is part of the charm. Tapioca flour naturally creates a chewy texture even when fully cooked.
That’s totally normal! The dough should be soft, stretchy, and sticky—somewhere between cake batter and cookie dough. Use a cookie scoop sprayed with cooking spray or dipped in water to make portioning easier.
Yes. The blender method is a great shortcut, especially when using a mini muffin tin. It is quick, easy, and perfect for busy days.
Troubleshooting
- Why did my Brazilian Cheese Bread turn out flat? Usually the dough or batter was too runny. Use tapioca flour, measure carefully, and use a mini muffin tin for the blender method.
- Why are they dense instead of airy? This can happen from too much flour, uneven mixing, or overmixing. Measure carefully and mix just until combined.
- Why did they deflate after baking? A little settling is normal. Big deflating can happen if they were underbaked or the batter was too thin.
- Why did they stick to the pan? Grease the pan well, especially for the blender method, and let them cool briefly before removing.

Make Ahead and Storage
This Brazilian Cheese Bread is best served warm, but it stores and freezes really well.
- Room temperature – Store in an airtight container for 1 to 2 days
- Refrigerator – Store in an airtight container for up to 3 days
- Freezer (baked) – Freeze in a freezer-safe bag or container for up to 2 months
- Freezer (unbaked batter) – Scoop into silicone molds or portion onto a tray, freeze, then bake from frozen with a few extra minutes added
Reheating Tips
- Microwave – Heat 1 to 2 rolls for 10 to 15 seconds (they will be softer and less crisp)
- Oven (350°F) – Reheat for 5 to 8 minutes until warmed through and lightly crisp
- Air fryer – Reheat for 1 to 2 minutes
More Hot Bread Recipes

- Pani Popo (Samoan Coconut Rolls)
- Mom’s Homemade Rolls
- Easy Monkey Bread
- Irish Soda Bread
- Rosemary Garlic Focaccia Bread
This Brazilian Cheese Bread recipe is one of my favorite breads to make when I want something warm, cheesy, and a little special without a lot of fuss. It is simple, naturally gluten-free. I’d love to hear what you think! Drop a comment below and let me know how it turned out. 💛
Brazilian Cheese Bread (Pao de Queijo)

Video
Ingredients
- 1 cup whole milk
- 1/2 cup vegetable oil
- 1 teaspoon salt
- 2 cups tapioca flour , (I use Bob's Red Mill in the gluten-free section of the grocery store)
- 2 eggs
- 3/4 cup Parmesan cheese, (freshly hand shredded)
- 3/4 cup sharp or medium cheddar cheese, (freshly hand shredded)
Instructions
- Preheat oven to 350 degrees.Combine the milk, oil, and salt in the saucepan, and whisking occasionally, bring it to a gentle boil over medium heat. Remove from heat as soon as you see big bubbles coming through the milk.

- Add all of the tapioca flour to the saucepan and stir until you see no more dry tapioca flour. The dough will be grainy and gelatinous at this point.
- Transfer the dough to the bowl of a standing mixer fitted with a paddle attachment. (Alternatively, you can do the next few steps by hand. Be prepared for a work-out.) Beat the dough for a few minutes at medium speed until it smooths out and has cooled enough that you can hold your finger against the dough for several seconds.
- Whisk the eggs together in a small bowl. With the mixer on medium, beat the eggs into the dough in two additions. Wait until the first addition has been fully incorporated into the dough before adding the second. Scrape down the sides of the bowl as needed.
- With the mixer on medium, beat in the cheese until fully incorporated. The resulting dough will be very sticky, stretchy, and soft with a consistency between cake batter and cookie dough.
- Using a cookie scoop, a tablespoon measure, or a dinner spoon, scoop rounded portions of the dough into mounds on the parchment-lined baking sheet.
- Space the mounds an inch or two apart. Dip your scoop in water or spray with cooking spray to prevent sticking.

- Transfer the sheet with the puffs to the oven and bake for 25-28 minutes, until the puffs have puffed, the outsides are dry, and they are JUST starting to color. Do not over bake! Cool briefly and eat.


Notes
- Use tapioca flour (tapioca starch), not cassava flour.
- Freshly shredded cheese melts better and gives the best flavor.
- Dough should be sticky and stretchy, this is normal.
- A cookie scoop dipped in water or sprayed with nonstick spray makes portioning easier.
- Do not over-bake or the centers can lose their chewy texture.
- A soft, slightly gooey center is normal and expected.
- Traditional method bakes at 350°F on a sheet pan.
- Quick blender method bakes at 400°F in a mini muffin tin.
- Store leftovers airtight at room temp for 1 to 2 days, in the fridge up to 3 days, or freeze up to 2 months.
- Reheat in the oven or air fryer for the best texture.
Nutrition
Nutrition information is automatically calculated, so should only be used as an approximation.
Love this recipe?
We want to hear from you! Please leave a review.
AMAZING!!!!! SO easy and delicious!
question what if we dont have a standing mixer?
You can use a hand mixer or even a blender! You can also whisk it by hand.
Glad I found this recipe. Used the blender method. Had no Parmesan cheese on hand, so used 3/4 cup Cheddar and 3/4 cup Romano. Had no mini-muffin pan, so used regular muffin pan. Ended up with 12 big, beautiful, and delicious popover-like cheesebreads. Thank you!
Ooh love the tips! Thank you for sharing!
Best recipe I’ve found. It’s delicious, crisp outside, soft inside and all-round incredible.
Yay thank you so much! So glad you liked this recipe 🙂 Thanks for the kind comment!
easy question: The recipe says to preheat to 400 degrees in 1 place and then 350 degrees somewhere else. Which one do I use?
thank you.
So the 400 degrees is found in the post above the recipe. This is for the variation to make the recipe in the blender. This bakes on a higher heat for less time. If you follow the recipe card it is 350 degrees for more time. It just depends on which variation you want to make. Hope this helps!
The 400 degrees is also listed in the post for the traditional method. It’s only the recipe card that says 350 degrees. I was confused by that too! Can you use either temp for either variation?
Sorry yes I will clarify — 400-degrees is for the “quick method” because it only bakes for 15 min, 350 degrees is for the traditional method and it cooks a bit longer. If you use the 400 degree temp for the “traditional” method, bake for 12 min and then keep an eye on it. Hope this makes sense!
Yes it does, thank you for the reply!
This is an amazing recipe! I tried to make Brazilian cheese bread for the first time and the balls turned out how I used to get them frozen from a store. The flavor, taste, and texture are exactly what I get from an expensive tiny bag at a store. But for these I used 4 different kinds of cheese and I multiplied this recipe for 6x times! My big family loves this bread and I am glad I made so much! Now I will freeze them and take out as much as I need and bake them and have them fresh every time! Thank you so much for this recipe! I have it now in my recipe book!
I’ve been making these for a long time and they are absolutely delicious! Want to add that they freeze and bake perfectly as though you just made the batter. Thanks again for sharing your recipe!
I actually did this recipe 3 times today, and once the authentic way in the past! I was so successful in the past. I have no idea what happened today, but all three times, when I stir in my tapioca starch, it became straight up liquid. I don’t know why I cannot achieve that grainy texture anymore. Wish I could show an actual picture…Anybody might know the reason?
I saw in your previous comment that you were doubling the recipe. Sometimes doubling a recipe doesn’t work because the quantities of ingredients won’t blend together right. I would suggest making one batch at a time. Hope this helps!
We had the same issue. Ultimately added about another 3/4 cup of tapioca flour to the batter. We also added about another 1/2 cu of shredded cheese.
Super recipe, nice and easy. I have just made batch for my family to enjoy on a long car trip beyond the arctic circle to go skiing.
It would be handy to have metric measures and Celsius temperatures for all recipes.
Thanks for the great insight, it’s something we will definitely look into for the future 🙂
Absolutely delicious and simple . I used a hand held electric mixer . It was a rather messy time transferring the spoons full of dough onto the baking paper ! My family are hooked on these tasty little balls. Thank you.
I tried to make these using the blender method, and the “dough” is quite runny. It certainly can’t be scooped onto a cookie sheet to freeze (which I was hoping to do). I followed the recipe as written. What went wrong?
If you use the blender method the dough will be a little more runny. That is why we suggest baking it in muffin tins. See instructions below:
Preheat oven to 400-degrees
Put all the ingredients except the cheese in a blender.
Blend until smooth (about 20 seconds) then scrape the sides of the blender.
Add cheese and pulse 3-4 times to incorporate.
Spray a mini muffin pan with cooking spray and fill each cup with the cheese mixture until almost full.
Place in the oven and bake 15-20 minutes or until the outside of the rolls are golden brown and puffed up. Do not over bake! The texture on the outside is more dry and “bread” like and the inside is more soft and chewy.
Ive tried several recipes for this and finally one that works! Easy to follow and consistent results.
I doubled this recipe and they were amazing! I froze them and baked them the next day, will definitely make them again. Thanks!
Yeast and gluten are not synonymous, they often go hand in hand, but yeast doesn’t have or make gluten, and gluten containing recipes often have no yeast.
Would be better if the measurements were done by weight instead of volume, I’m pretty sure the dough was way too thin as these ended up more like cookies instead of puffs.
Also, for first timers, tapioca starch has about the same consistency as corn starch so it can easily go everywhere when you’re dry pouring it, but it gets SUPER sticky once you start to mix, so using something like a whisk isn’t a great idea, unless you enjoy trying to get a giant glob of gooey out of the middle of your whisk.
I made these (using the traditional method) and they were so tasty! I did get concerned for a bit when it seemed like the dough was not coming together–the flour/milk mixture was separated from the oil and not combining in my stand mixer. I took some time to break the flour/milk up with my hands and then it started to incorporate! I started cooking these at 400 for 20-25 minutes, but they were underbaked inside, so dropped the temp down to 350 and cooked for another 10, and that worked well.
I made these this morning for breakfast and it was an absolute success. I took me 20min total and my kid helped. I was very exceptical with the blender method but it actually works! Saving this and doing it again and again and again…. 🤩
To cook good food not all people know that to cook good food, the mind should also be clean and I have seen your post and the recipe you have made is very beautiful, I sincerely hope that when I make these recipes, I will very happy i will definitely try it. https://anupatel.in/
Can I use egg whites instead of including the yolks?
We haven’t tried it that way so I can’t say how it would affect taste or texture.
this is such a lovely forgiving recipe. i always multiply it by 1¾-ish so it uses a full 400g bag of tapioca flour, and have substituted many different cheeses, and although some cheeses result in a flatter, more spread-out bread, it’s always lovely to eat