We may earn a commission when you click on the affiliate links in this post.
This ice cream cake is easy to make, easy to decorate, and even easier to serve and enjoy! It truly takes the cake… and the ice cream!
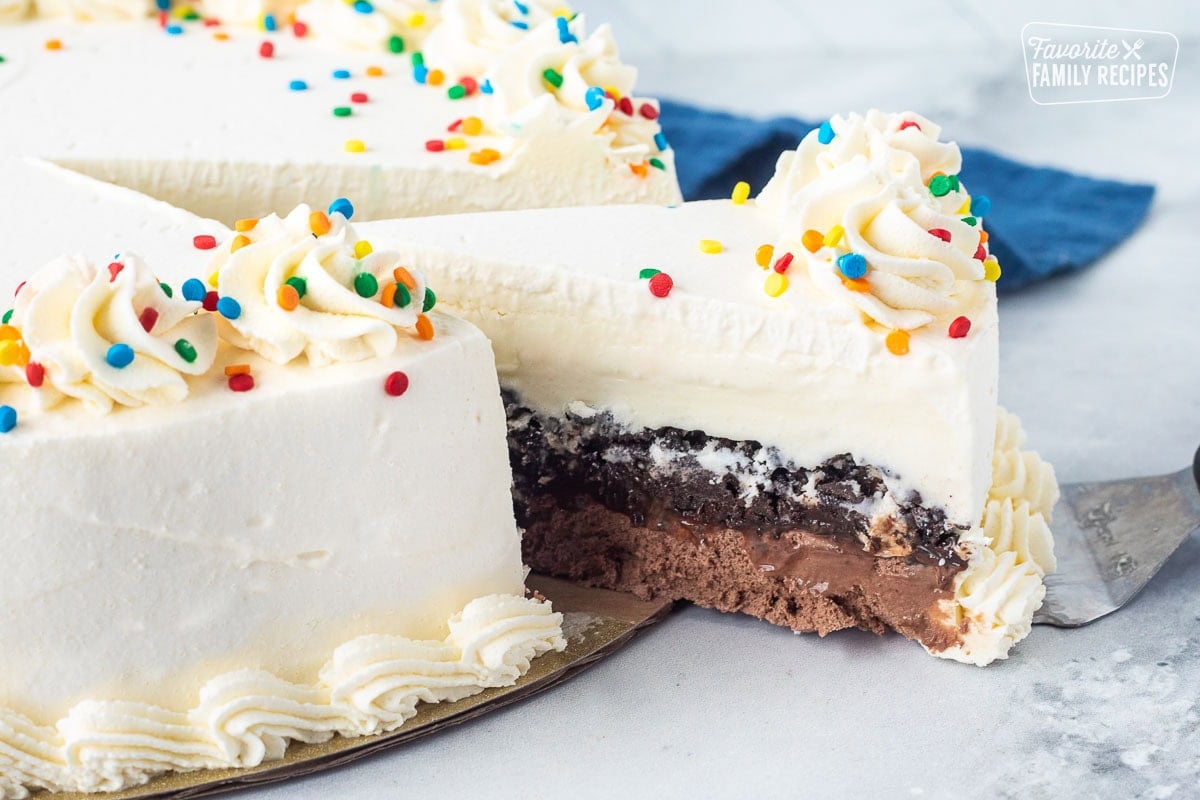
Table of Contents
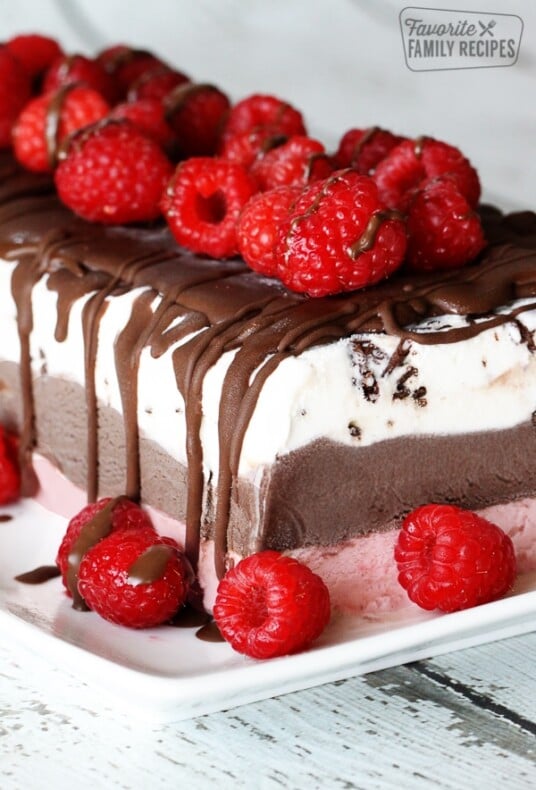
Ice Cream Cake is one of my favorite birthday cakes ever! My favorite part is the chocolate cookie crumb layer between the ice cream layers. It’s perfectly crunchy, ice cold, and so delicious. It’s surprisingly fun to make your own ice cream cake because you can pick the exact flavors you want, from ice cream to frosting, and customize toppings as well! Once you make this ice cream cake for the first time, you’ll never look back… it’ll be ice cream cake for every occasion!
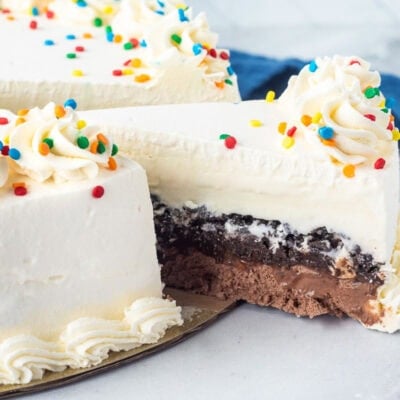
Dairy Queen-Style Ice Cream Cake Layer by Layer
Layer 1: The Vanilla Ice Cream Layer
Because you are building this in a pan that will be flipped upside down, you will want to work from the bottom up. That means we will start with the vanilla ice cream first. To be honest, it doesn’t really matter which flavor ice cream you start with. I have accidentally made it so the chocolate layer ended up on top before and no one called me out on it. It still tasted exactly the same. But, if you want to make it like DQ, layer the vanilla first so it will be on the top when you frost it. Make sure this layer is totally frozen again before adding the next layers.
Layer 2: The Chocolate Cookie Crunch Layer
This is my favorite layer. It is simply made from crushed Oreo Cookies and Magic Shell Chocolate Fudge Topping. I usually find the magic shell near the ice cream cones in the grocery store, or wherever all the other ice cream toppings are. You can find the exact ingredients and amounts in the recipe card below.
Layer 3: The Fudge Layer
Ok maybe this is my favorite layer. Actually I think this layer and the cookie later combined equals my favorite layer overall. Just crack open a jar of your favorite fudge or about 1 ½ – 2 cups of our homemade hot fudge sauce (cooled to room temp) and spread it over the cookie crunch layer.
Layer 4: The Chocolate Layer
After the fudge layer has hardened in the freezer, you can add the chocolate layer. This will ultimately be your bottom layer. Just smooth the softened chocolate over top of the cooled fudge and then freeze again until the whole cake is frozen solid.
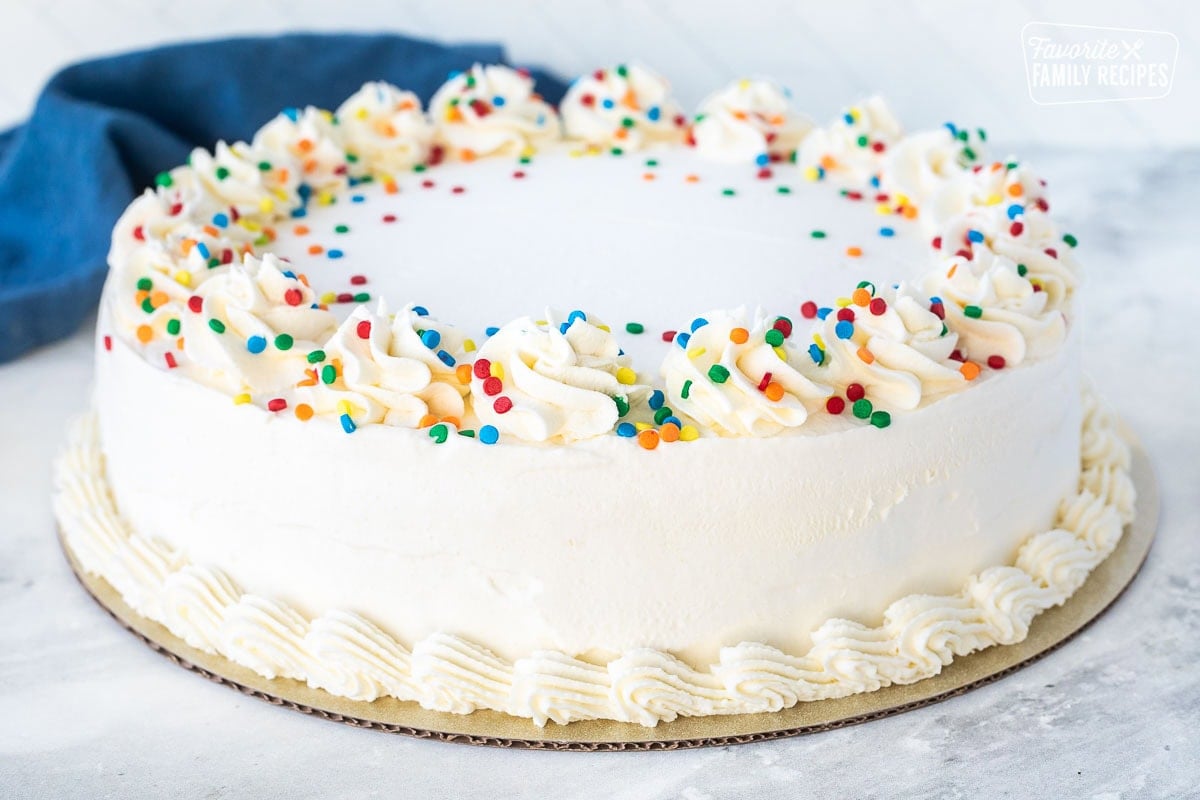
Layer 5: The Frosting and Toppings
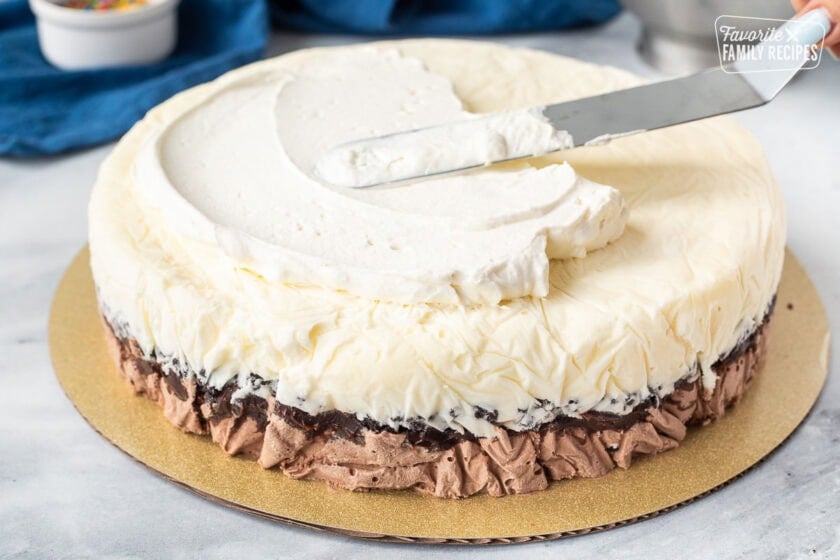
This is the fun layer. Here you will make a stabilized whipped cream and use it as a frosting. You will find full details on how to make this in the recipe card below. Once the cake is flipped over and removed from the pan, spread the frosting over the whole cake and use the rest of the frosting to pipe and decorate. Add sprinkles, crumbled cookies, or whatever suits your fancy over the top of the cake as the final decoration.

Tips and Tricks
Use High Quality Ice Cream -The better the ice cream, the better the ice cream cake. It’s as simple as that.
Air pockets – Smooth down the ice cream really well when you are making your layers, you don’t want any air pockets in there because these will result in large holes in the cake.
Warm Knife – Run your knife under warm/hot water between slices to make cutting the cake easier. Dry the knife quickly after running it under the water so you don’t get water droplets on your cake.
Soften Slightly Before Serving – Keep in the freezer until about 15-20 minutes before you are ready to serve, at this point you can transfer the cake to the fridge so it can begin to soften.
Variation Ideas
Now just because Dairy Queen layers their ice cream cake a certain way with certain flavors, doesn’t mean that you have to! The flavor combinations are endless (and delicious). Here are some of my personal favorite ice cream flavor combos:
- cookies & cream + vanilla (or chocolate)
- strawberry + vanilla
- mint chocolate chip + chocolate
- cookies & cream + cookie dough (this is my husband’s favorite combo by far)
- cherry chocolate chip + chocolate
- chocolate peanut butter + vanilla
Of course there are all sorts of unique ice cream flavors that would pair well together. I would LOVE to hear your ideas or combinations you have tried below.
Frequently Asked Questions
Yes and no. You don’t want to frost the cake with it but it can be used to decorate. You will still want to frost the cake with the whipped cream first and then you can decorate with buttercream. Buttercream won’t stick directly to the ice cream as well as the whipped cream does and it will flake off when frozen. It works great for decorations is you are pipings borders, flowers, balloons, or any other decorative designs.
You can never go wrong with chocolate and vanilla. If you want to please a crowd, this is probably your best bet.
No, most ice cream cakes are not gluten free because they have a cookie layer in the middle that contains gluten. The good news is, when you make your own at home they can easily be made GF by swapping out regular Oreos for GF Oreos.
More Ice Cream Cake Recipes

Ice Cream Cake
Video
Ingredients
- 1.5 quart vanilla ice cream, (French Vanilla or Homestyle)
- 24 Oreo cookies
- 1/2 cup Magic Shell chocolate fudge topping
- 1.5 quart chocolate ice cream
- 12 ounces chocolate fudge topping, (I used the Smuckers brand)
For the Stabilized Whipped Cream Frosting:
- 2 cups heavy whipping cream , (very cold)
- 2 teaspoons unflavored gelatin powder, (I used Knox brand)
- 4 tablespoons cold water
- 1/2 cup powdered sugar
- 1 teaspoon vanilla extract
- candy sprinkles , (for topping, optional)
Instructions
- Soften vanilla ice cream for about 20-25 minutes on the counter until it it soft enough to stir.
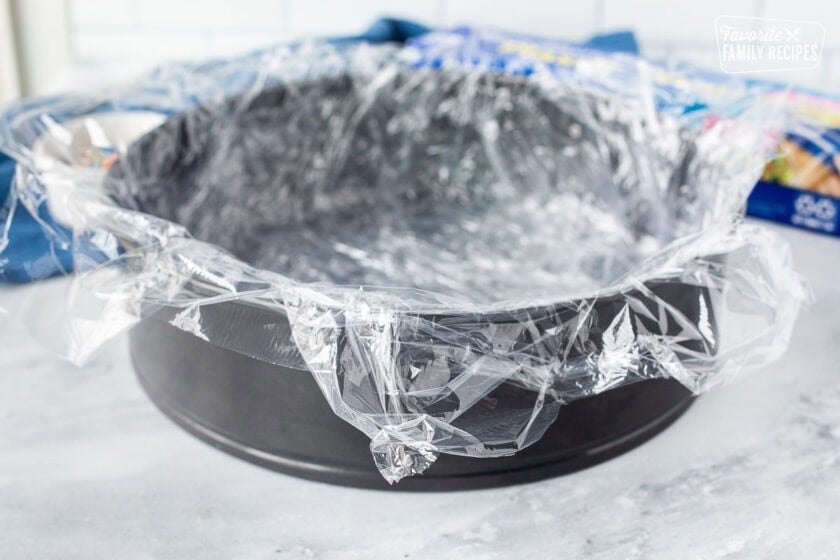
- While ice cream is softening, line a 9" springform pan with plastic wrap, leaving the wrap hanging over the edges for easier filling. You may need to line it with several sheets of plastic wrap to make sure it's completely covered.

- When ice cream has softened, stir until it becomes the texture of soft-serve ice cream. Spread the ice cream into the bottom of the prepared springform pan. Place in the freezer and freeze for 1 hour.
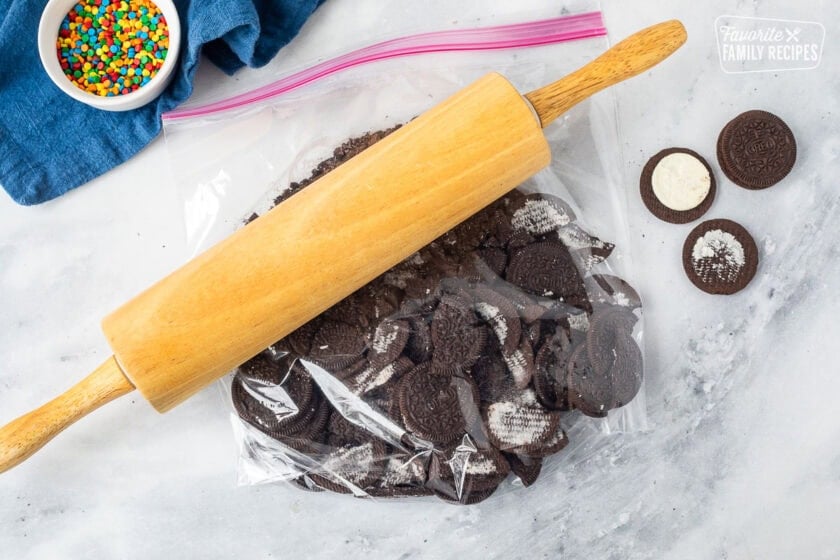
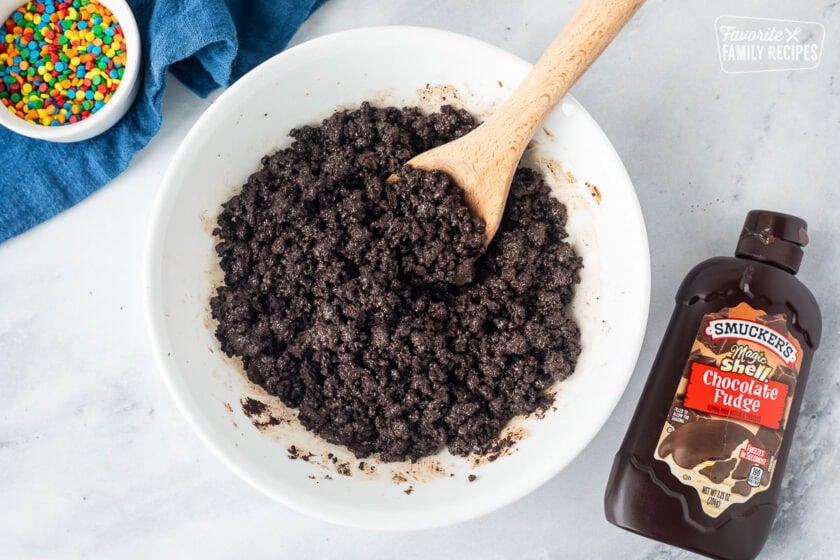
- While the vanilla layer is freezing, remove the "creme" filling from Oreos and use a food processor to coarsely chop the chocolate cookies. You can also put the cookies in a Ziplock bag and use a rolling pin to crush them. Don't crush/process them too much. You want them to have a coarse, crumbly texture, not a fine, powdery texture.
- Place the cookie crumbles into a mixing bowl. Shake the Magic Shell topping well then add ½ cup to the cookie crumbs. Use a spatula to mix until crumbs are coating in the chocolate topping. Set aside.
- Once the vanilla layer has hardened, sprinkle the Oreo crumble mixture over the top, lightly packing it down to make a cookie crust layer.
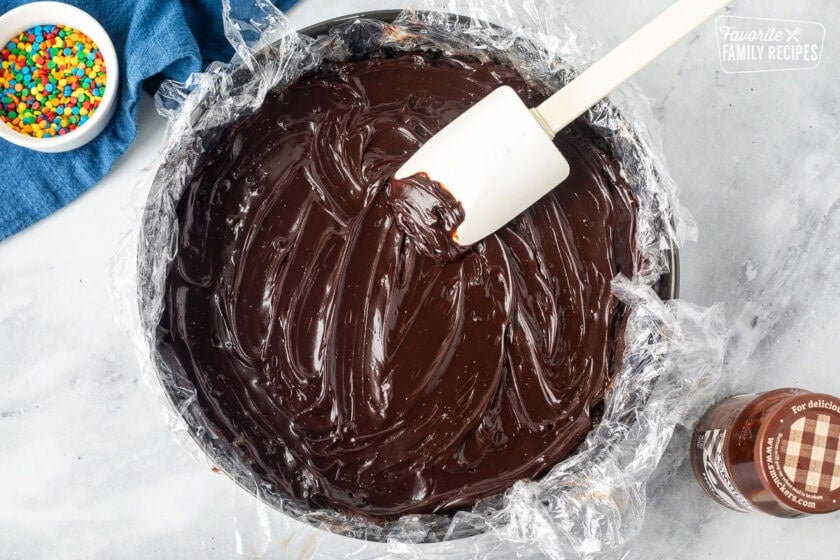
- Spoon fudge topping over the top and gently spread to make an even layer. Do this gently or you will pull up the cookie layer. If your fudge is too thick, run the jar under some hot water until it thins out. Don't get the fudge too warm because you don't want it to melt the ice cream underneath. Place back in the freezer for another 20-30 minutes or until fudge has hardened. This is a good time to remove the chocolate ice cream from the freezer to begin softening.
- Once softened, stir chocolate ice cream until smooth and has a soft-serve consistency. Remove the ice cream cake from the freezer and spread the chocolate ice cream over the fudge layer. Smooth over the top until it is flat and even, filling in any empty spaces along the sides. Place back in the freezer for another 2-3 hours or until the chocolate layer is completely frozen.


For the Stabilized Whipped Cream Frosting:
- Place your mixing bowl and whisk attachment in the freezer for about 10 minutes. This will keep the cream cold and make a better consistency for your whipped frosting.
- Add water to a glass bowl and sprinkle gelatin over the top. Set aside for about 3 minutes, until the gelatin begins to dissolve and the mixture becomes wrinkled. Place the bowl in the microwave and microwave for only about 4-5 seconds at a time, stirring each time until the gelatin completely dissolves. Allow to cool to room temperature without it hardening again.
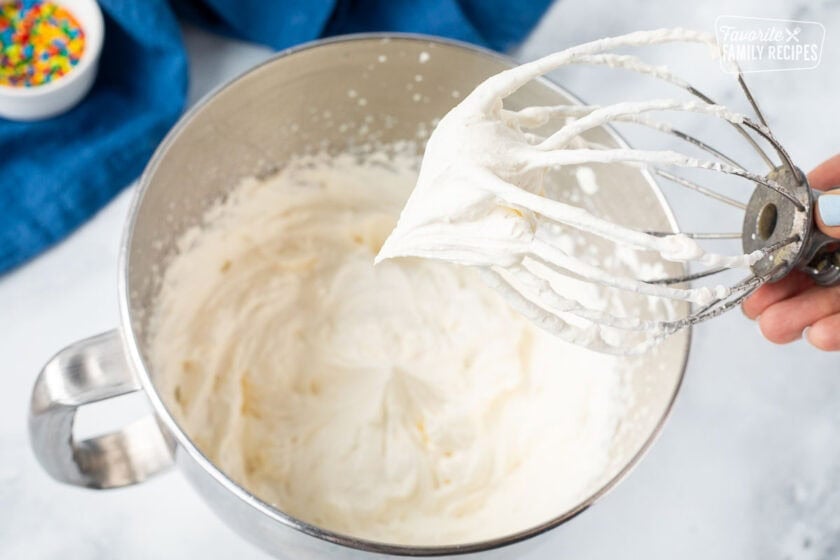
- Remove mixing bowl from freezer and add whipping cream, powdered sugar, and vanilla extract. Whip on medium-high speed until the mixture begins to thicken and soft peaks start to form. Reduce speed to low and SLOWLY pour in the gelatin mixture. Increase the speed back to medium high and mix until stiff peaks form.

Decorating the Cake:
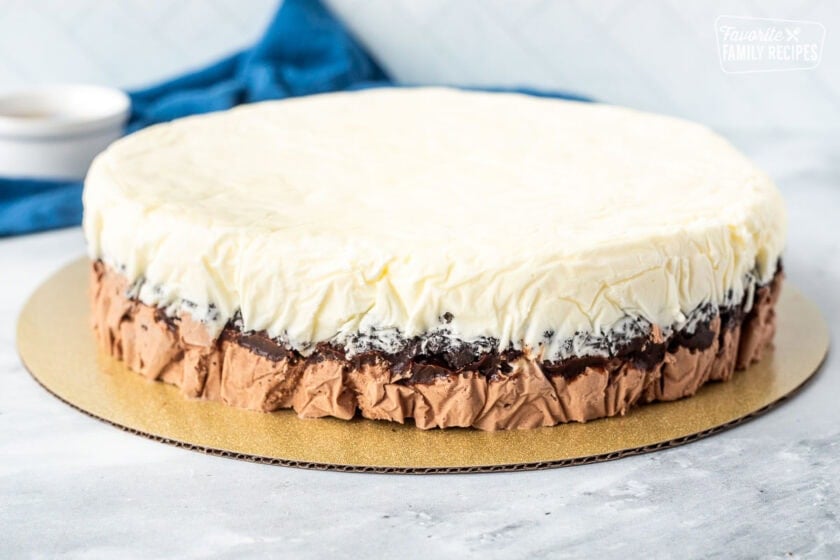
- Remove the frozen cake from the freezer and turn upside-down onto your serving plate (the vanilla layer should be on top). Release the sides of the springform pan and peel off plastic wrap to reveal the frozen cake.
- Use about 2/3 of the frosting to frost the cake and then use remaining frosting to pipe decorations.
- Sprinkle sprinkles or other decorations/garnishes over the top and place back in the freezer for another 20 minutes or until ready to serve.

Equipment
- 1 9" Springform Pan
- Electric Mixer
Nutrition
Nutrition information is automatically calculated, so should only be used as an approximation.
Love this recipe?
We want to hear from you! Please leave a review.
This is my first time making ice cream cake, it turned out really good. Next time I would probably either skip the magic shell or try less, it tastes great but it makes the middle really hard to cut thru. Thank you for this great recipe!
So glad you liked it! Yes you can definitely switch it up if you found it was difficult to cut through!
Perfect
Thank you
You’re welcome!
I made this cake for Mother’s Day, it was the talk of the party. Thanks for the easy to follow recipe.
Made this, Great recipe!!! Now I do not have to
drive 3 hours to get birthday cakes!! Thanks
Yay for less hours in the car!