We may earn a commission when you click on the affiliate links in this post.
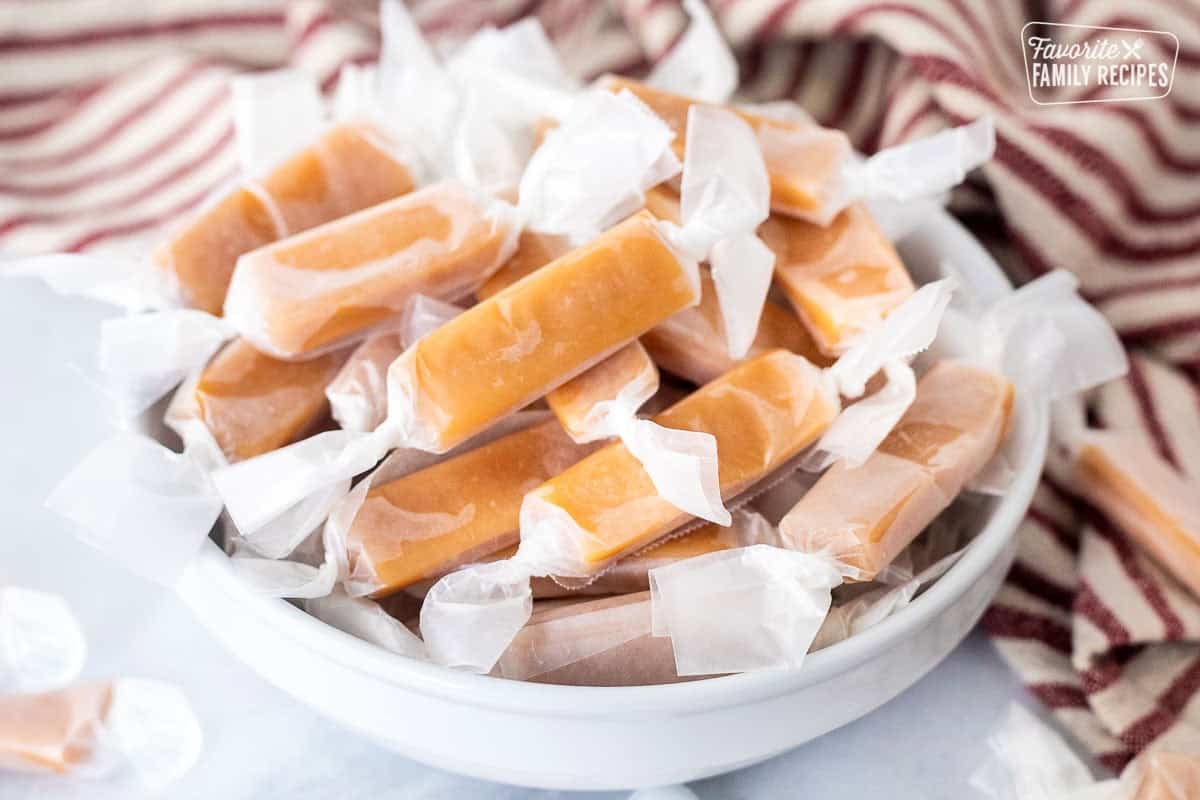
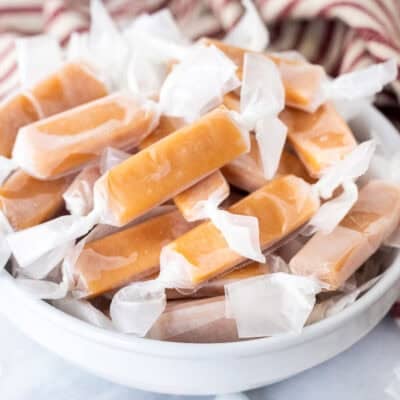
Homemade Caramels made with just 4 ingredients! Buttery, rich, and melt-in-your-mouth perfect every time. A true, classic family favorite!
5-Star Reader Reviews ⭐️⭐️⭐️⭐️⭐️
“This is my go-to caramel recipe for the holidays and people always rave about it!” – Kendall
“I just made these and they are amazing! So simple and yummy! I added chopped pecans in mine and my husband says they taste just like what his grandma made when he was young…” – AlaskaChick
Traditional Christmas Caramels
I’ve made these homemade caramels so many times I could do it in my sleep, and after you make them once, you probably could too! My mom always said, “It’s just two of everything,”, two sticks of butter, two cups of cream, two cups of sugar, and two cups of light corn syrup. That’s it! These rich, buttery caramels are melt-in-your-mouth delicious and turn out perfectly every. single. time. They’re a classic treat, great for gifting, snacking, or turning into all kinds of sweet candies like salted caramels (see below) or dipped caramel pretzel bites.
If you love caramel as much as we do, you will definitely want to try some of our other caramel favorites like our salted caramel sauce, caramel apple dip, or caramel popcorn! I can’t wait for you to try them all!
🩷Emily
Table of Contents
- 5-Star Reader Reviews ⭐️⭐️⭐️⭐️⭐️
- Traditional Christmas Caramels
- Ingredients in Homemade Caramels
- How to Make Homemade Caramels
- Homemade Caramels Without A Candy Thermometer
- Make Salted Caramels
- How to Wrap Caramels
- Frequently Asked Questions
- Christmas Treat Recipes
- Mom’s Homemade Caramels Recipe
- More Christmas Recipes
Ingredients in Homemade Caramels
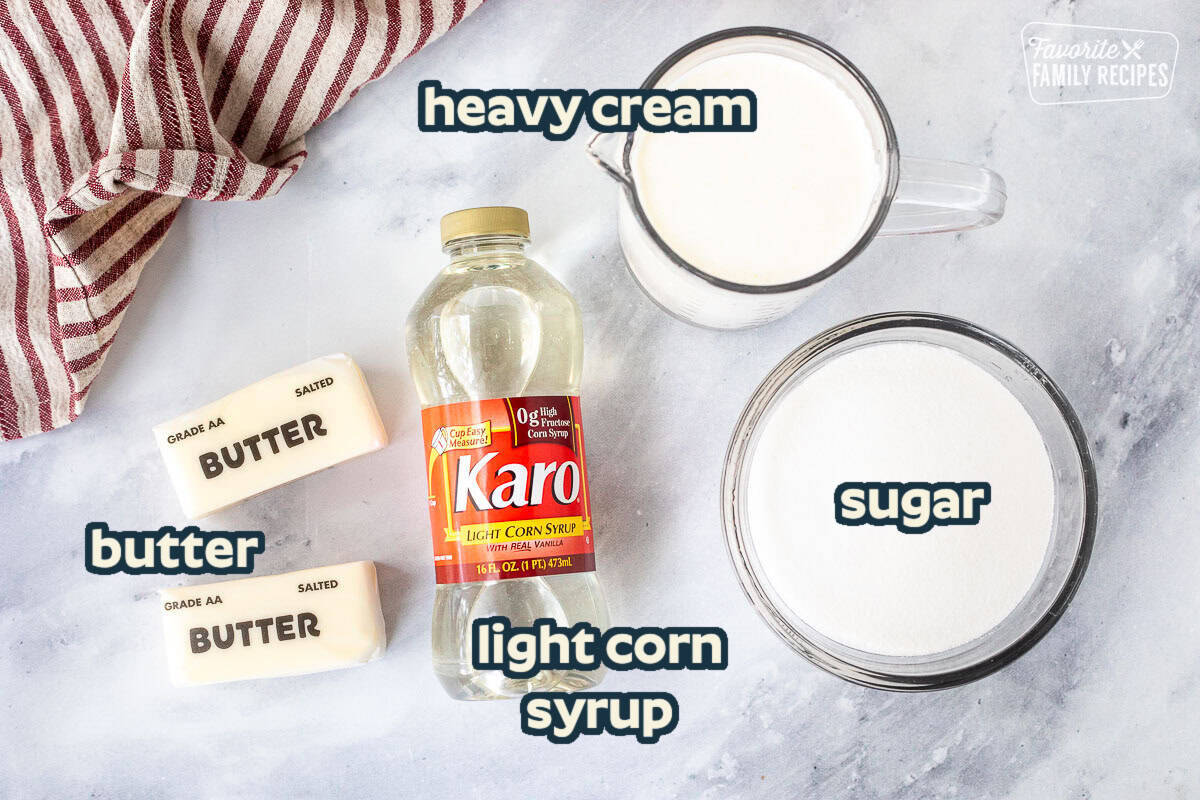
- Butter – I always use salted butter to cut the sweetness of the caramels just a little bit. Make sure you don’t use margarine. It won’t set up the same.
- Whipping cream – Soft and chewy comes straight from the whipping cream. This helps give it the creamy texture.
- Sugar – You will want white granulated sugar, not brown sugar. The caramel coloring is from the butter and Karo syrup combination. The sugar adds the perfect sweetness to the homemade caramels.
- Light corn syrup – We always use “karo” syrup to add thickness, sweetness, and silkiness to the easy caramels.
How to Make Homemade Caramels

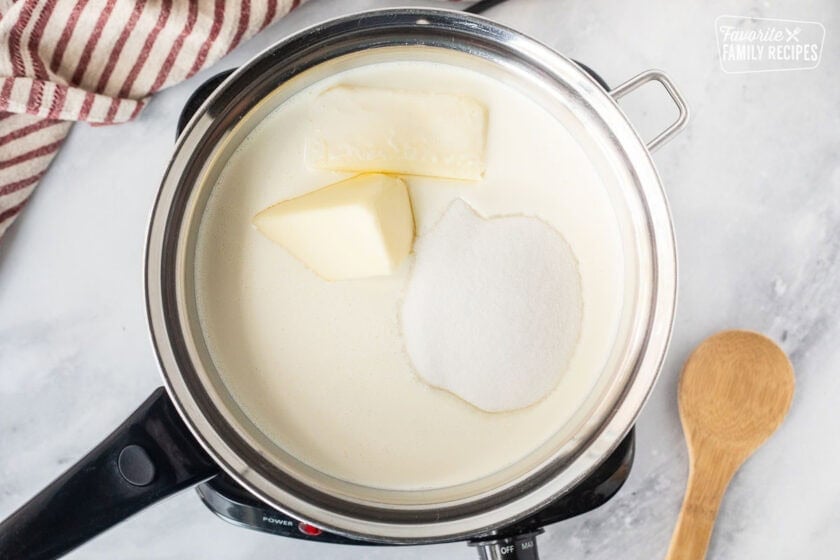
- Generously butter a large baking sheet and set it aside. In a heavy saucepan, combine the butter, cream, sugar, and corn syrup.

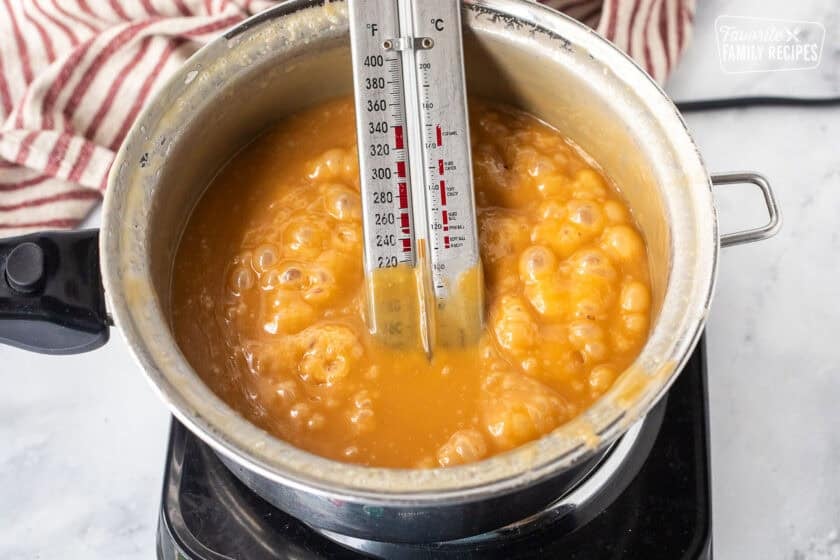
- Over medium heat, stirring continuously, bring to a boil and continue boiling and stirring until the candy thermometer reaches 240 degrees F.

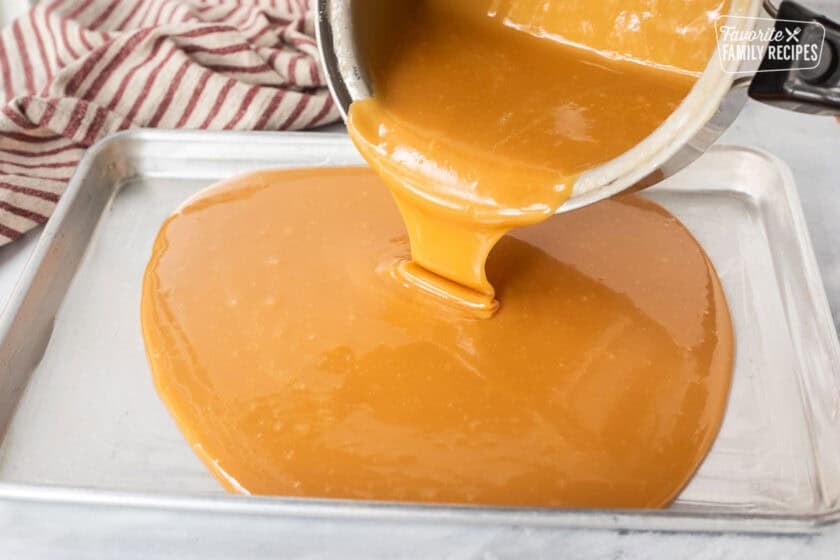
- Pour the caramel onto the prepared pan to cool completely.
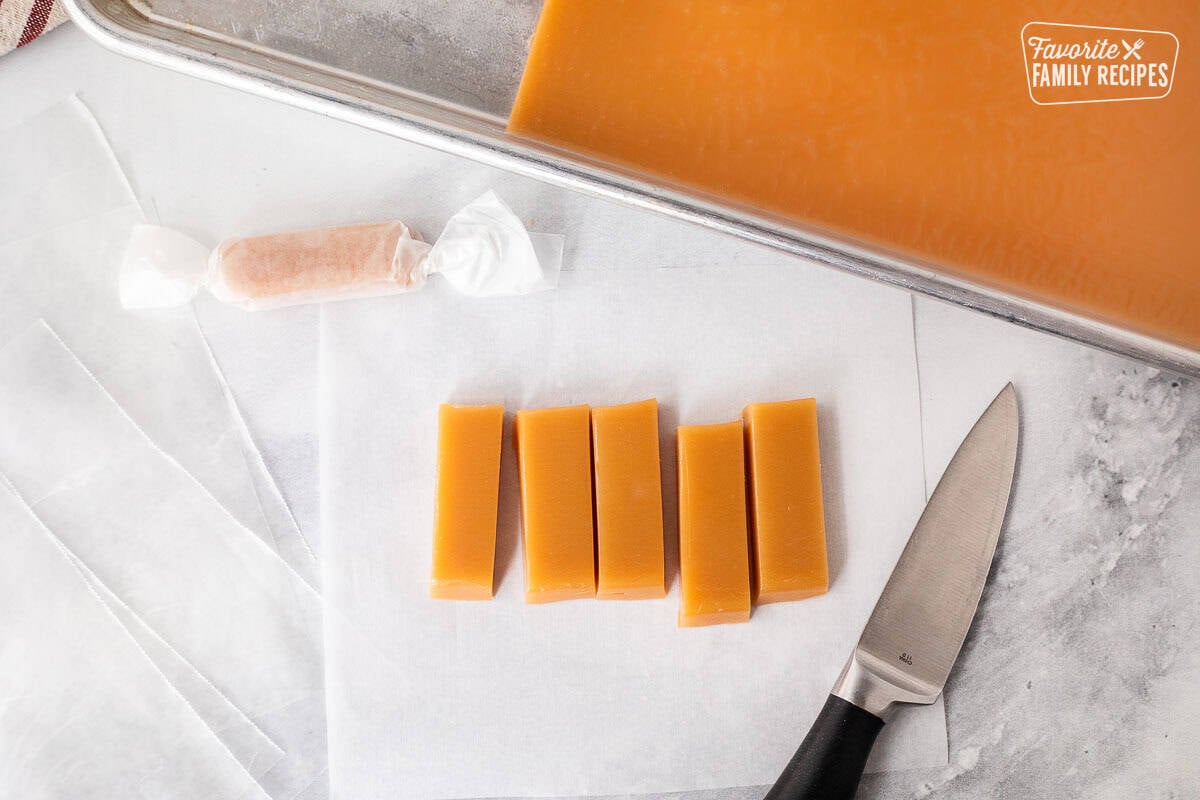
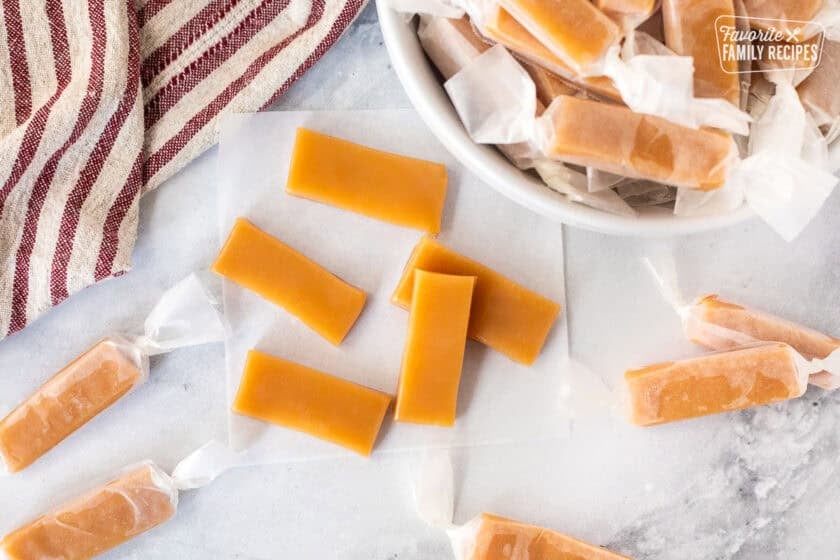
- Cut into bite-sized pieces and wrap in wax paper.
Homemade Caramels Without A Candy Thermometer
I recommend using a candy thermometer for this recipe, but if you don’t have a candy thermometer or are just old-school, you can always do the “softball stage test” or the “cold water test”.
Using a clean spoon, carefully take a little of the cooked caramel from the saucepan and drop it into the bowl of very cold water. Reach into the bowl with your hands and see if the caramel can be molded into a softball. If it’s pliable and soft, the caramel has reached the softball stage (234-240 degrees F).

Make Salted Caramels
If you are wanting to take the traditional homemade recipe just one step further, try stirring a splash of vanilla extract in with the caramel before pouring it into the baking dish. Then, sprinkle some pink Hawaiian sea salt or coarse Kosher salt over the top after you have poured it into the pan and it has cooled for about 15 minutes. That way, the salt will stick to the top and not get absorbed into the caramel. SO GOOD.

How to Wrap Caramels
The easiest way to wrap homemade caramel candy is to wait until they are mostly cooled in the baking dish before cutting them into pieces. I have found that they are easiest to wrap when they have reached room temperature.
Cut the caramels with a sharp knife (or scissors) into approximately 1″ x 1 1/2″ pieces and wrap them in wax or parchment paper approximately 3″x3″. Wrapping them diagonally to get full coverage, and then twisting the ends to seal them.

Frequently Asked Questions
Your caramels didn’t get up to the correct temperature. It needs to be 240 degrees Fahrenheit before removing it from the pan. You can place the caramel back in the pan and re-heat it to bring it up to temperature if needed.
Yes! These homemade caramels can be enjoyed by those with gluten allergies or requiring a gluten-free diet.
No, they can cool to room temperature and remain at room temperature after being cut and wrapped.
Up to three weeks at room temperature. Just keep it in an airtight container to keep moisture out.
Yes! After wrapping the caramels individually (so they don’t stick together) place them in a Freezer zip-top bag and freeze for up to 6 months. To thaw, just place at room temperature for a few minutes until soft and ready to eat.
READ MORE: 25+ Christmas Dessert Ideas

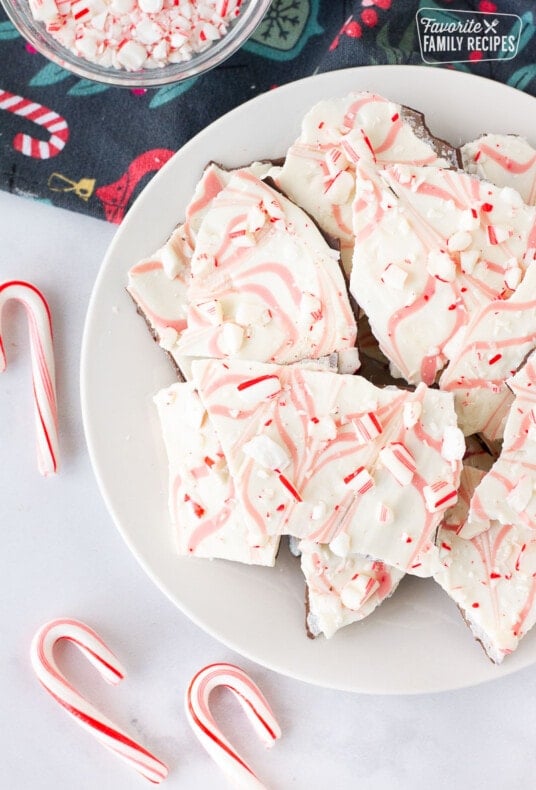
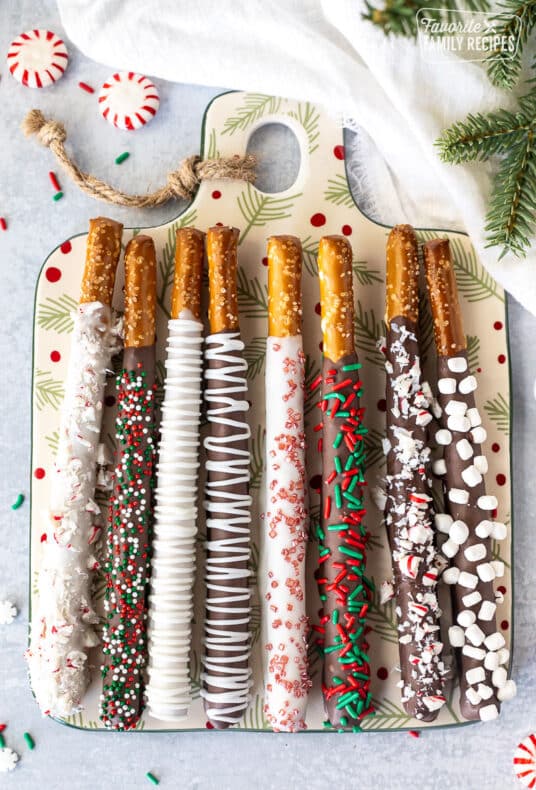
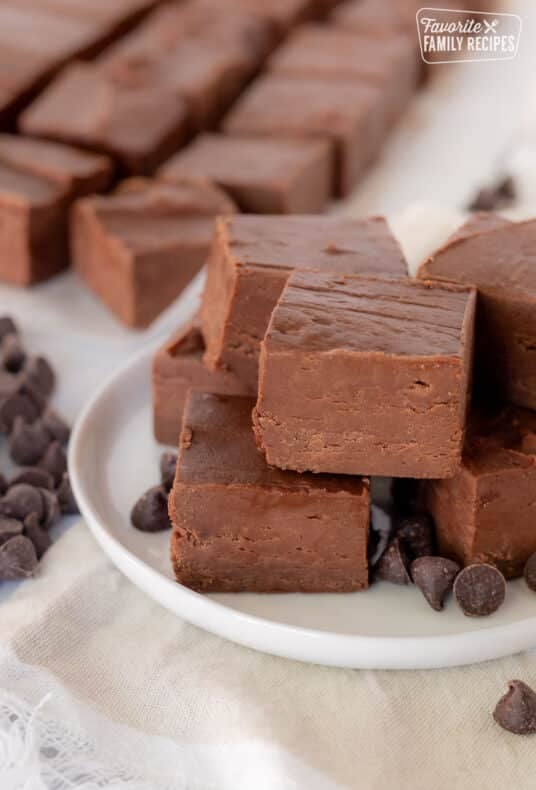
Christmas Treat Recipes
We LOVE all the candy recipes around Christmastime, especially our unique recipes like our Christmas Charcuterie or our Chocolate Orange Cookies. Here are more of our favorites:
If these caramels bring back sweet memories (or make new ones!), let me know in the comments below. Don’t forget to leave a star rating! I love hearing how our family recipes turn out in your kitchen! 💬⭐️
Mom’s Homemade Caramels
Video
Ingredients
- 1 cup butter, (2 sticks)
- 2 cups heavy whipping cream
- 2 cups granulated sugar
- 2 cups light corn syrup
Instructions
- Grease a large cookie sheet with butter and set aside. Combine all ingredients in a large pan.
- Over medium heat, stirring continuously, bring to a boil and continue boiling and stirring until the candy thermometer reaches 240 degrees.
- Pour into a large, greased cookie sheet and cool.
- Once cooled, cut into bite-size squares and wrap in wax paper.
Notes
Tips on Making Homemade Caramels
- We recommend using a candy thermometer for this recipe, but if you don’t have a candy thermometer or are just old-school, you can always do the “soft ball stage test” or the “cold water test”. Using a clean spoon, carefully take a little of the cooked caramel from the saucepan and drop it into the bowl of very cold water. Reach into the bowl with your hands and see if the caramel can be molded into a soft ball. If it’s pliable and soft, the caramel has reached the softball stage (234 – 240 degrees F).
- USE MEDIUM HEAT STIRRING CONTINUOUSLY. If you turn the stove top high, it will burn the caramel leaving you with little brown pieces throughout.
- If your caramels are too soft, that means they didn’t get up to the correct temperature. It needs to be 240 degrees F before removing it from the pan. You can place the caramel back in the pan and re-heat it to bring it up to temperature if needed.
- For salted caramels, try stirring a splash of vanilla extract in with the caramel before pouring it into the baking dish. Then, sprinkle some pink Hawaiian sea salt or coarse Kosher salt over the top after you have poured it into the pan and it has cooled for about 15 minutes. That way the salt will stick to the top and not get absorbed into the caramel.
Nutrition
Nutrition information is automatically calculated, so should only be used as an approximation.
Love this recipe?
We want to hear from you! Please leave a review.
How do you cut them? They were very hard to cut…tried a heated knife and ended up using kitchen shears.
We actually use kitchen shears to cut if it doesn’t cut easily with a knife! It is usually faster!
I just made these…they were EXCELLENT!….Question….how do you cut them? I tried a knife, heated knife and ended up with kitchen shears…but it was difficult.
Yes, scissors definitely make it easier if a knife isn’t cutting it (no pun intended lol)
What size pan are you using 9×13 or 15×10?
Thank you
We use a 15 x 10 jelly roll pan. Thanks for asking!
This sounds great! Erica, do you have a suggestion for a dairy free whipping cream option?
We haven’t tried making it dairy-free so I am not sure what to suggest so it will turn out right :/
The problem that people are having is that they need to check their candy thermometer. Water boils at 212 degrees, if your water boils at 210, then you subtract 2 degrees from the recipe. Or it it boils at 203, then subtract 9 from the recipe, etc. This makes a HUGE difference!!! I always test my thermometer before making candies, weather, altitude, etc make a huge difference!!
Thank you Yvette! That is a good rule of thumb! You are SO right about the weather.. last time I made them it was raining and they didn’t quite turn out right… weird huh?!
I made these yesterday and it took me three attempts. First I tried 240 degrees, but it came out mushy. I re-melted it and then tried 245 but it was still way too soft to keep it’s shape. The third time was just right at about 253 degrees (on the candy thermometer it was the point just below hard ball). Perfectly firm yet chewy. They taste delicious and my family agrees. Definitely a winner! Thanks!
Can’t wait to try your recipes. It is 9:20pm here in Texas and I cannot go to bed without making these. Will let you know how they turn out.
I hope they turned out great!
Light or dark caro syrup?
light
Are these caramels hard or chewy? Also, how long do they last-if I was making them for a Christmas gift?
They are chewy and they last a long time.. a couple weeks at least!
Do you use salted or unsalted butter?
you can use either, I prefer the unsalted.
Have made a similar recipe but without the butter. This would seem to be creamier. Originally recipe read to bring to a boil of 246 but after making the first batch of candy due to it being hard, we went only to 240. Thanks.
what do you mean by cube of butter? I’m assuming tablespoon.
A cube is a stick or 1/2 cup
I didn’t know that’s what cube means 😊
You didn't boil them long enough, if they don't get to a high enough temperature they will be sticky and un-wrappable. You want to make sure they are a light brown caramel color before taking them off the stove. Sorry your first attempt didn't turn out!
It 1 or 2 cups of butter?
1 cup!
Mandy- I made these yesterday and there seems to be a problem with them. They have been cooling for about 16 hours now and they still haven't set enough to cut and wrap. What happened? Maybe I didn't boil it long enough?
Sorry Mandy, I don't have a great recipe for that! Let me know if you find one.
Looks delicious! I was wondering if you might have a good recipe for frosting for Gingerbread houses? Something good and strong to hold them together? If you could let me know that would be great. I have a gingerbread house party tonight and would a recipe if you have one 🙂 Thank you
Sometimes I think we grew up in the same family. That's why I love your blog. So many recipes remind me of home.
And, no, you don't need to butter the pan. If you cook it to the right temperature and let it cool, it should come up on easily.
Fixed it, thanks!
no stirring required? do you butter the pans?